|
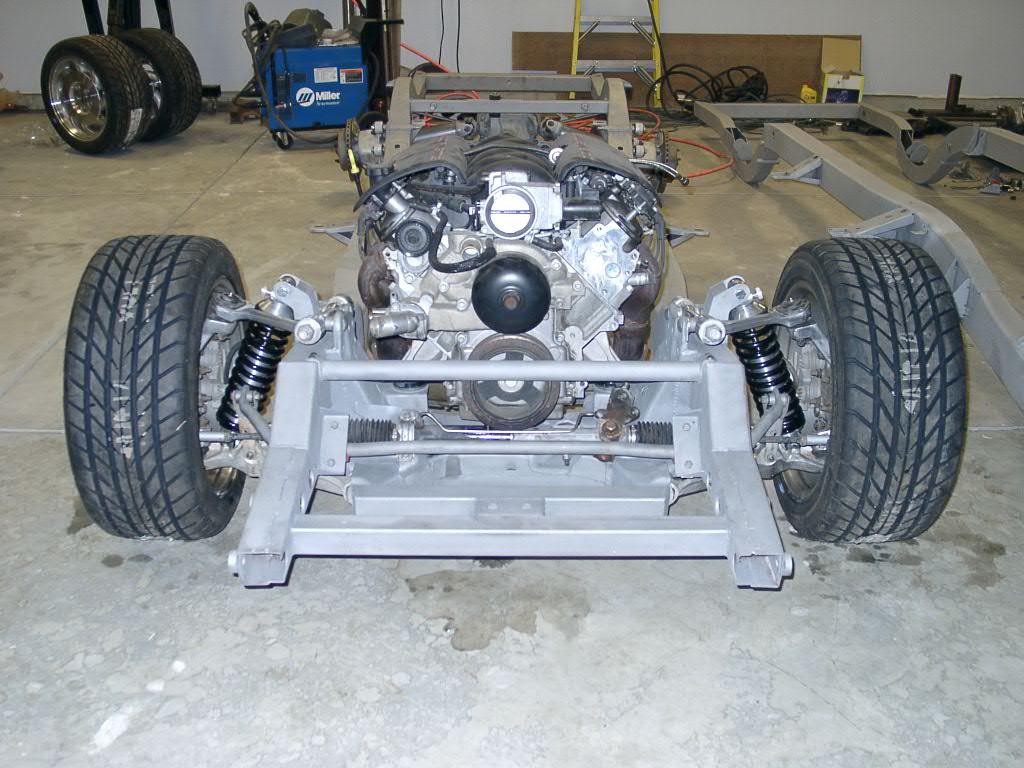
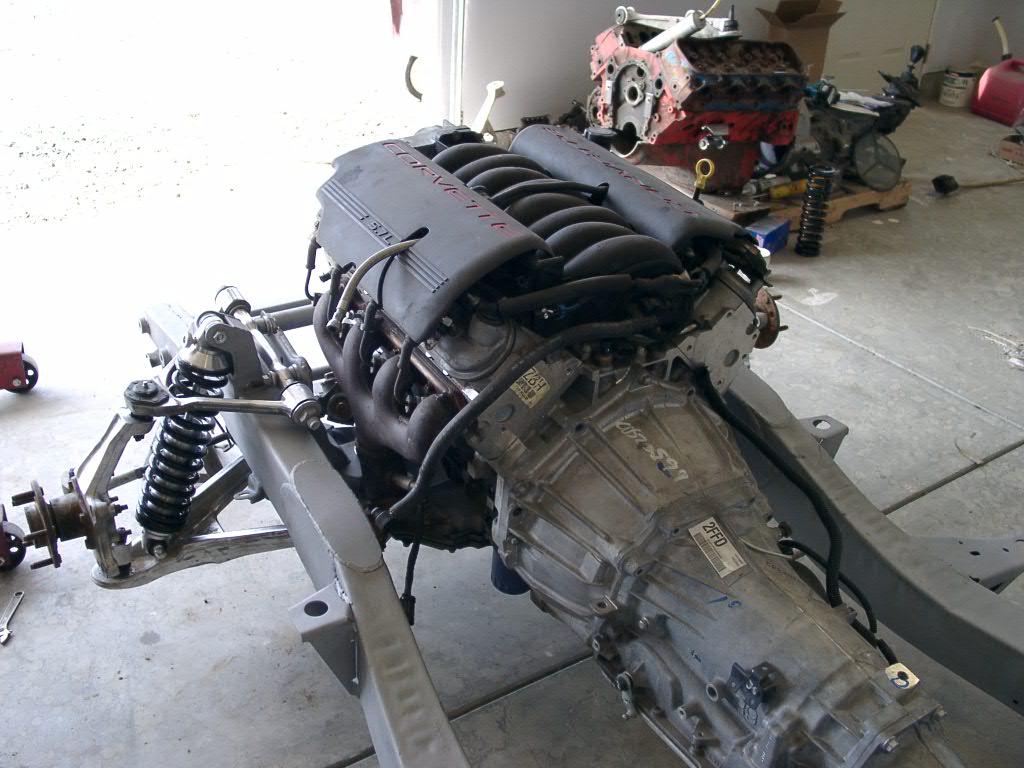
The foundation of this Nomad will be a modern chassis rolling on an up to date suspension from a late model Corvette. The suspension will feature four wheel disc brakes, independent rear suspension, coil-over shocks, and 17" Corvette wheels and tires. |
|
The frame was built for me by Laszlo Nobi of Ft. Collins, CO. Laszlo is a regular contributor to the Chevytalk Internet forum. Laszlo had adapted Corvette suspensions to two Tri-five Chevy frames before starting mine. Here is a LINK to Laszlo's web site. |
|
Chassis Progress |
|
Progress pictures and descriptions are posted in reverse order, with the most recent information at the top. |
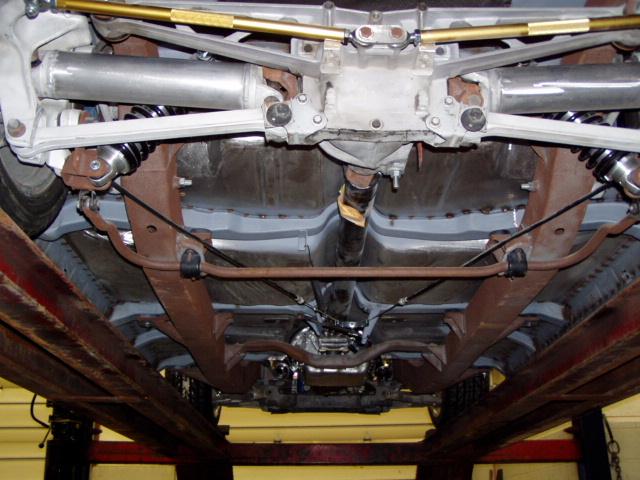
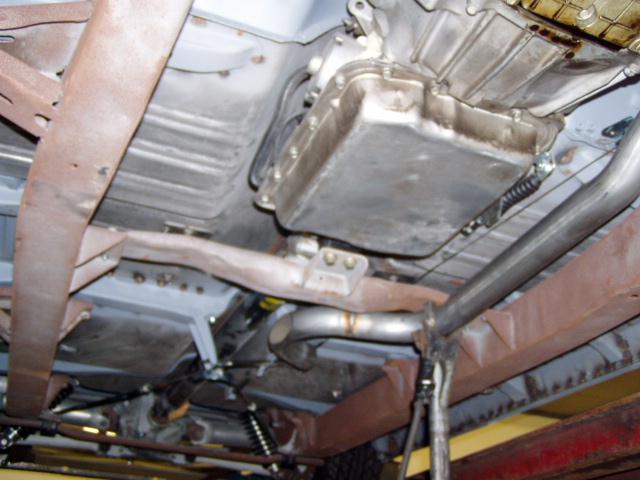
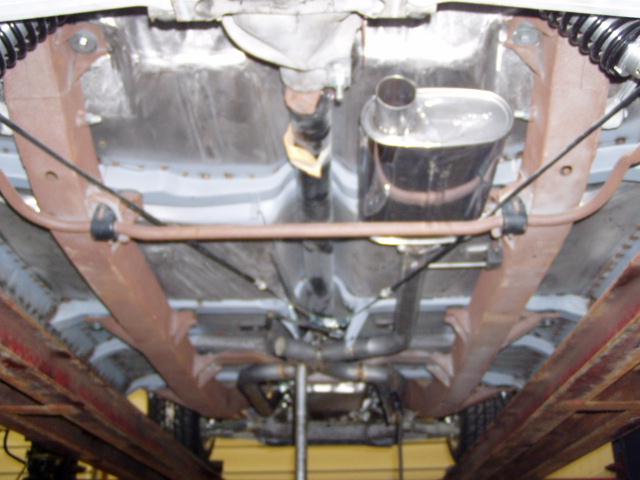
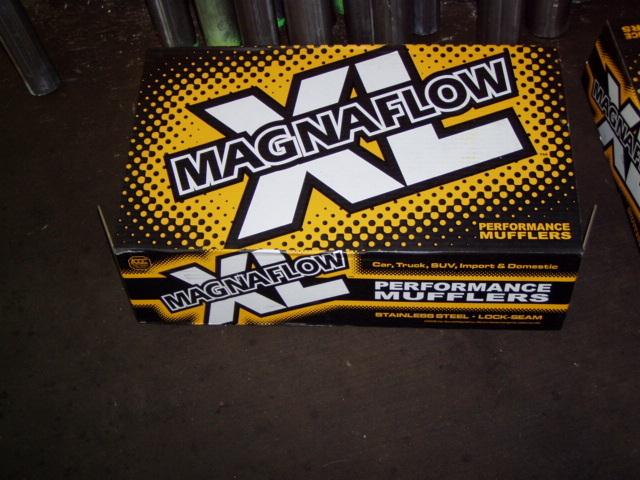
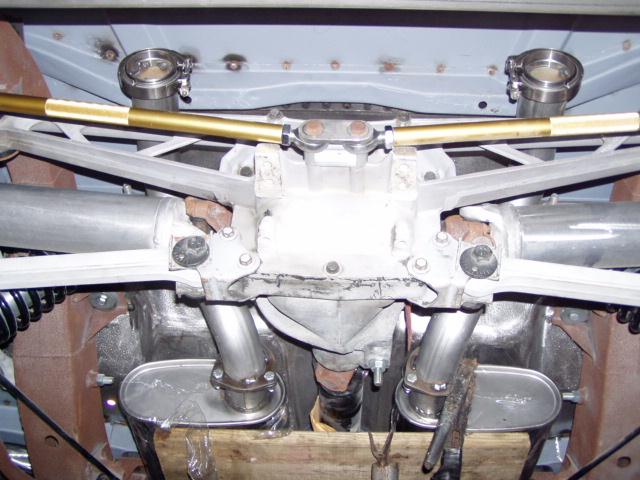
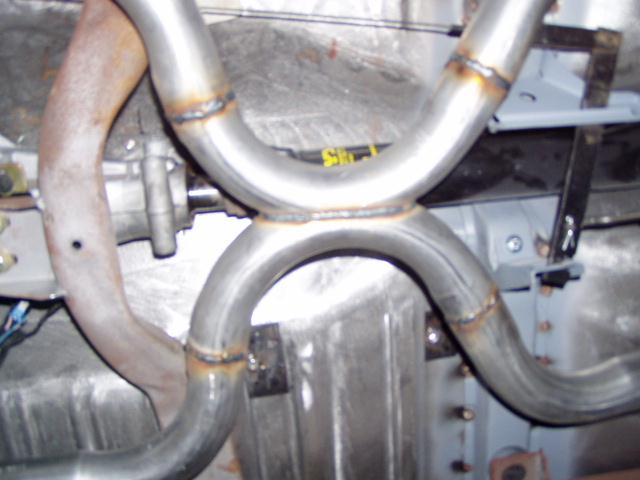
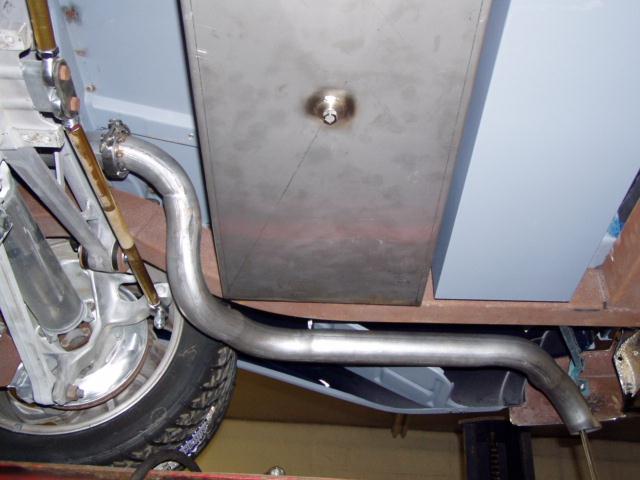
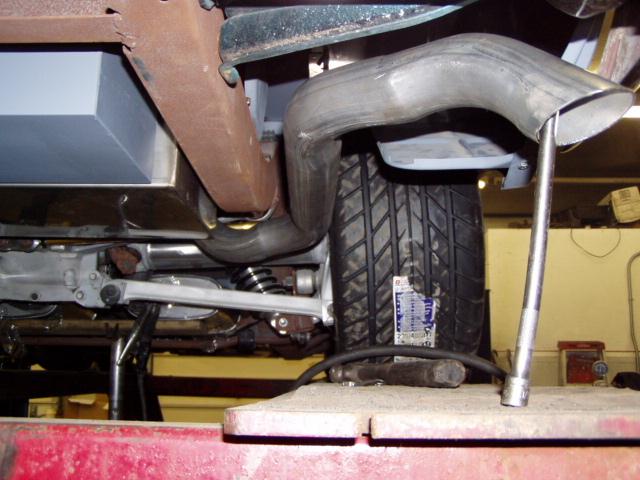
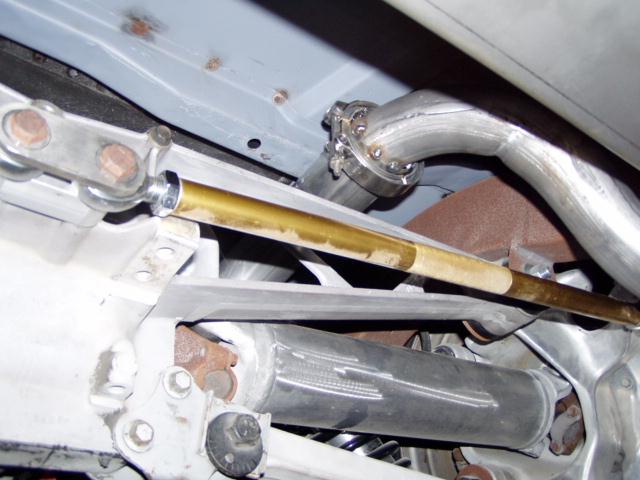
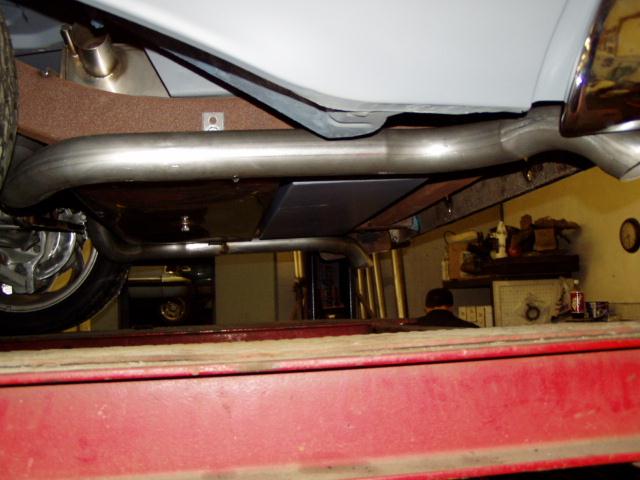
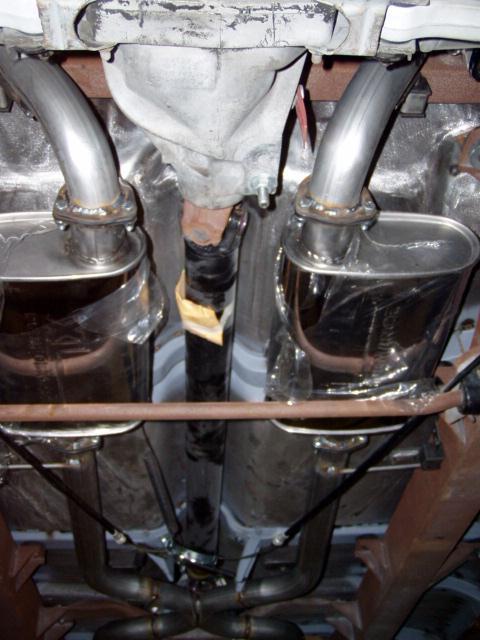
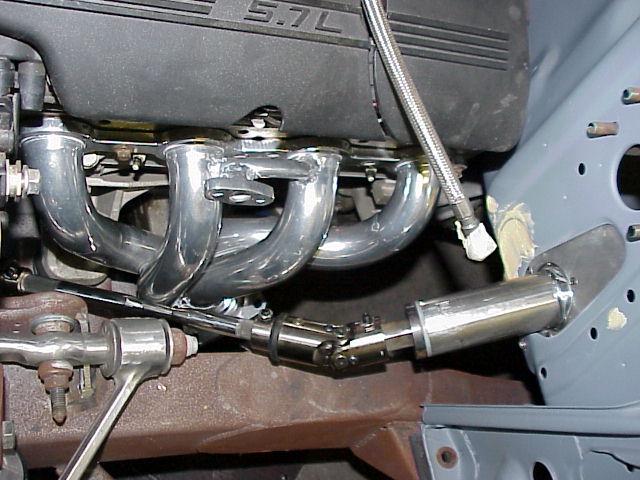
| Exhaust System |
| February 5, 2004 - Exhaust system was built by Expert Exhaust here in Fairmont. System is designed to break apart easily by using V-Band Clamps at the headers and above the rear end. Mufflers are polished stainless steel Magnaflows. The headers and pipes will be sent out for coating while the frame is being detailed. |
 |
 |
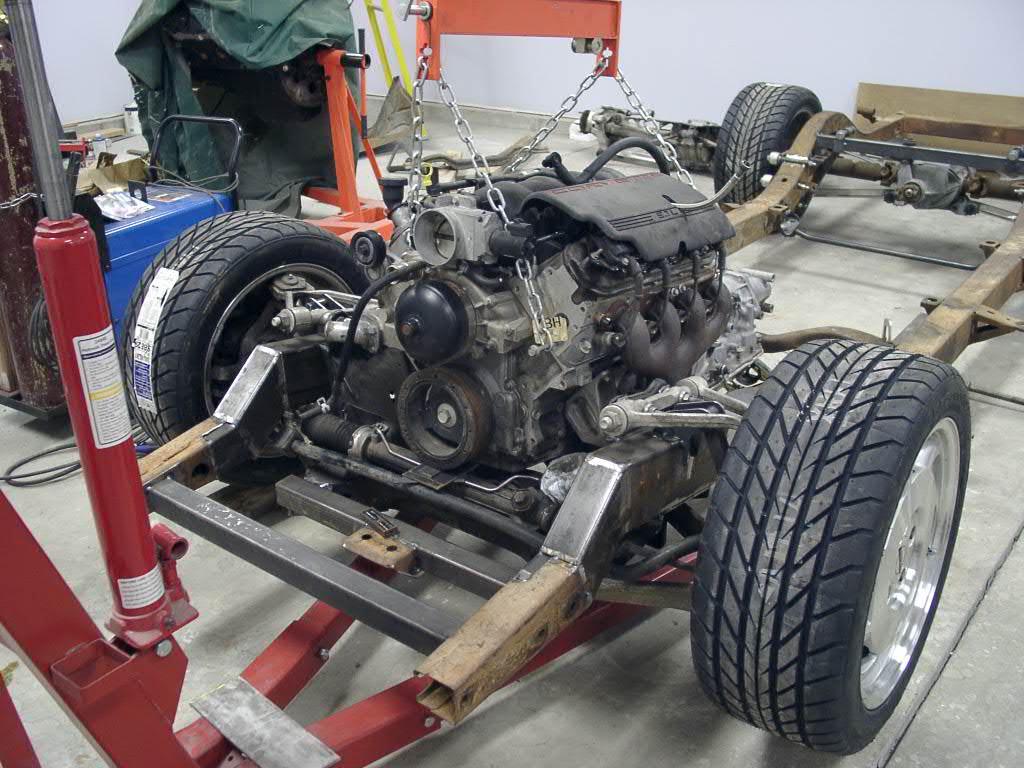
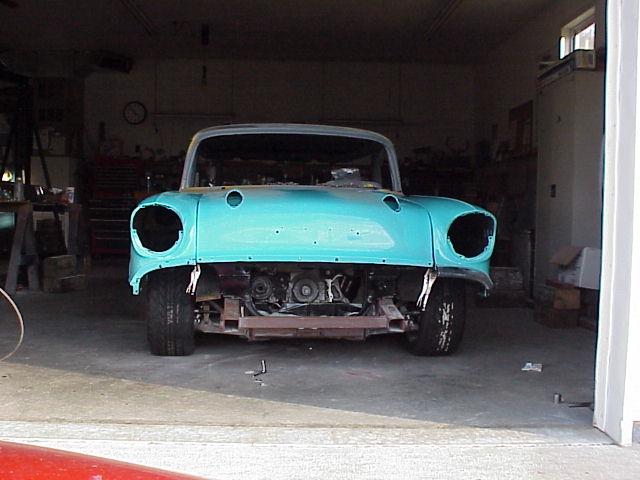
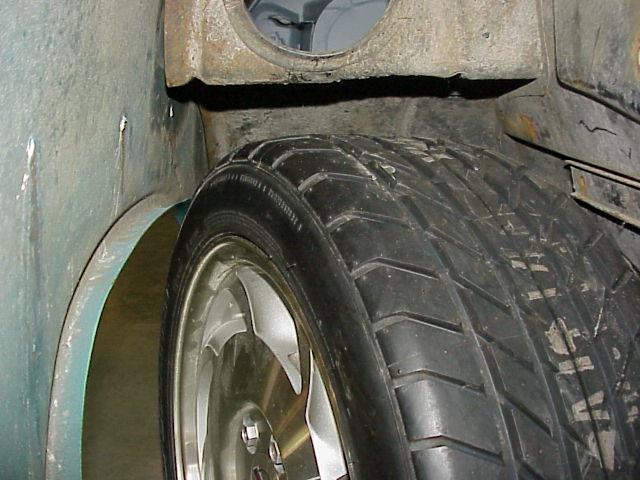
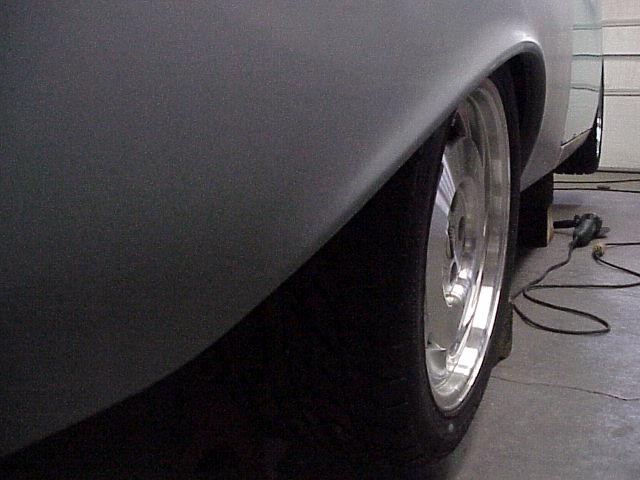
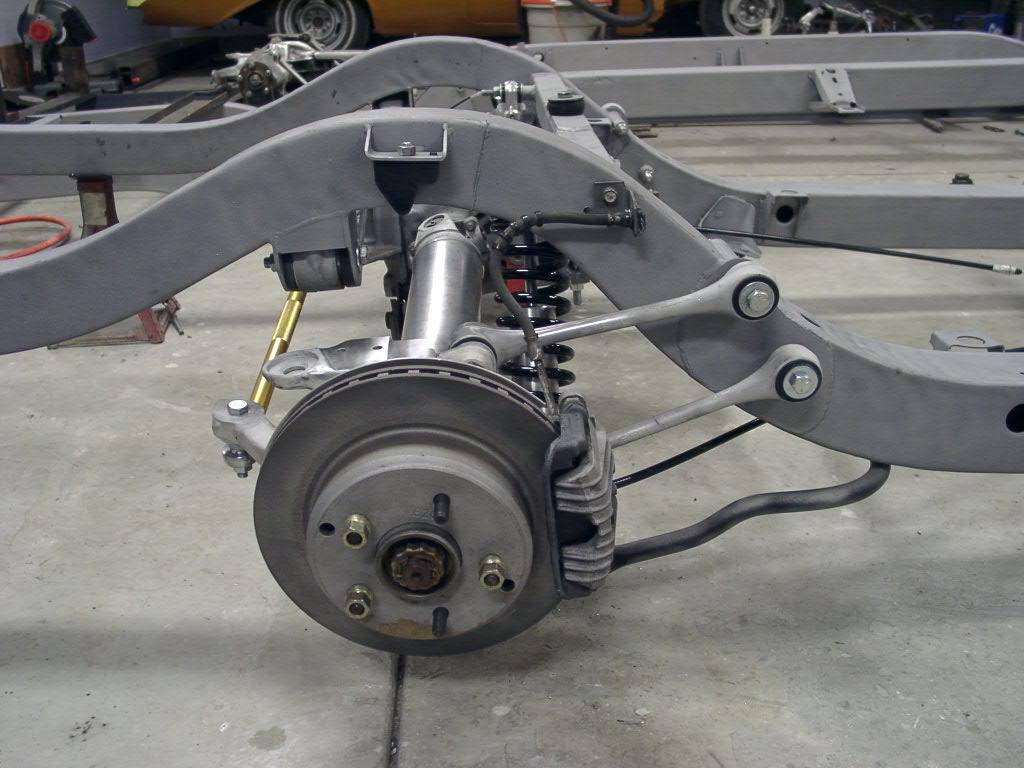
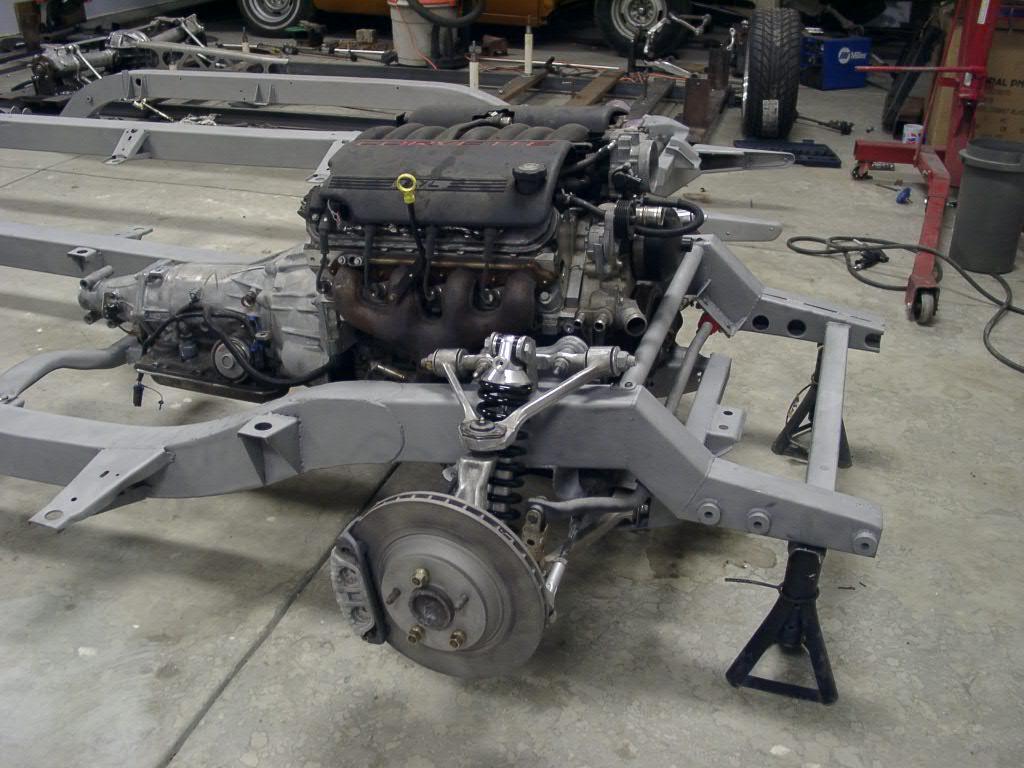
| Dry Fit Front Clip |
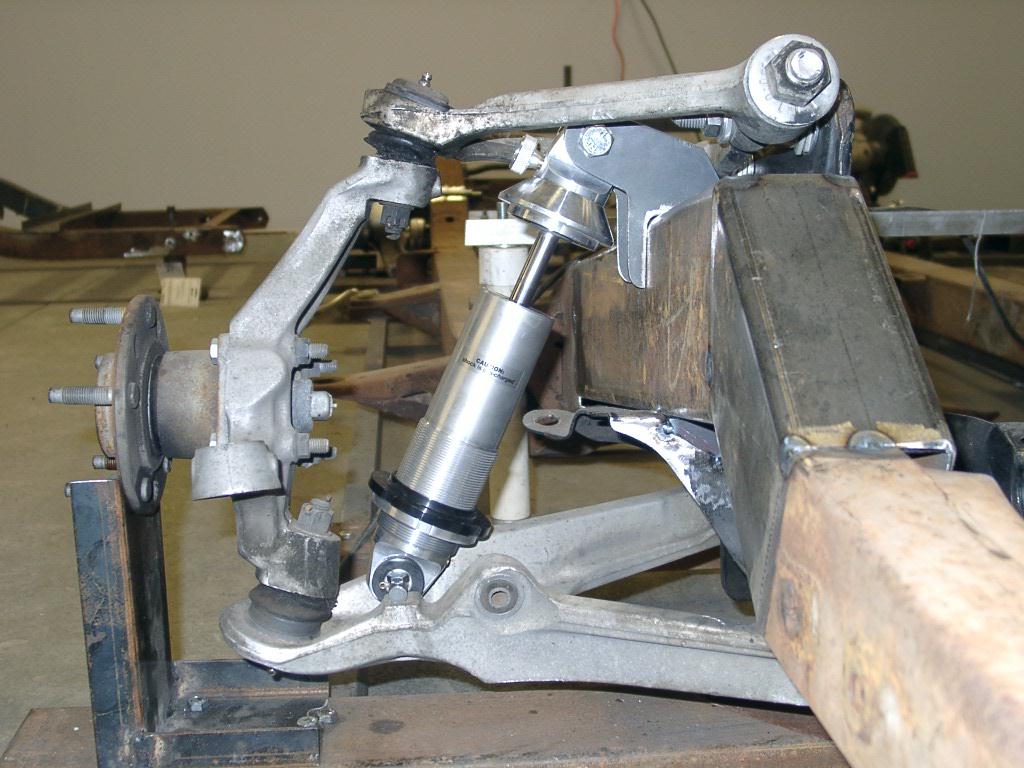
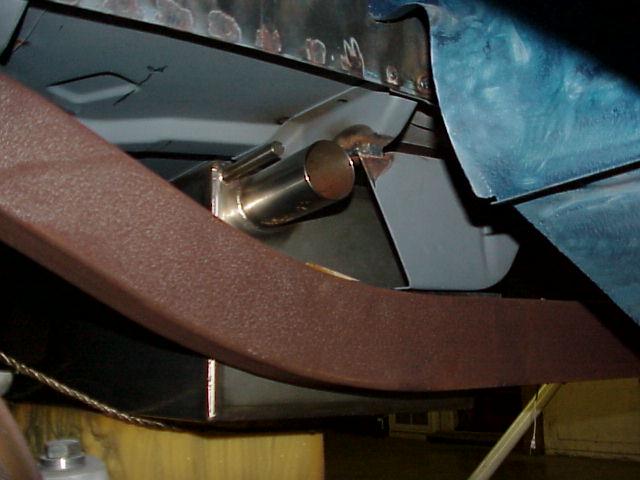
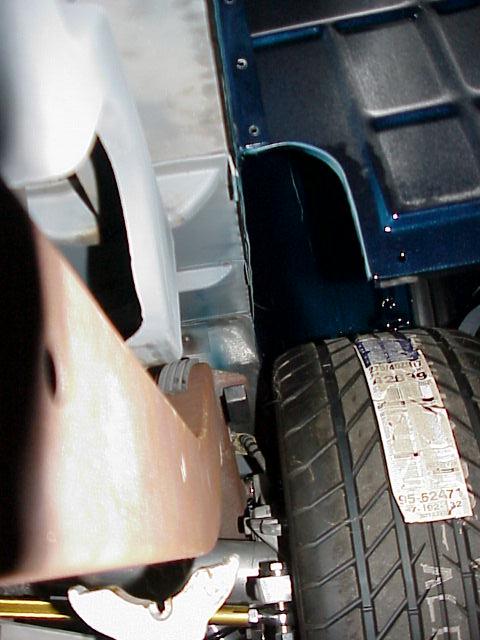
| November 18, 2003 - Dry fit of front clip before final prep for paint. Inner fenders will require remarkably little work to accommodate Corvette front suspension! Distance from floor to top of front fender is 36". The Aldon coil-over shocks will be adjusted up by about 3/4". |
 |
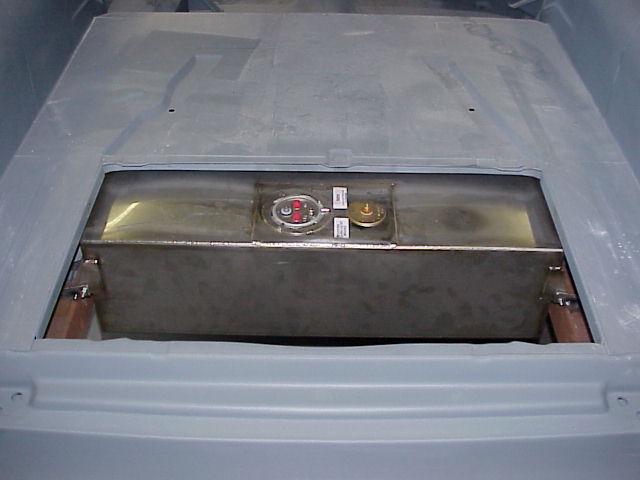
| Custom Fuel Tank |
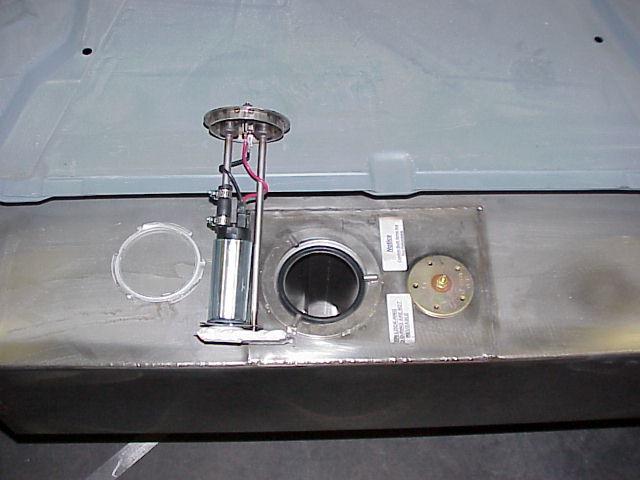
| October 25, 2003 - Steve built a custom fuel tank that attaches directly to the frame. This tank is made of stainless steel, and includes an in-tank fuel pump setup for the LS1 engine. The fuel pump assembly was purchased from Rock Valley. As can be seen from the pictures, there is plenty of room for a storage box behind the tank. The box, as well as the fuel pump will be accessible by lifting the stock Nomad spare tire lid. |

 |
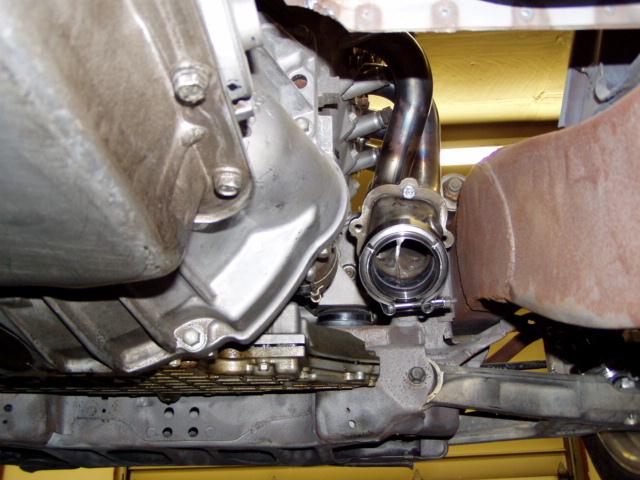
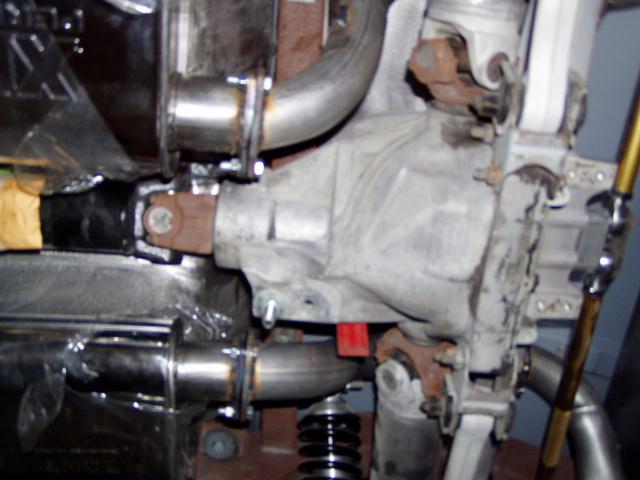
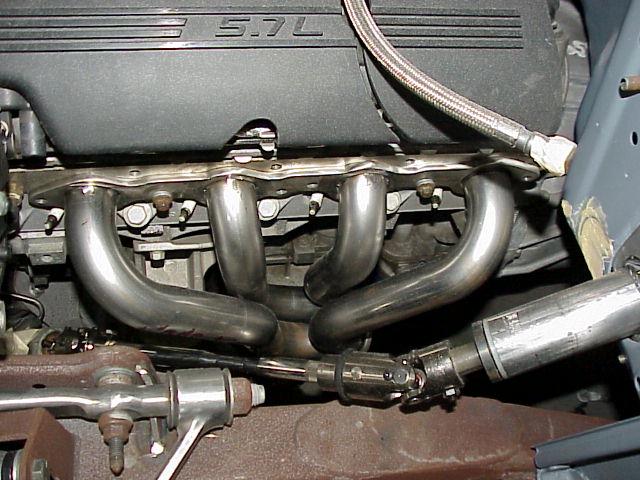
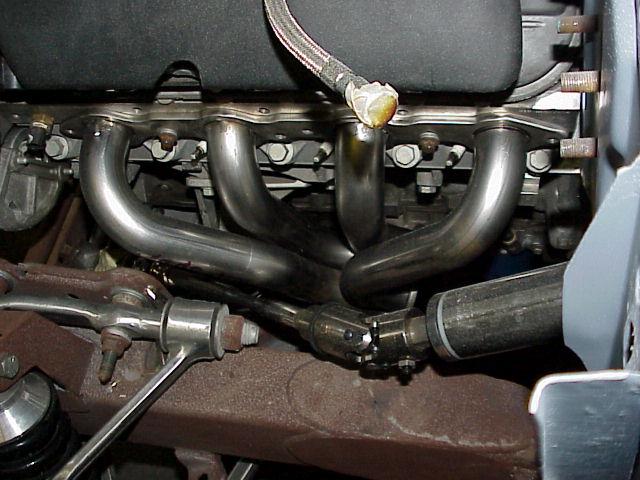
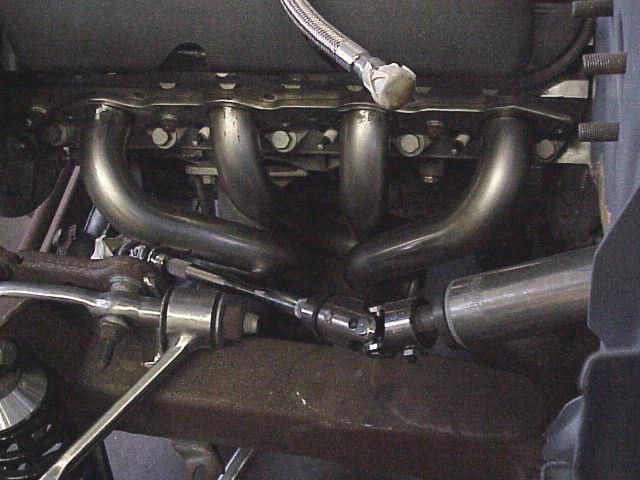
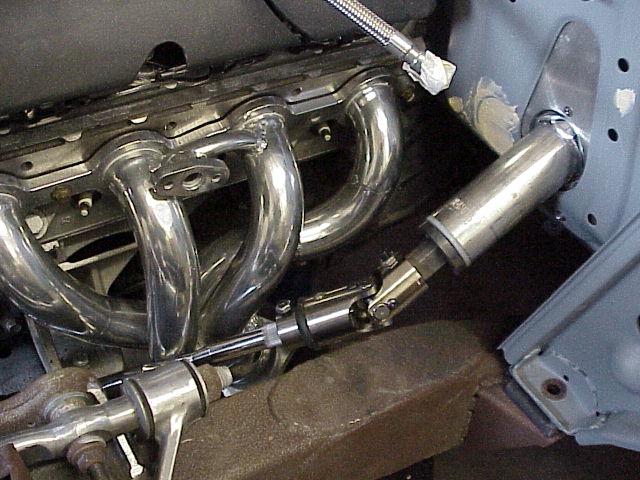
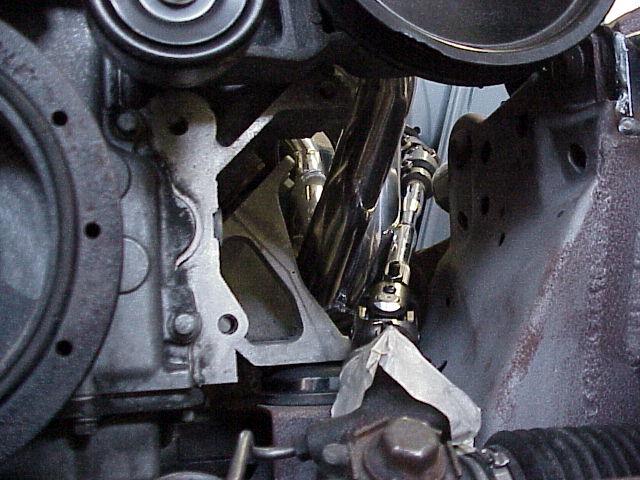
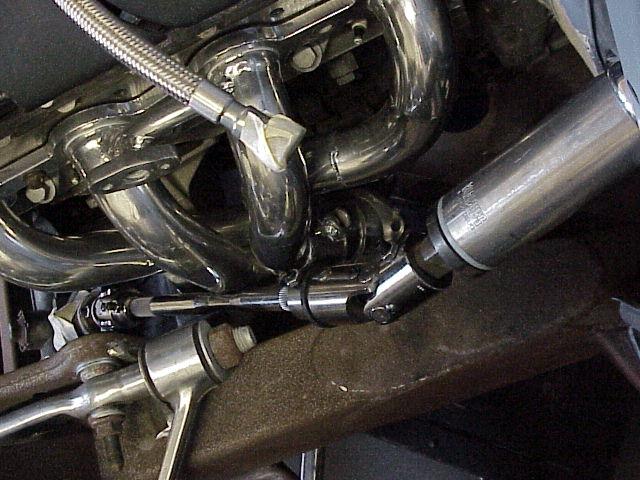
| New Custom Headers from Street & Performance |
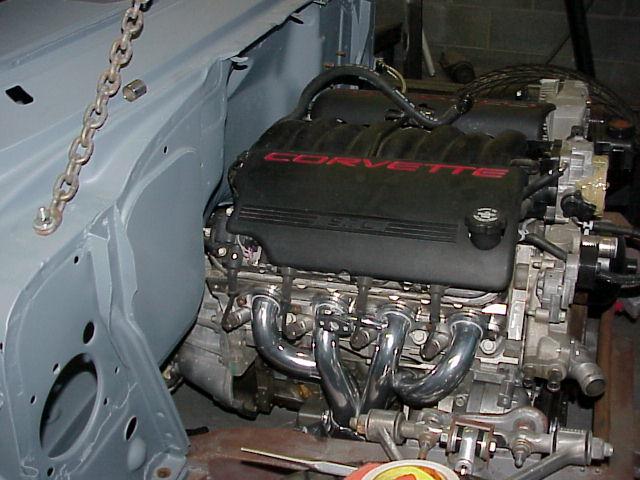
| October 1, 2003 - I called Street & Performance and talked to Mark about my header vs. steering shaft clearance problem. Mark knew exactly what my problem was, and offered to send me a pair of headers especially designed for the LS1-in'57 Chevy with rack & pinion steering. Knowing that my application is custom, S&P offered to send the headers to me partially welded, to allow Steve to remove tack welds and move things around if needed. As it turned out, we did break the left side header apart and push the two front pipes inward by about 1/2" to gain maximum clearance from the steering shaft. Now I have the choice of sending them back to Street & Performance to be finished and coated, or just get Steve to weld them up and send them out for coating myself. |
 |
| Steering Shaft |
| September 19, 2003 - The Flaming River tilt steering column is mounted two inches forward of the standard position to achieve the desired steering wheel distance from the driver seat. That extends the column two additional inches forward of the firewall. This worked out fine for the positioning of the link to the steering rack. I am using stainless universal joints, vibration damper, and shaft from Flaming River. As of now, we still need to gain about 3/8" more clearance between the shaft and the header. |
 |
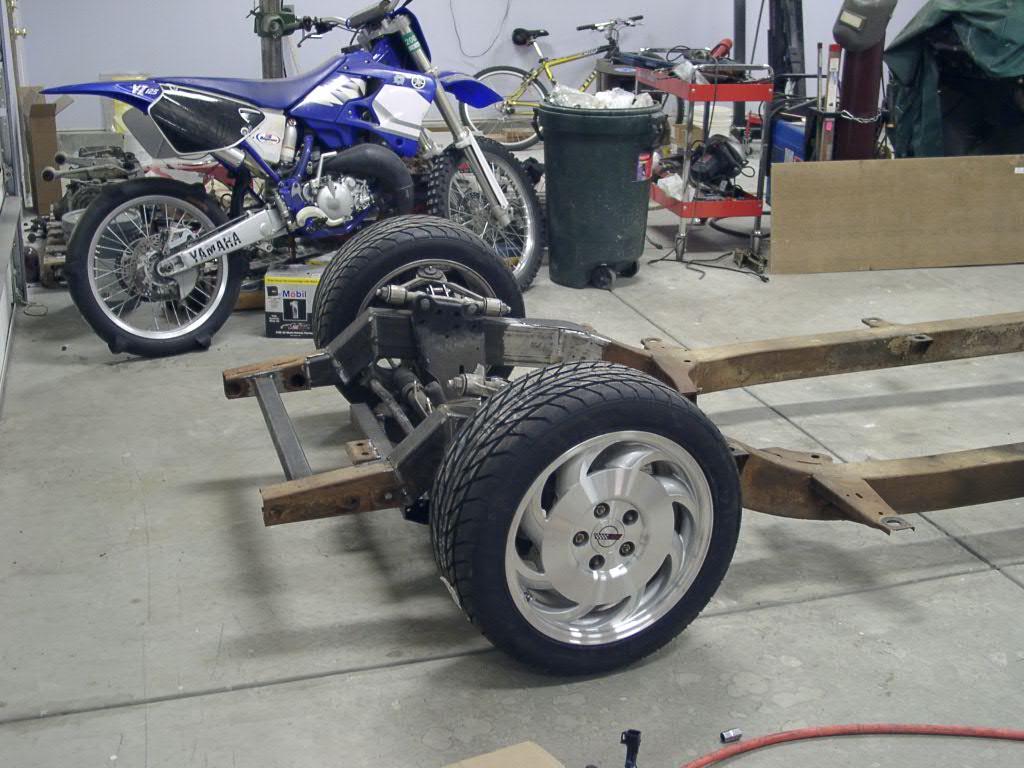
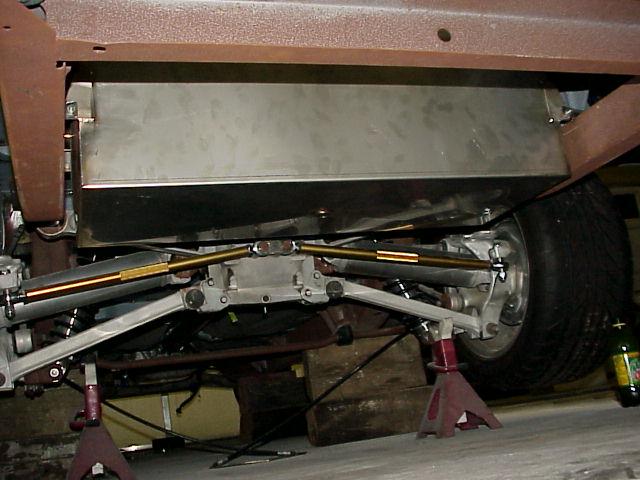
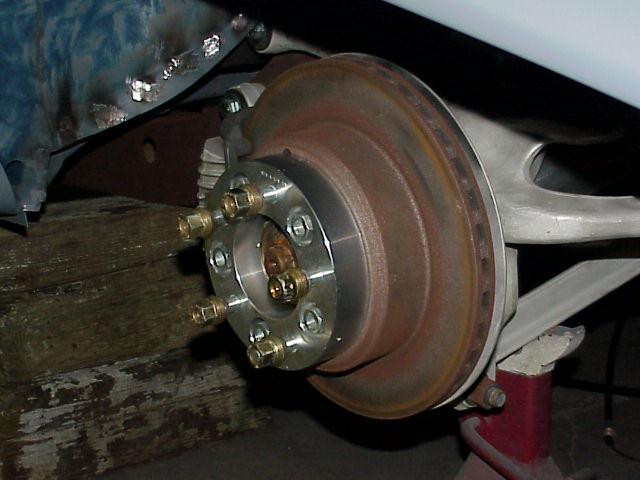
| Rear Wheel Spacers Installed |
| August 27, 2003 - Installed 1.25" wheel spacers on the rear. The 275x40x17" tires now fit perfectly in the wheel wells! |
 |
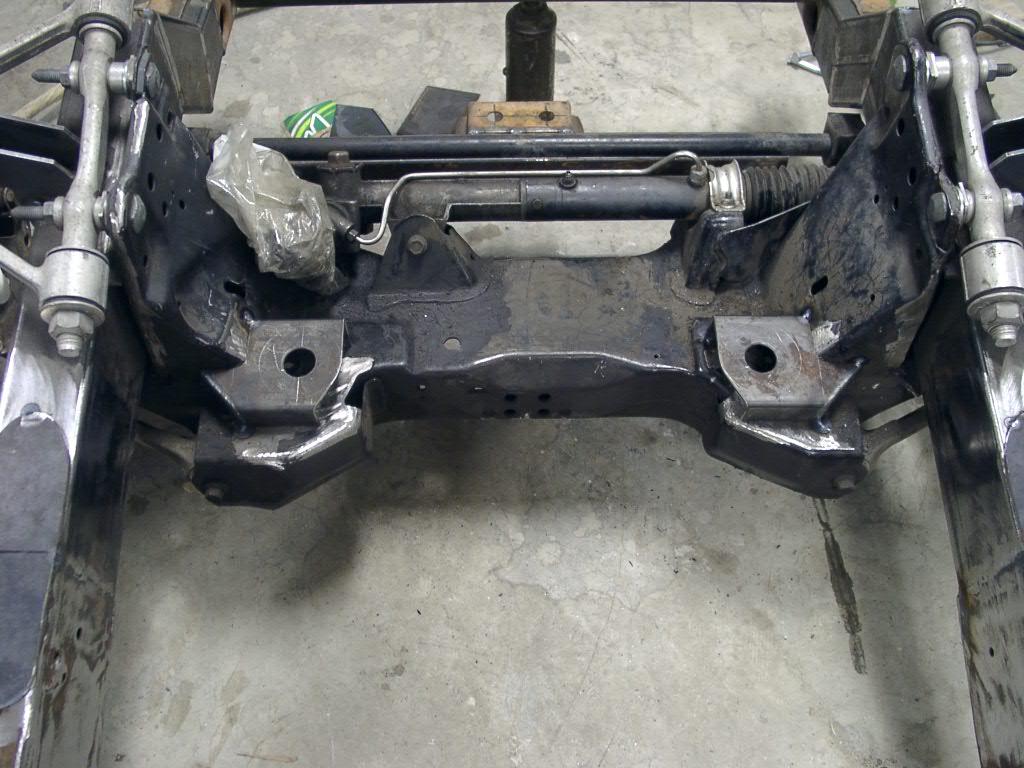
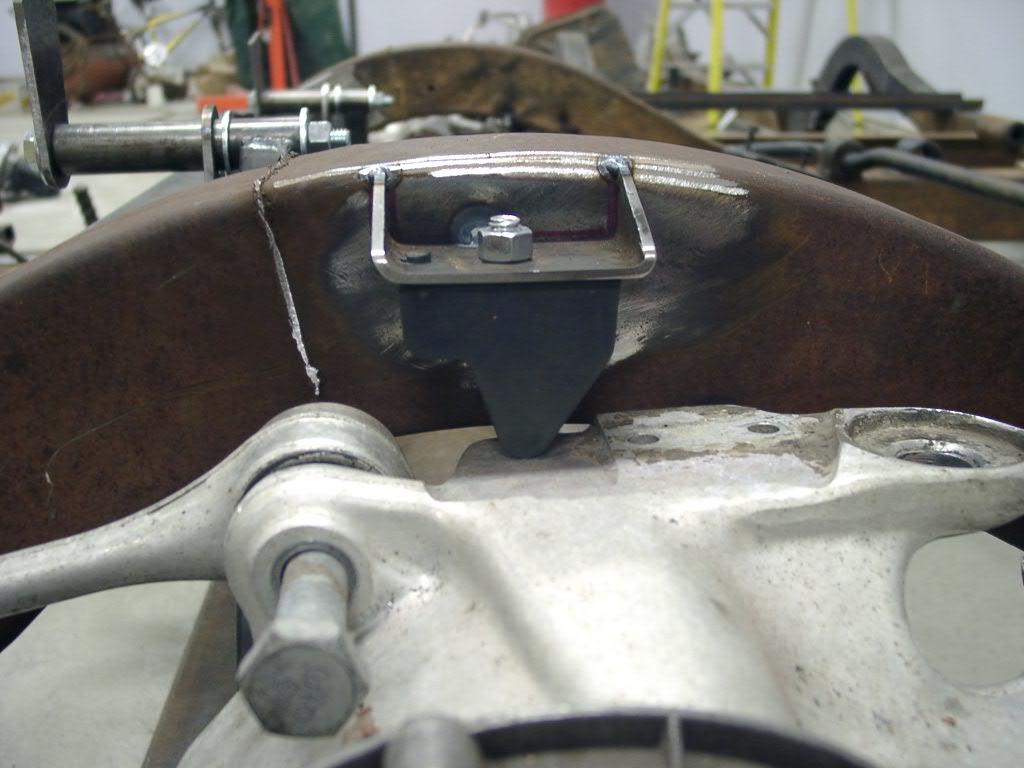
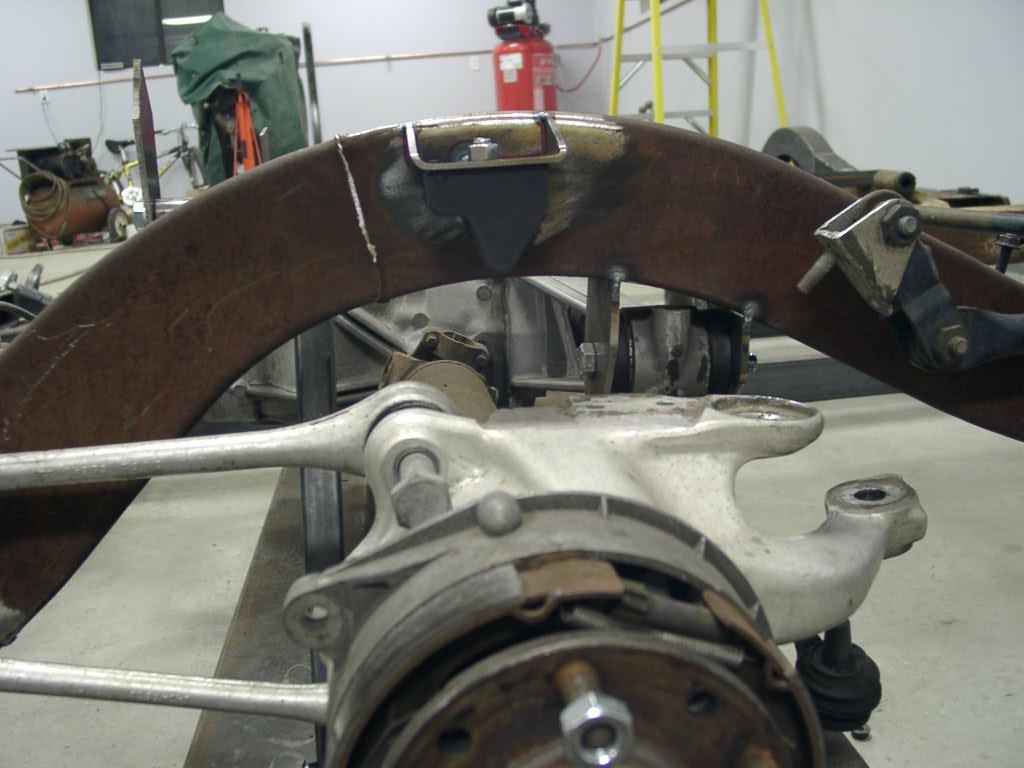
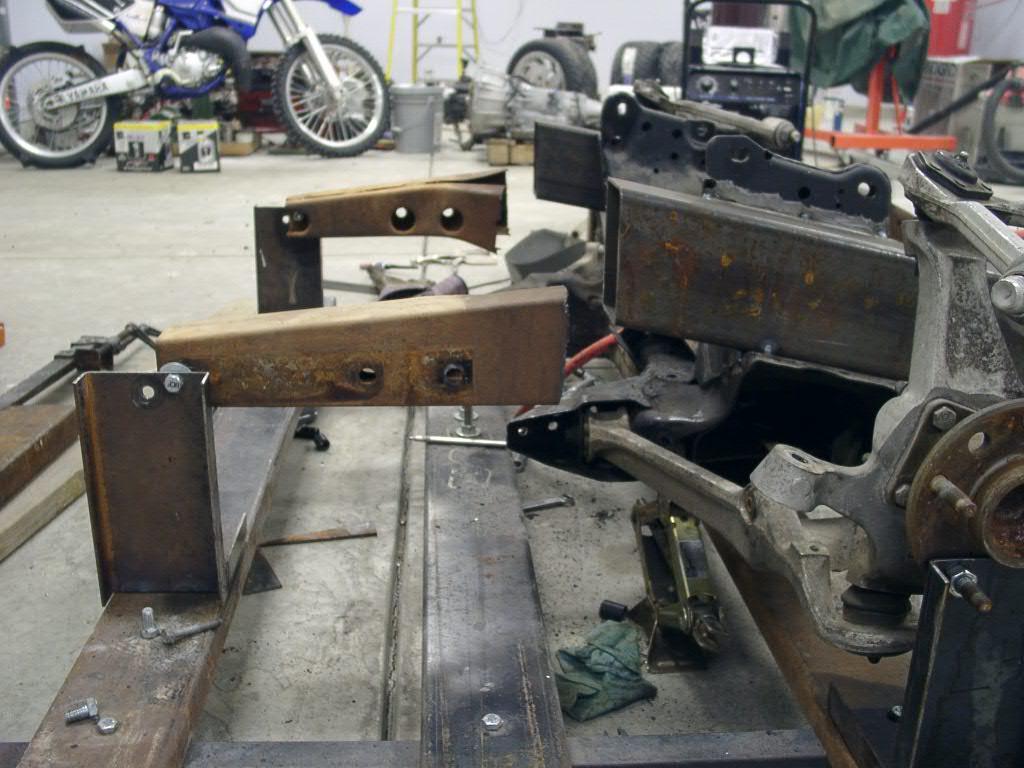
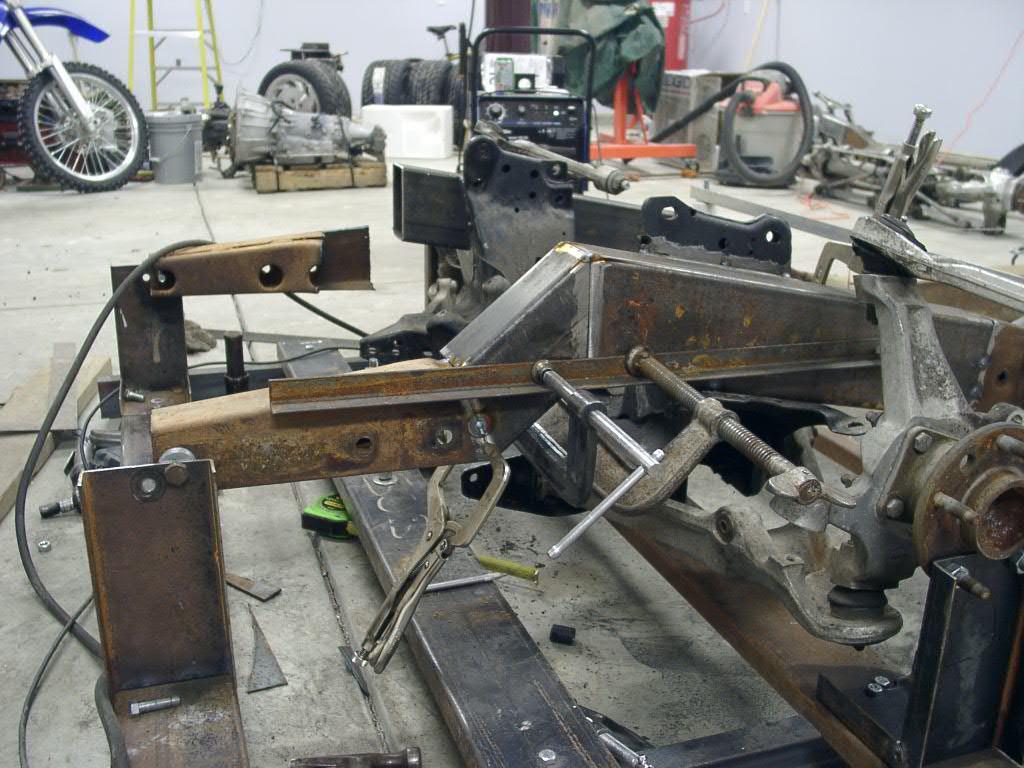
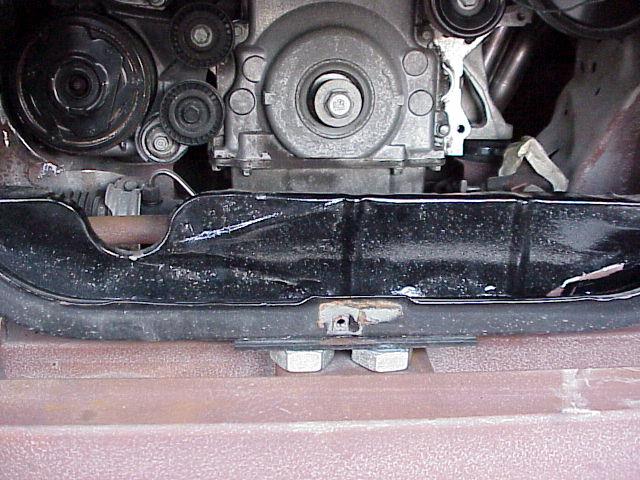
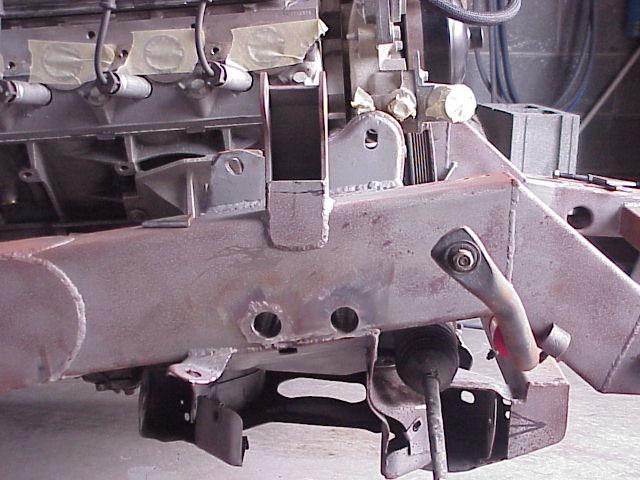
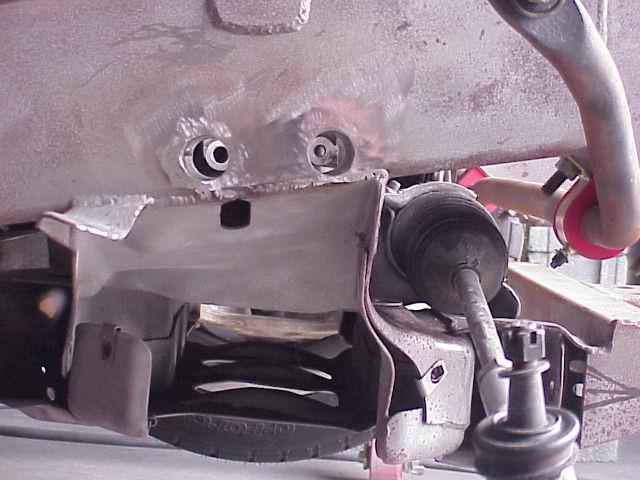
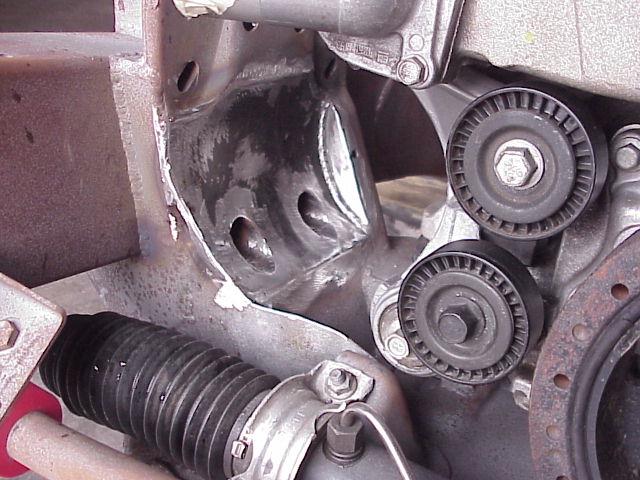
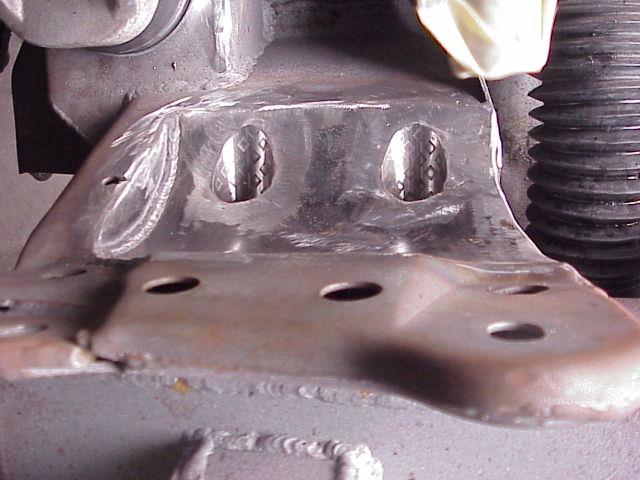
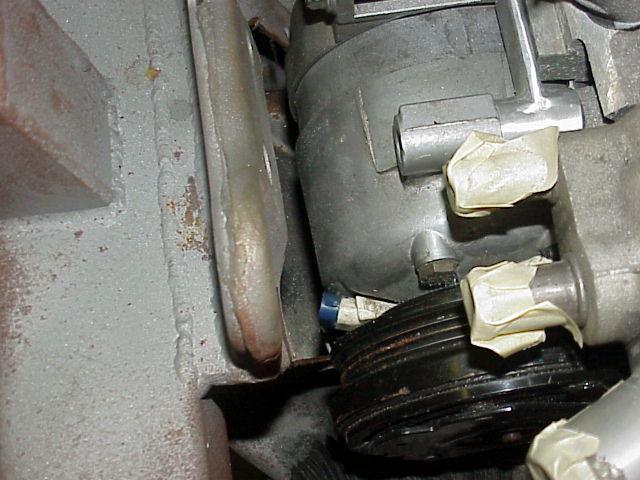
| Engine Cradle Modified to fit A/C compressor |
|
August 20, 2003 - The LS1 engine normally
has the air conditioner compressor mounted very low on the passenger side.
The engine cradle from the C4 Vette is not wide enough at that point for
the compressor to reside there; much less R&R if necessary. There
are aftermarket bracket kits that move it to the top of the engine, but I
want to avoid that if possible for a cleaner look under the hood. The answer was to cut a notch out of the cradle and weld a concave-shaped patch to make room. Access holes had to be cut, and reinforced with steel pipe to allow access to the bottom mounting bolts. It was a lot of work, but I think the results are worth it. Steve also added support gussets to the upper A-arm mounting points to improve strength. |
 |
| Here is what it looked like after cutting a notch out of the cradle, but before Steve fabricated and installed the new wall and access holes. |
 |
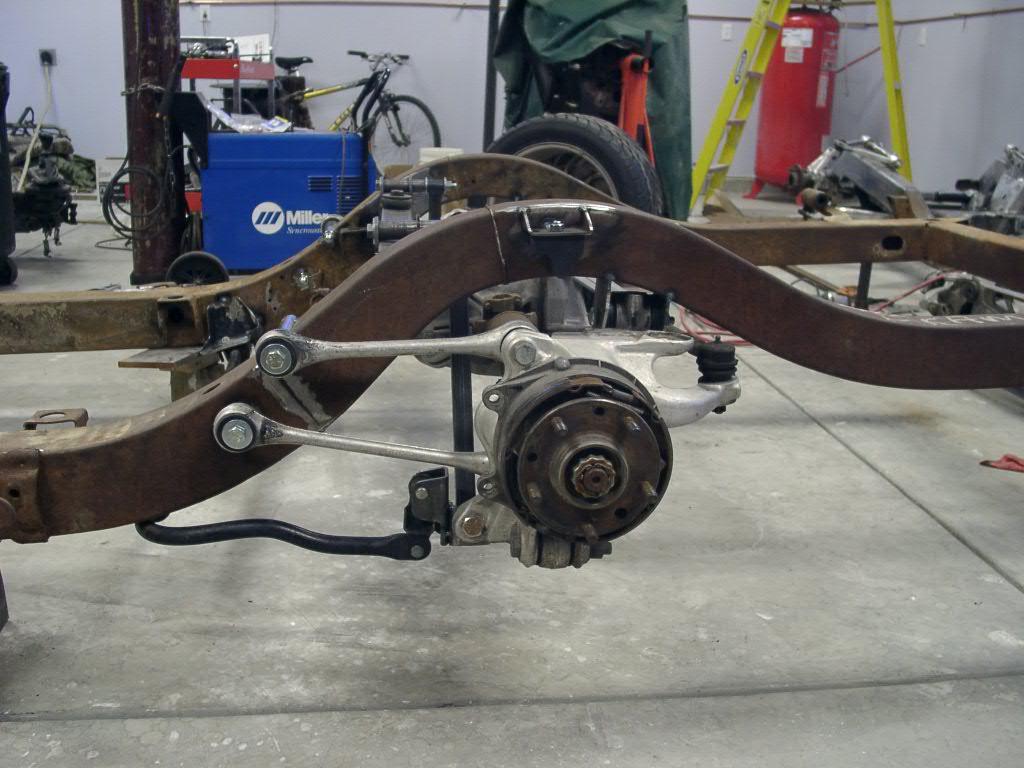
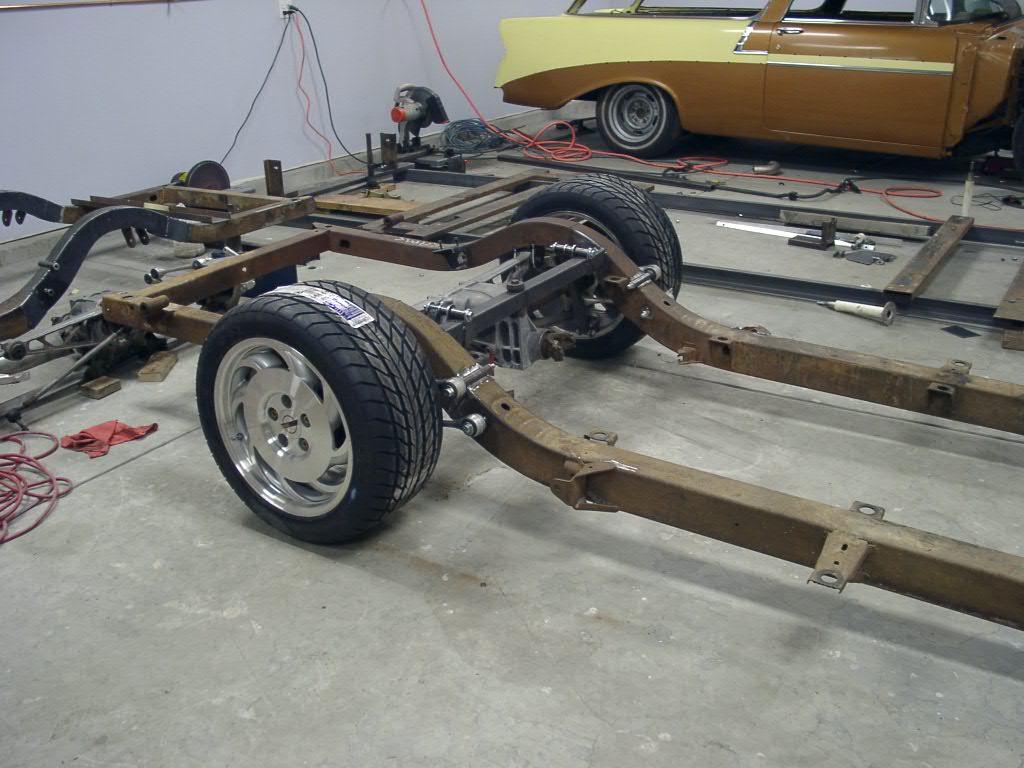
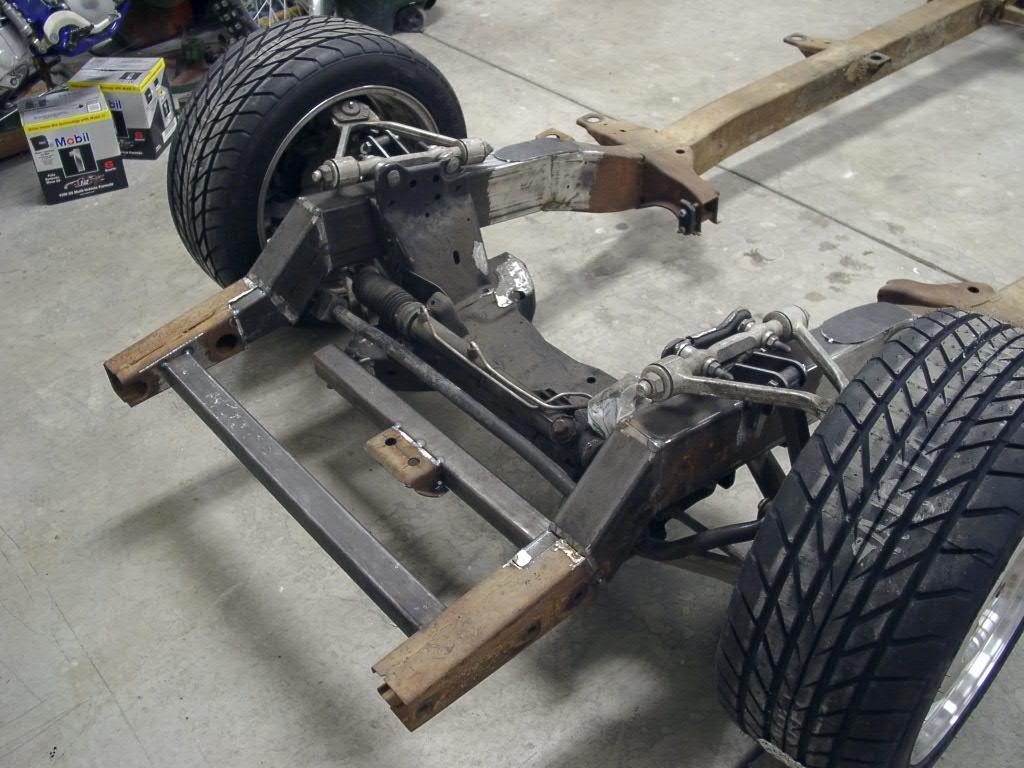
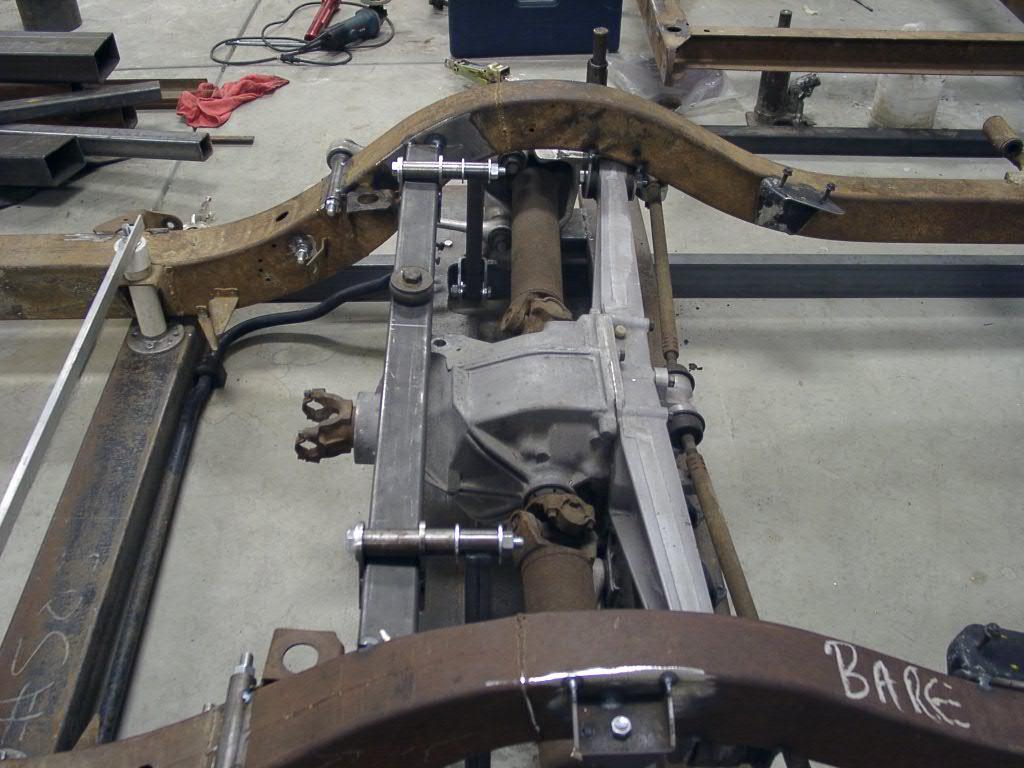
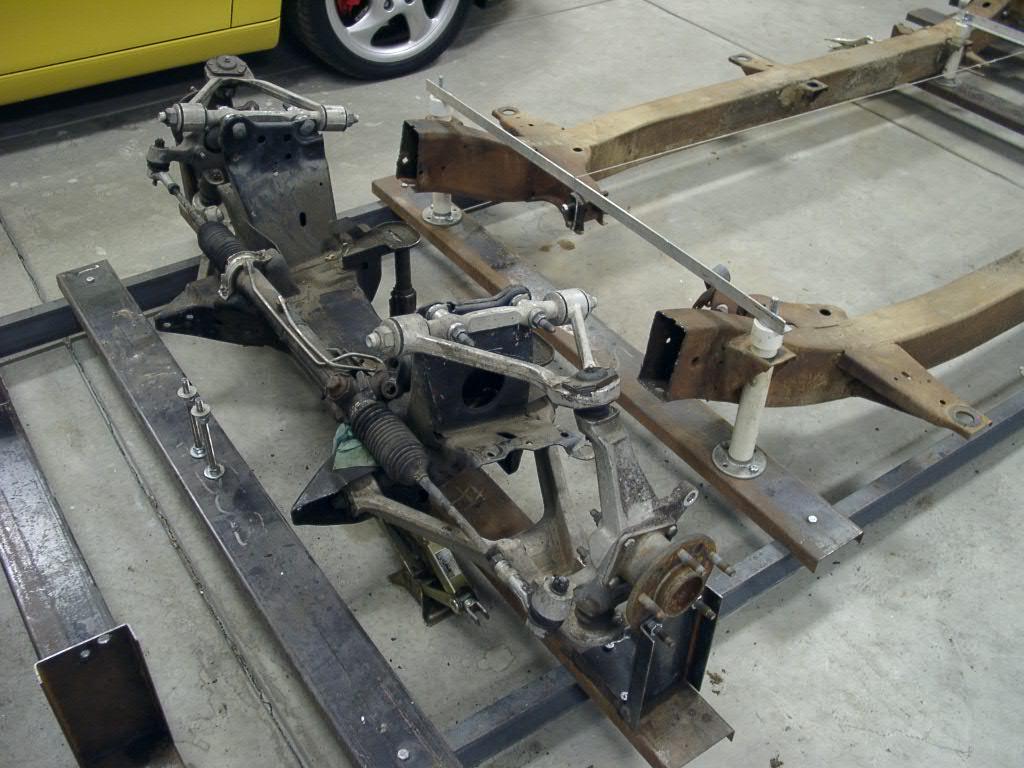
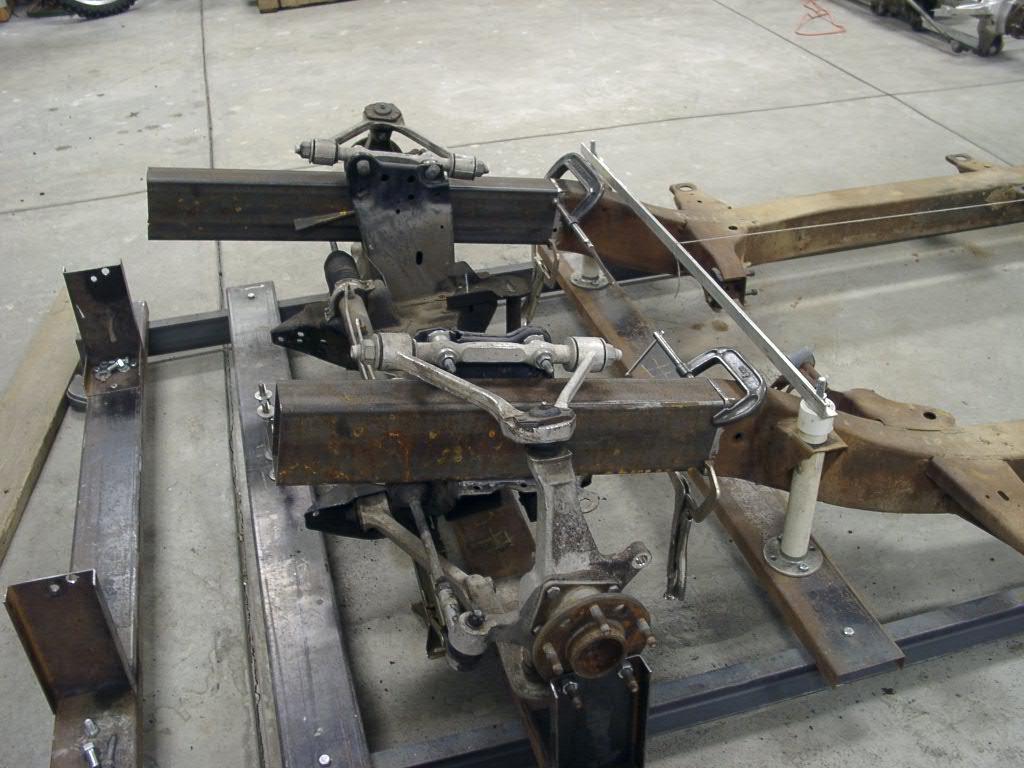
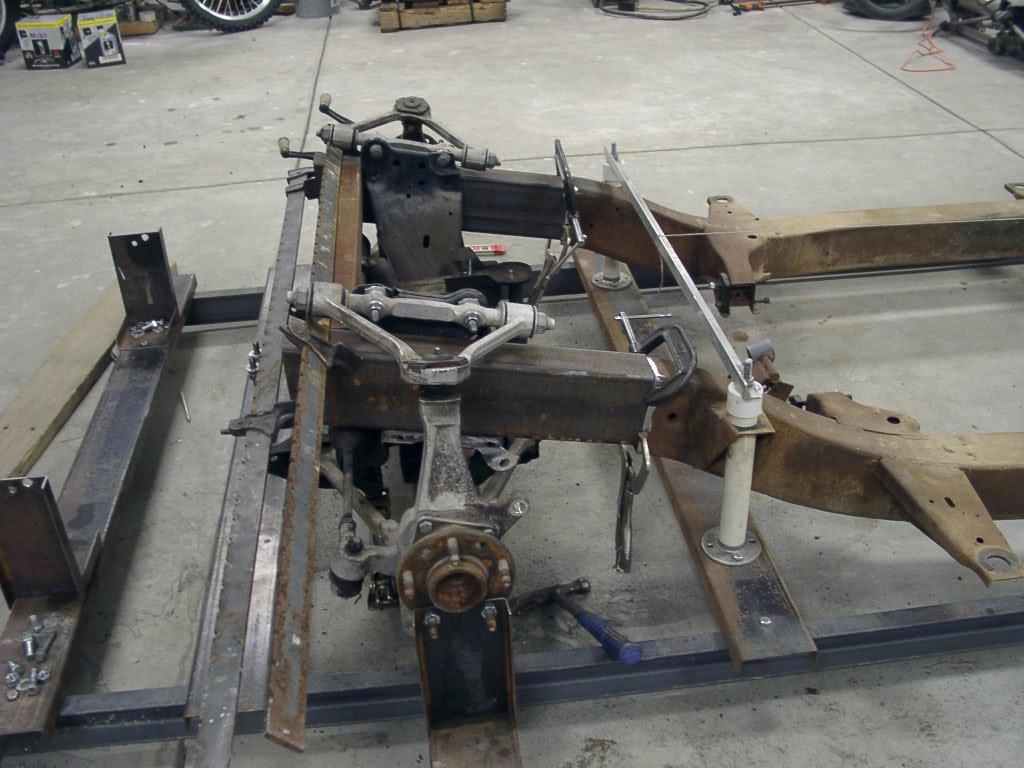
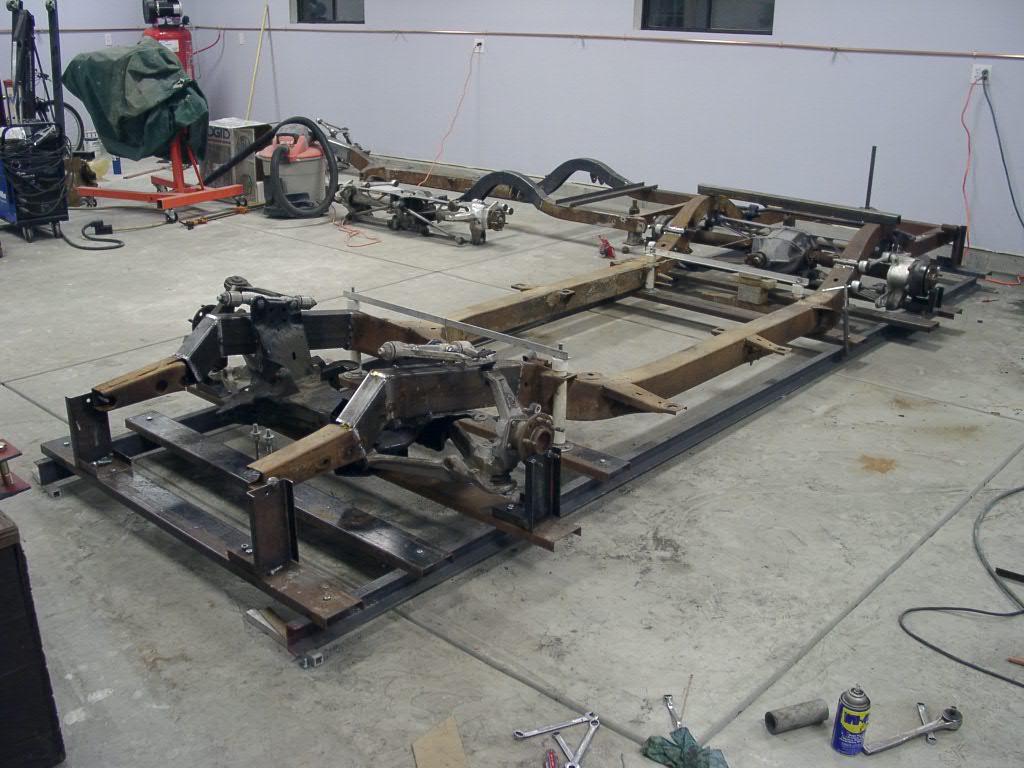
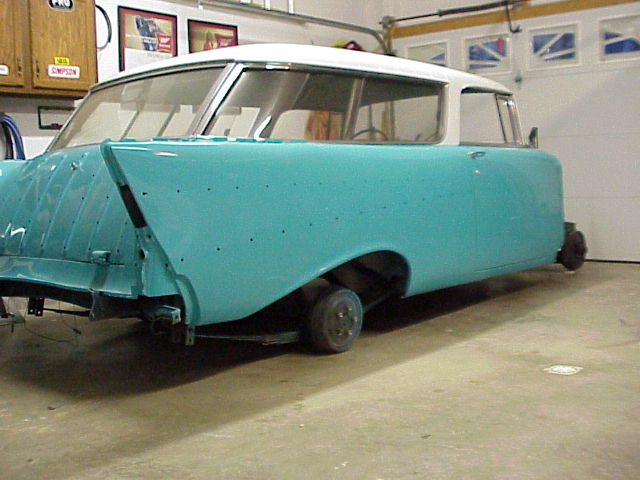
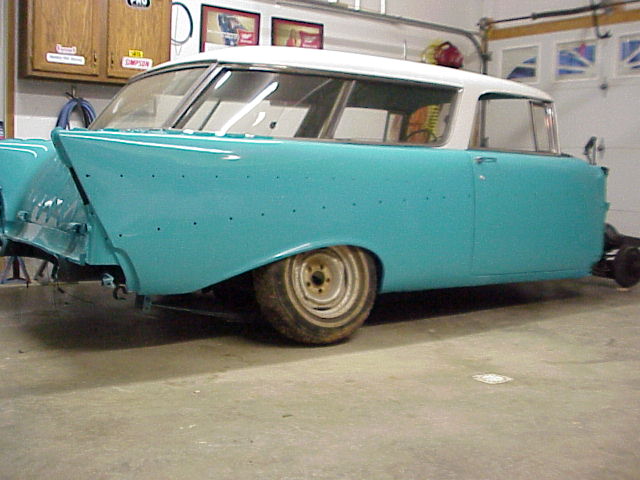
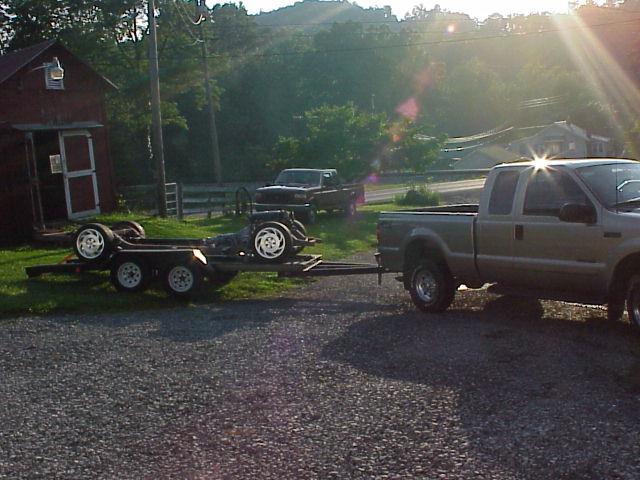
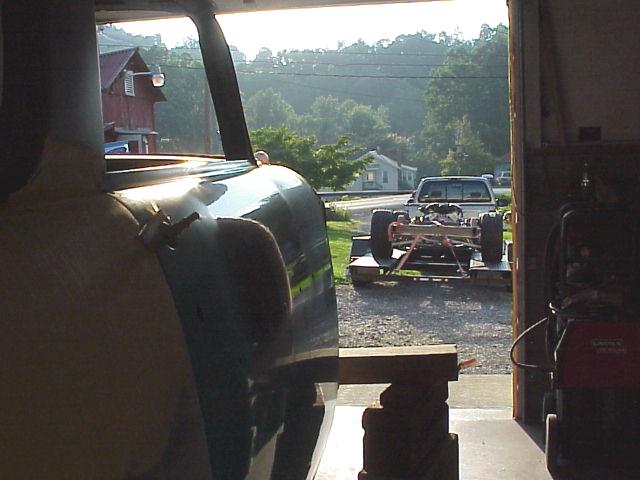
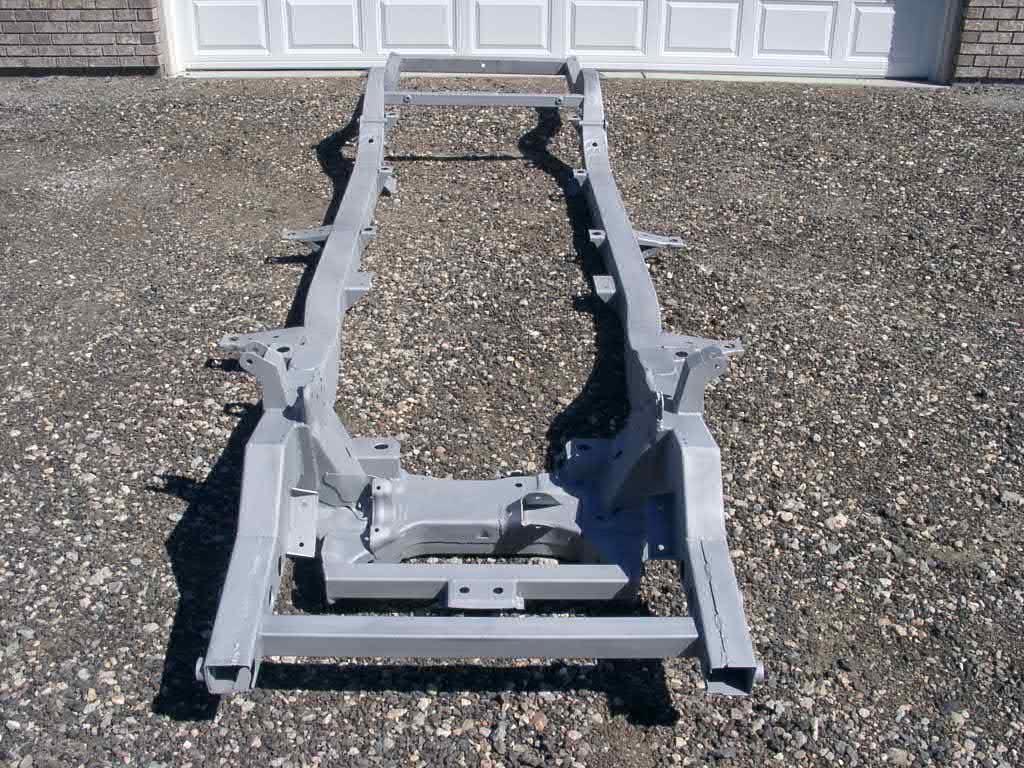
| New Frame "Test Fit" to Body |
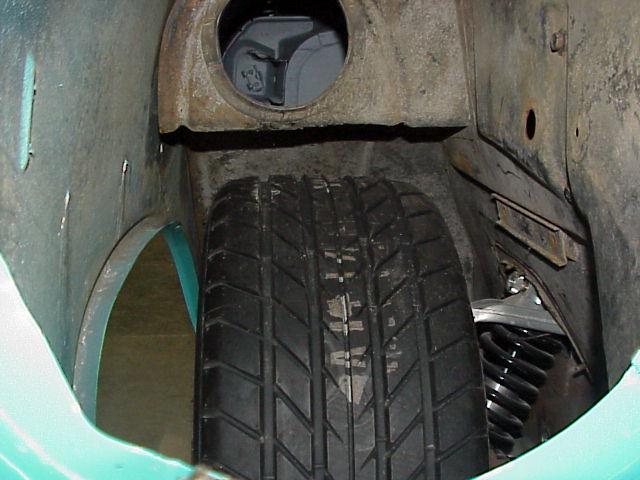
| August 4, 2003 - We trailored the new frame out to Steve's shop and dropped the body on it to find any clearance issues. Laszlo's placement of the engine is perfect! The floor area above the 'dog bones' on the rear suspension will have to be 'adjusted,' as will the seam area where the floor pans mate to the toe board. The rear wheels rub the insides of the fender wells, so I will need spacers if I want to use the Vette wheels. The wheel issue is no surprise. I asked Laszlo to use the 84-87 Vette rear because it is 1 1/4" narrower than the later versions. Earlier rear is 1 1/4" narrower overall (62.25" vs 63.5"). The idea being that I will have room for a little bit of "dish" if I decide later to change to a vintage-looking wheel. |
 |
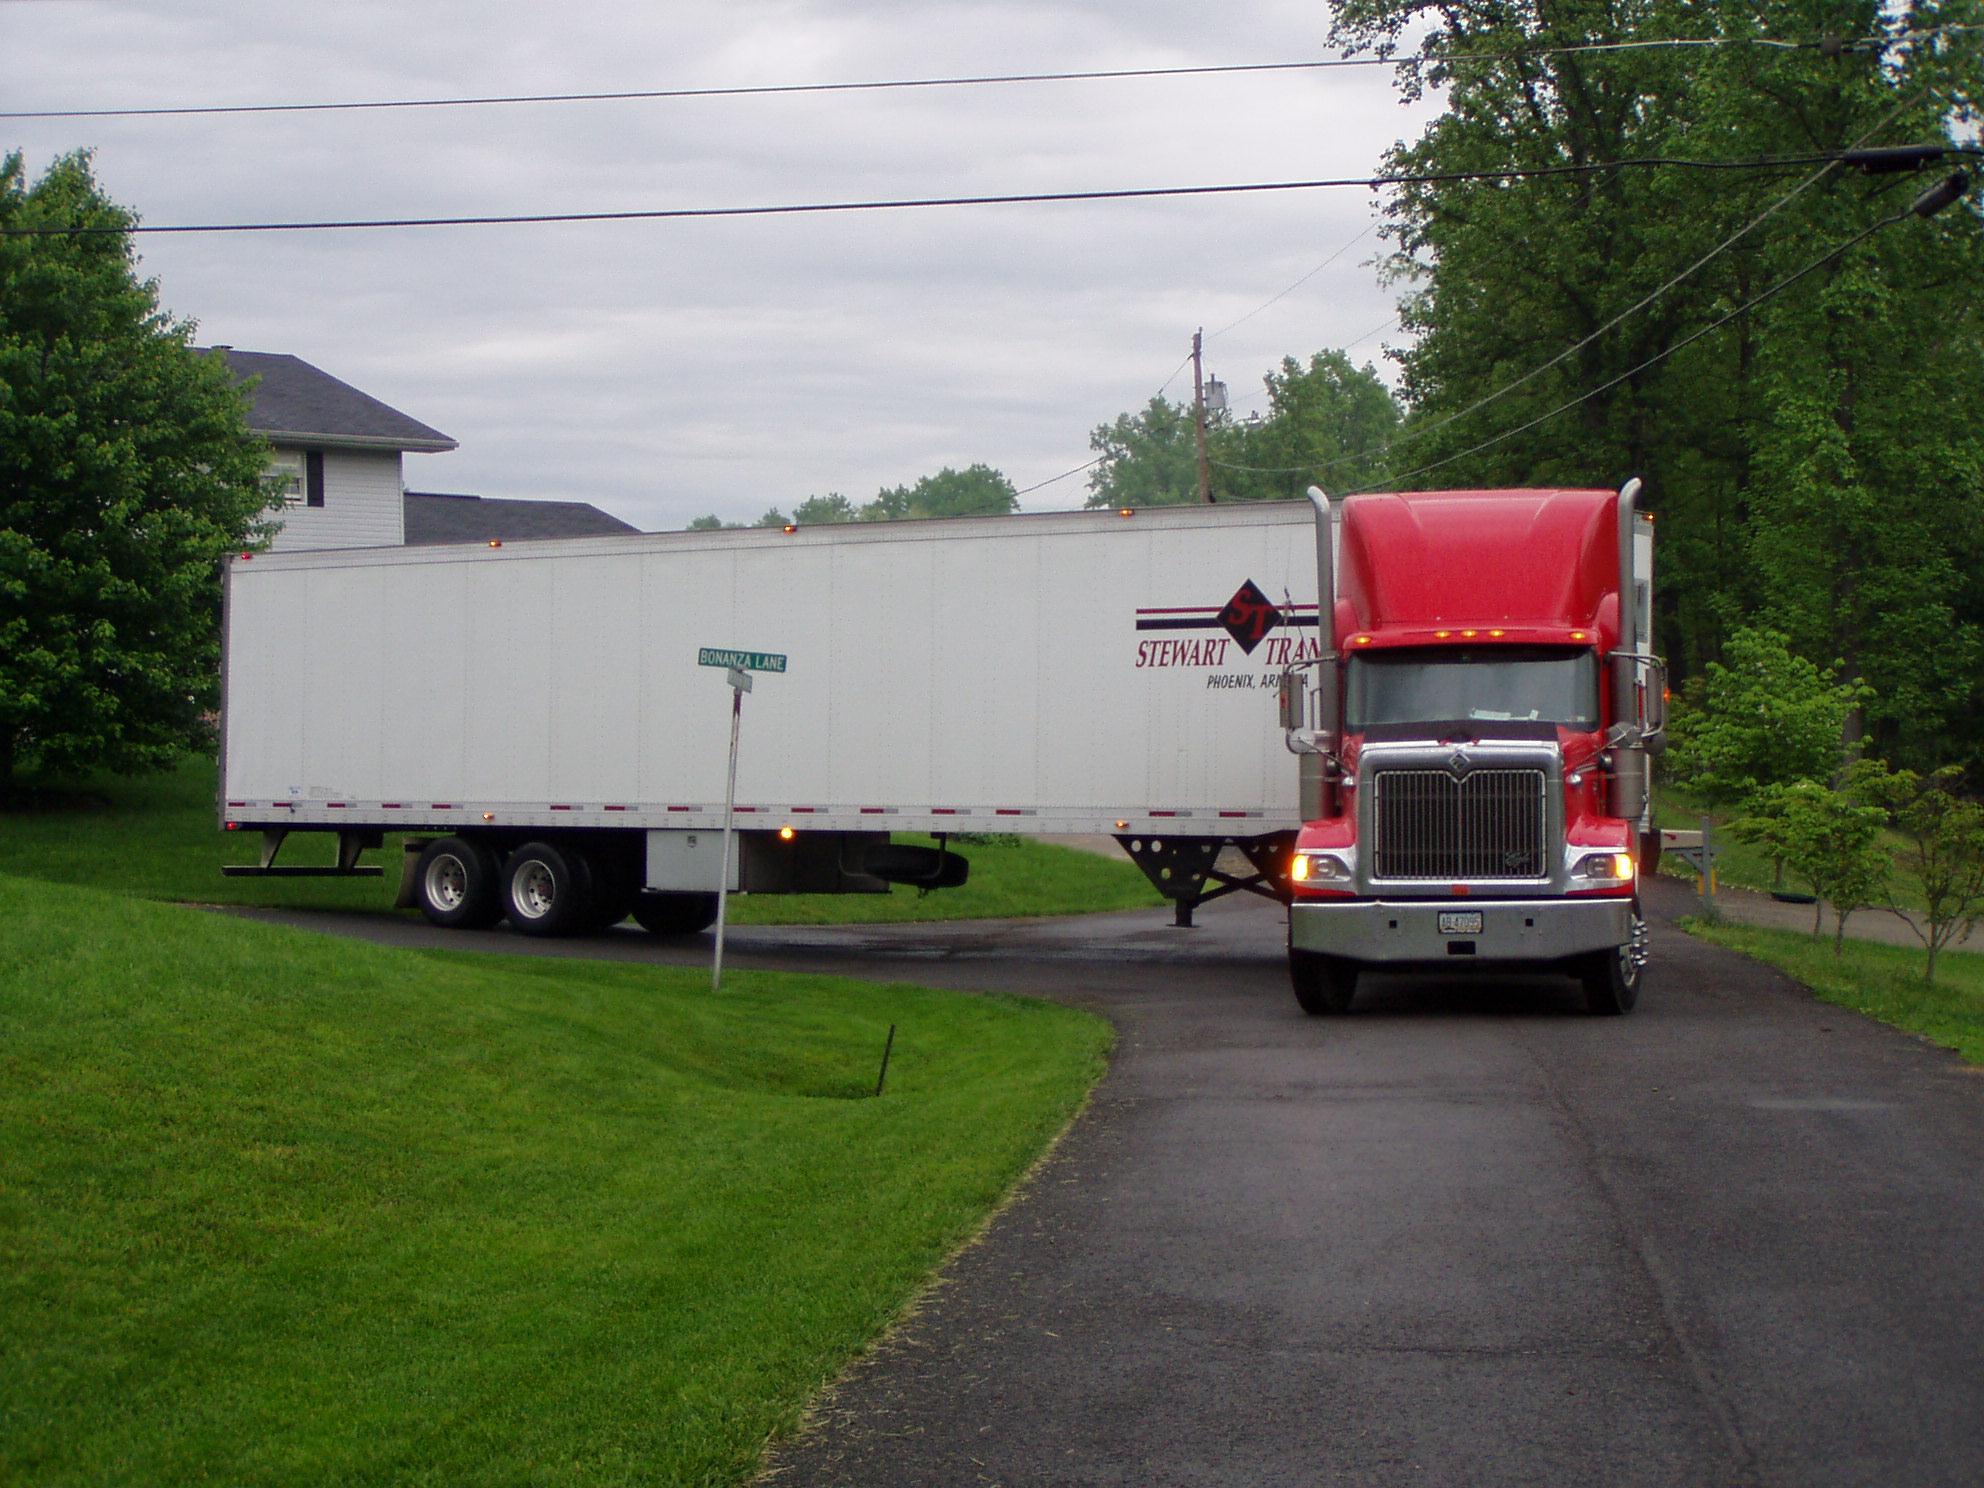
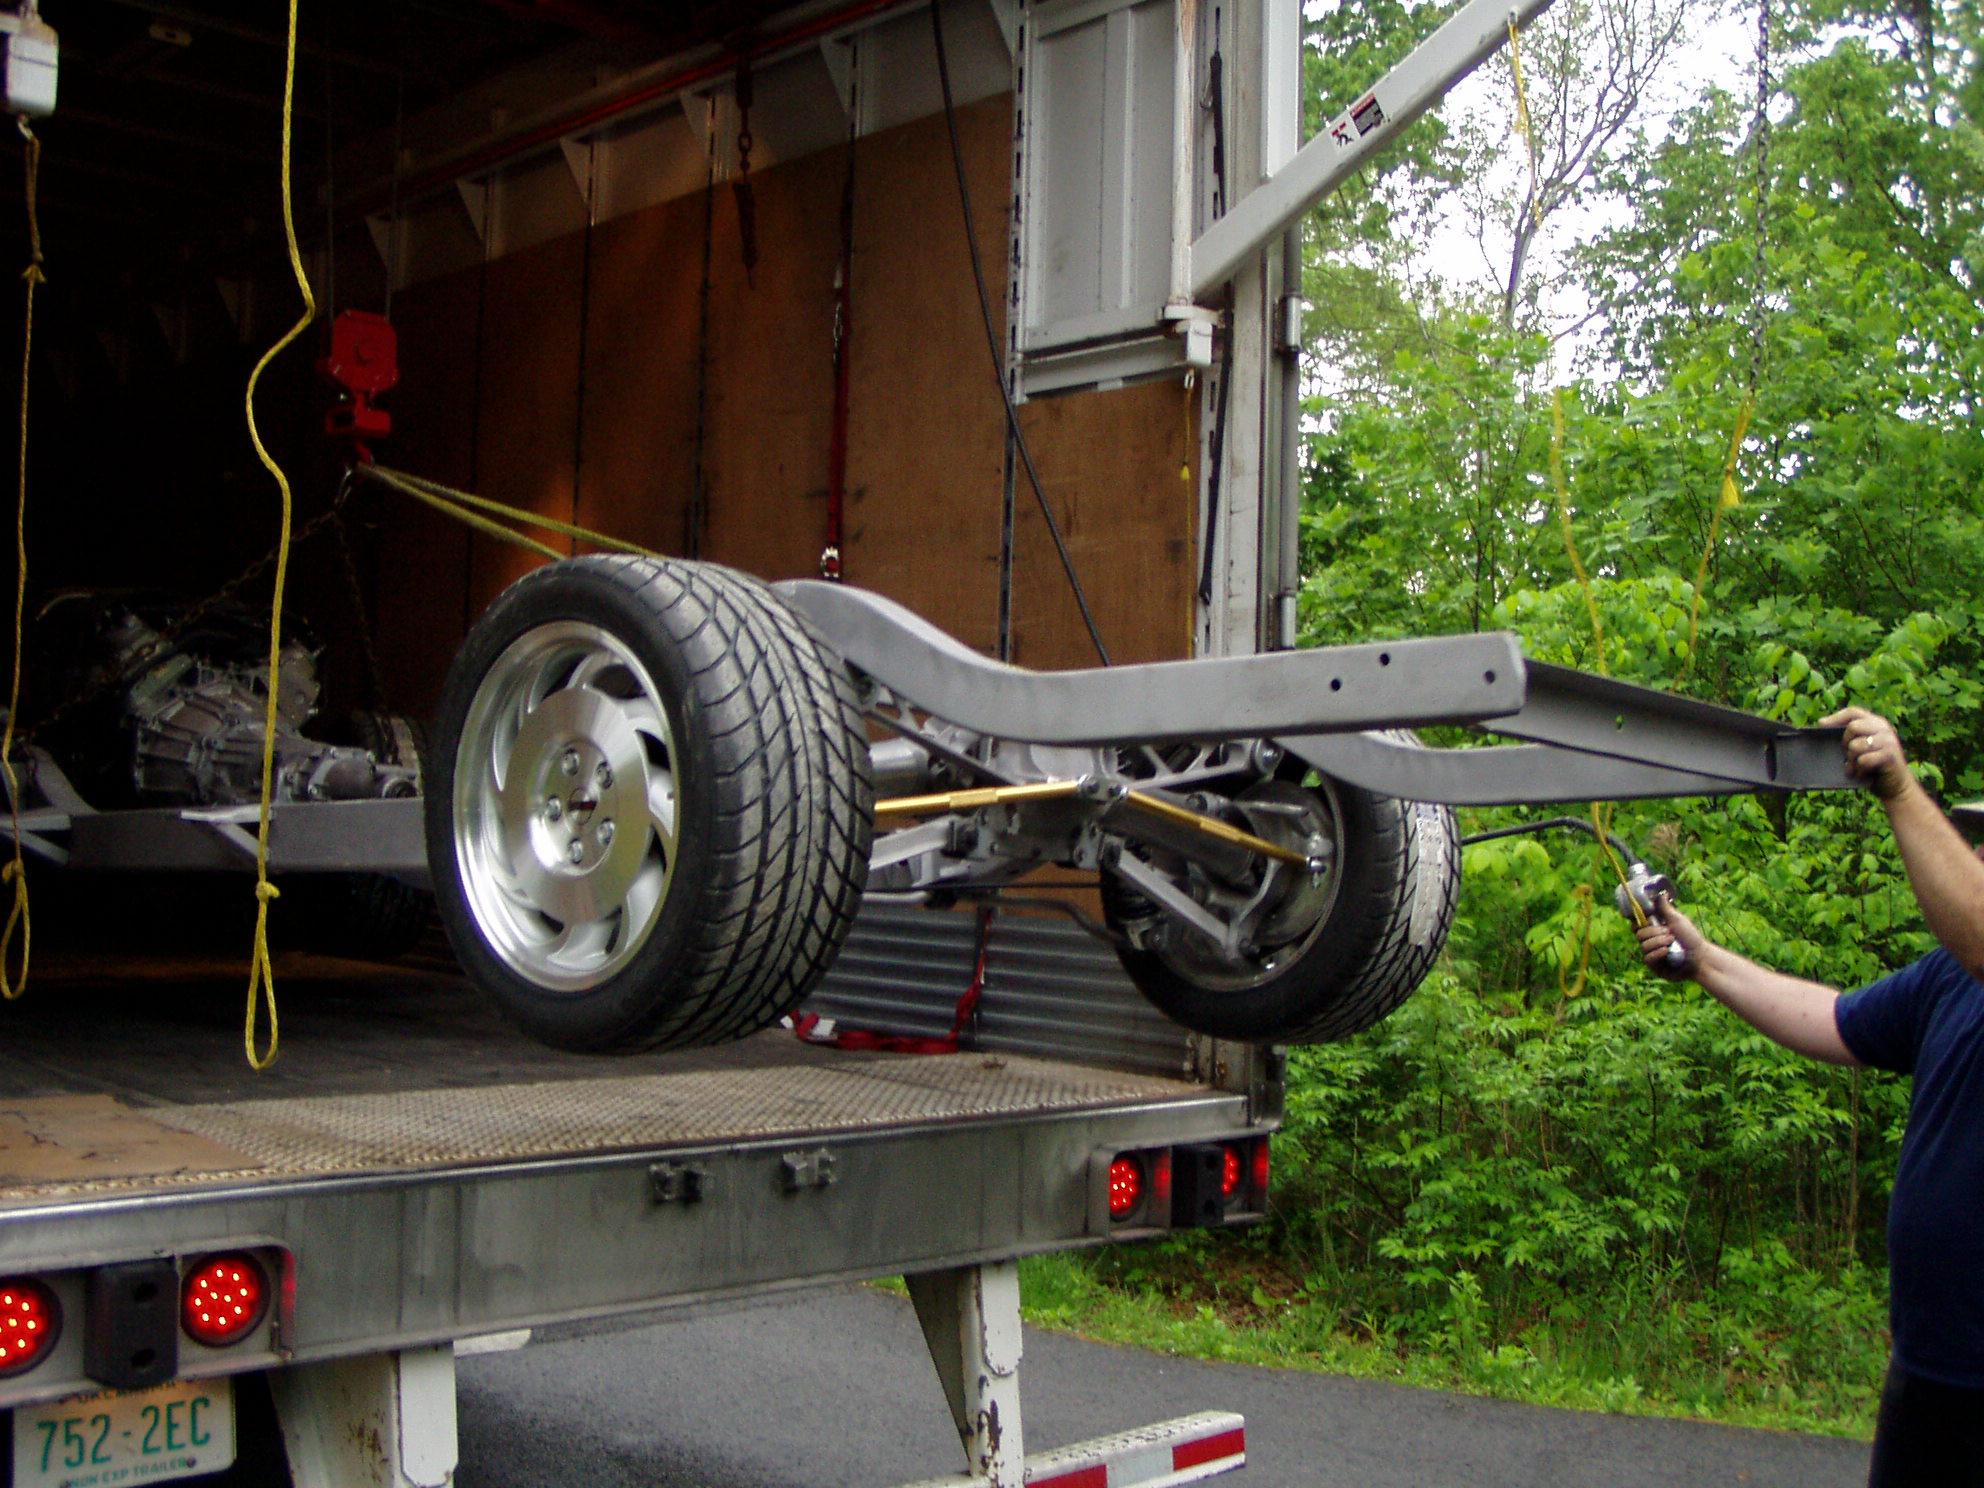
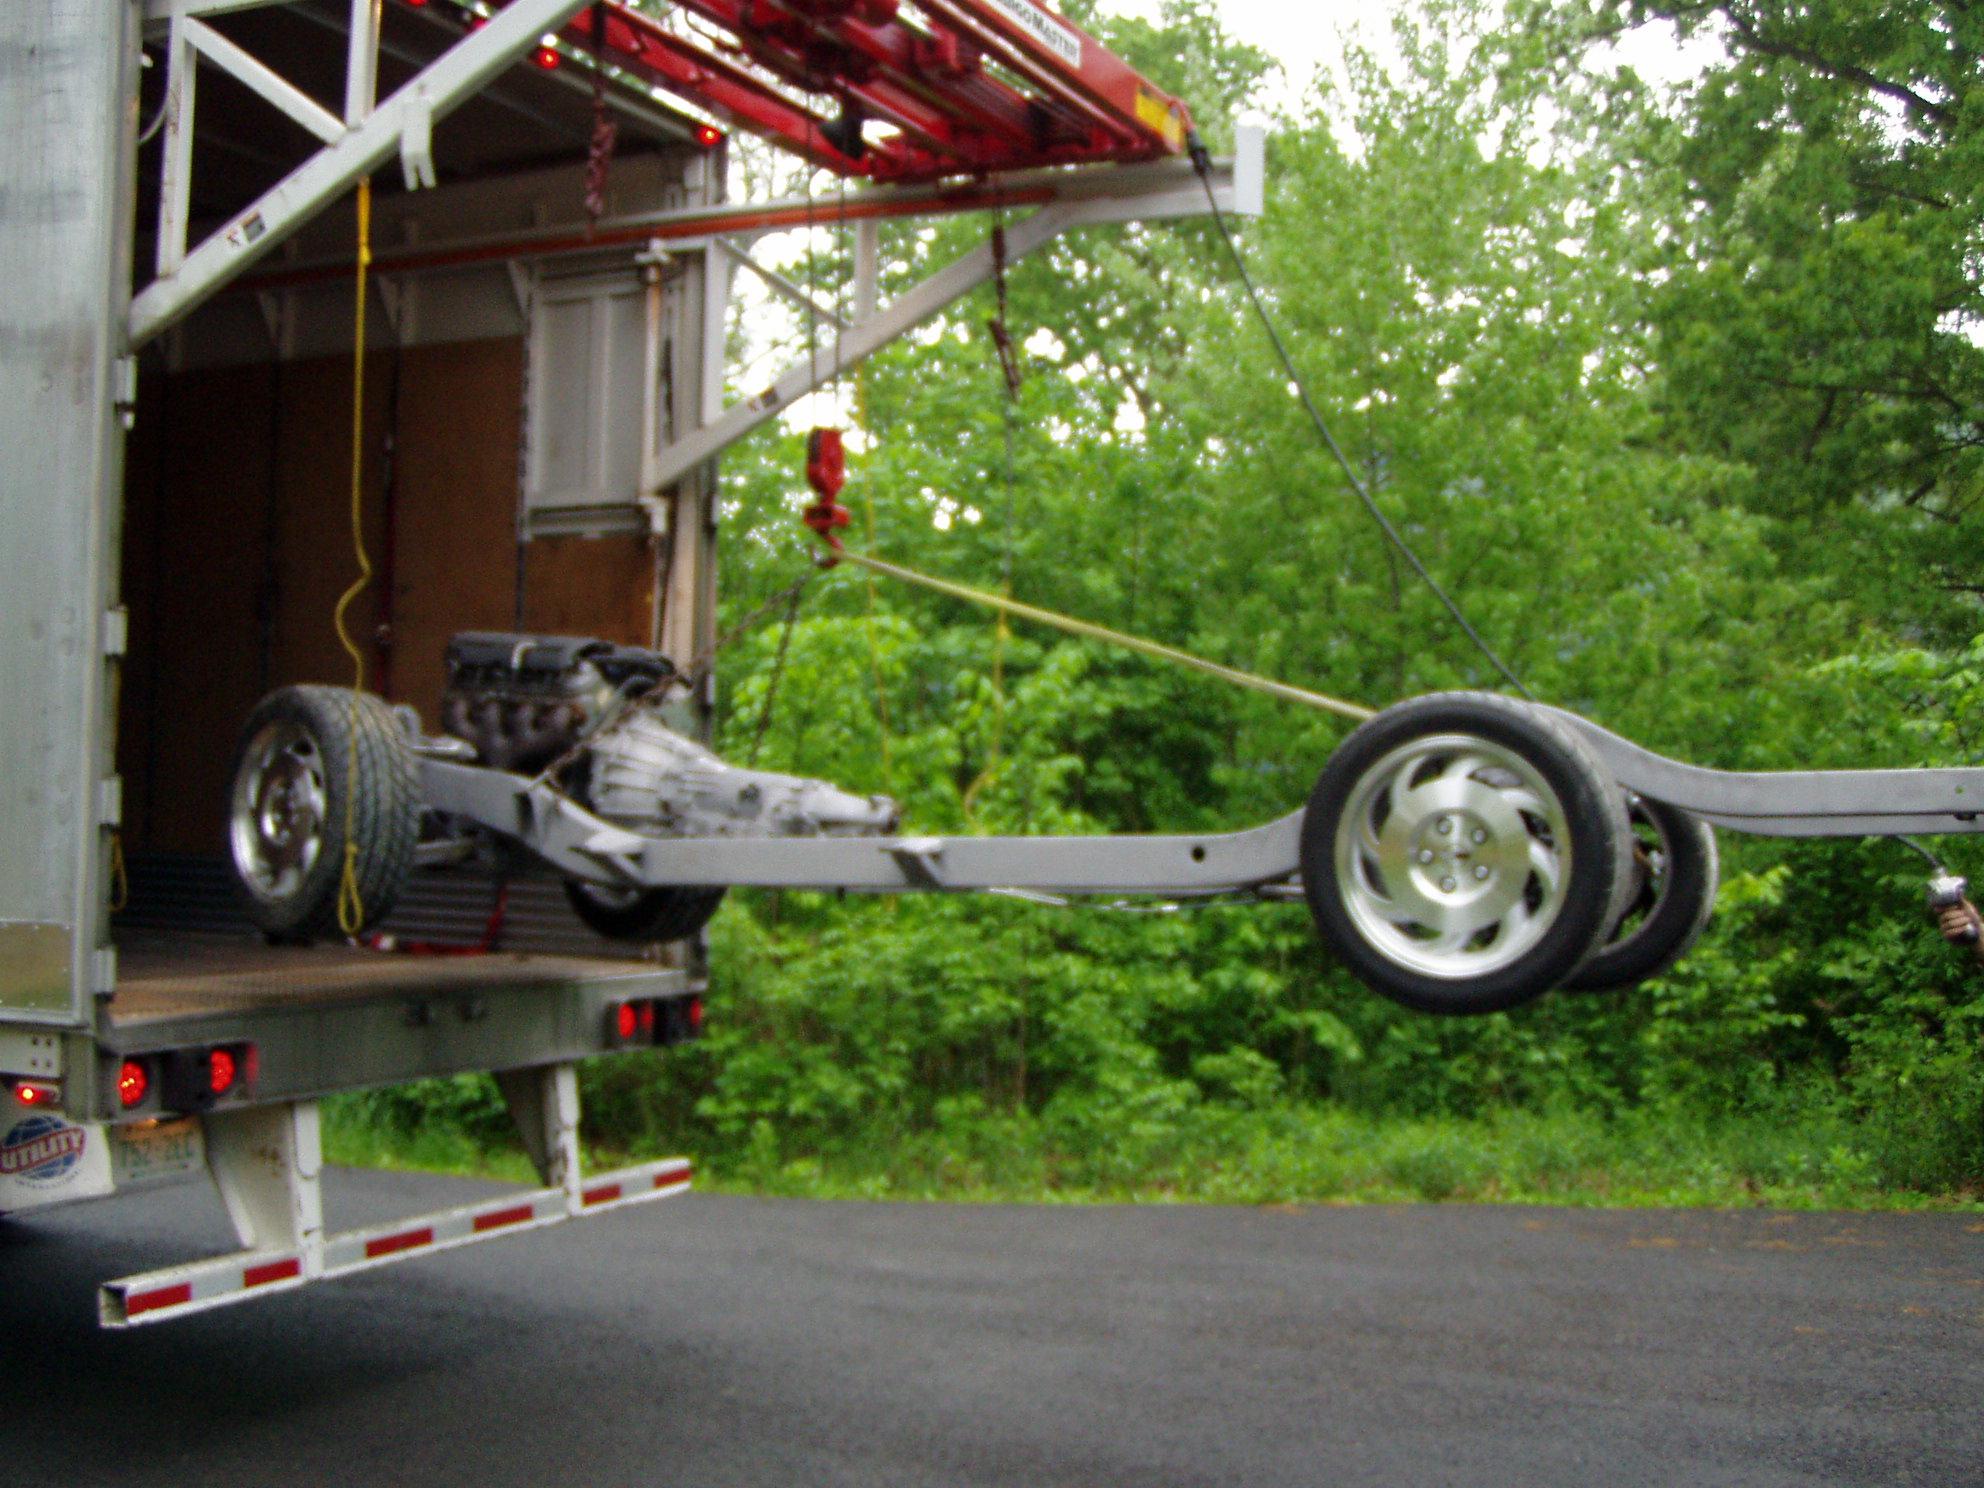
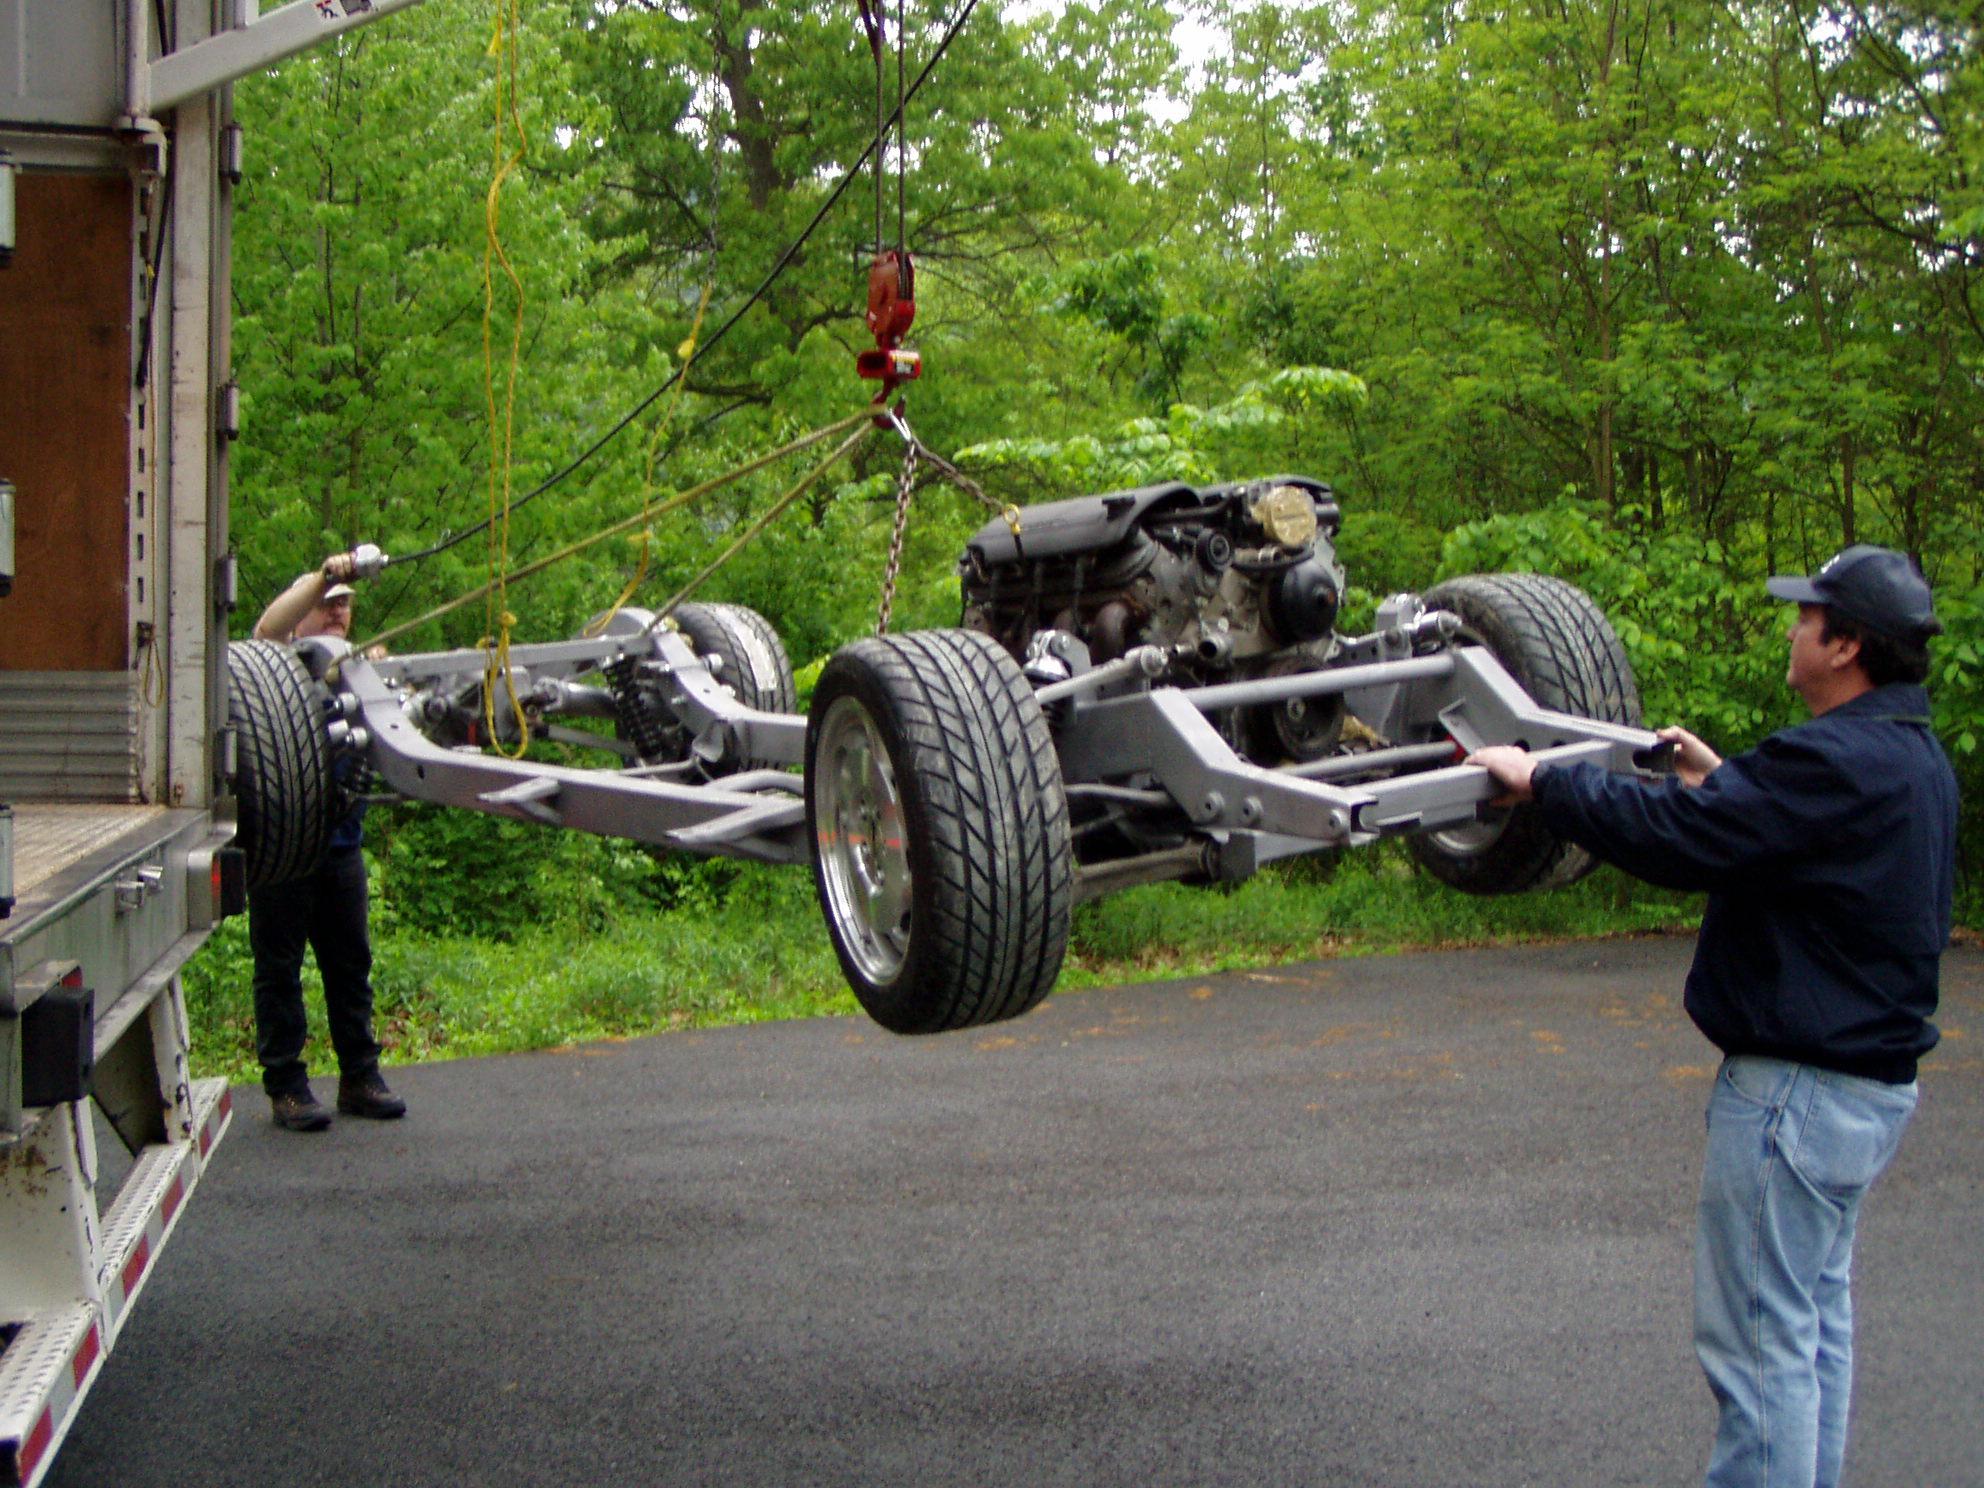
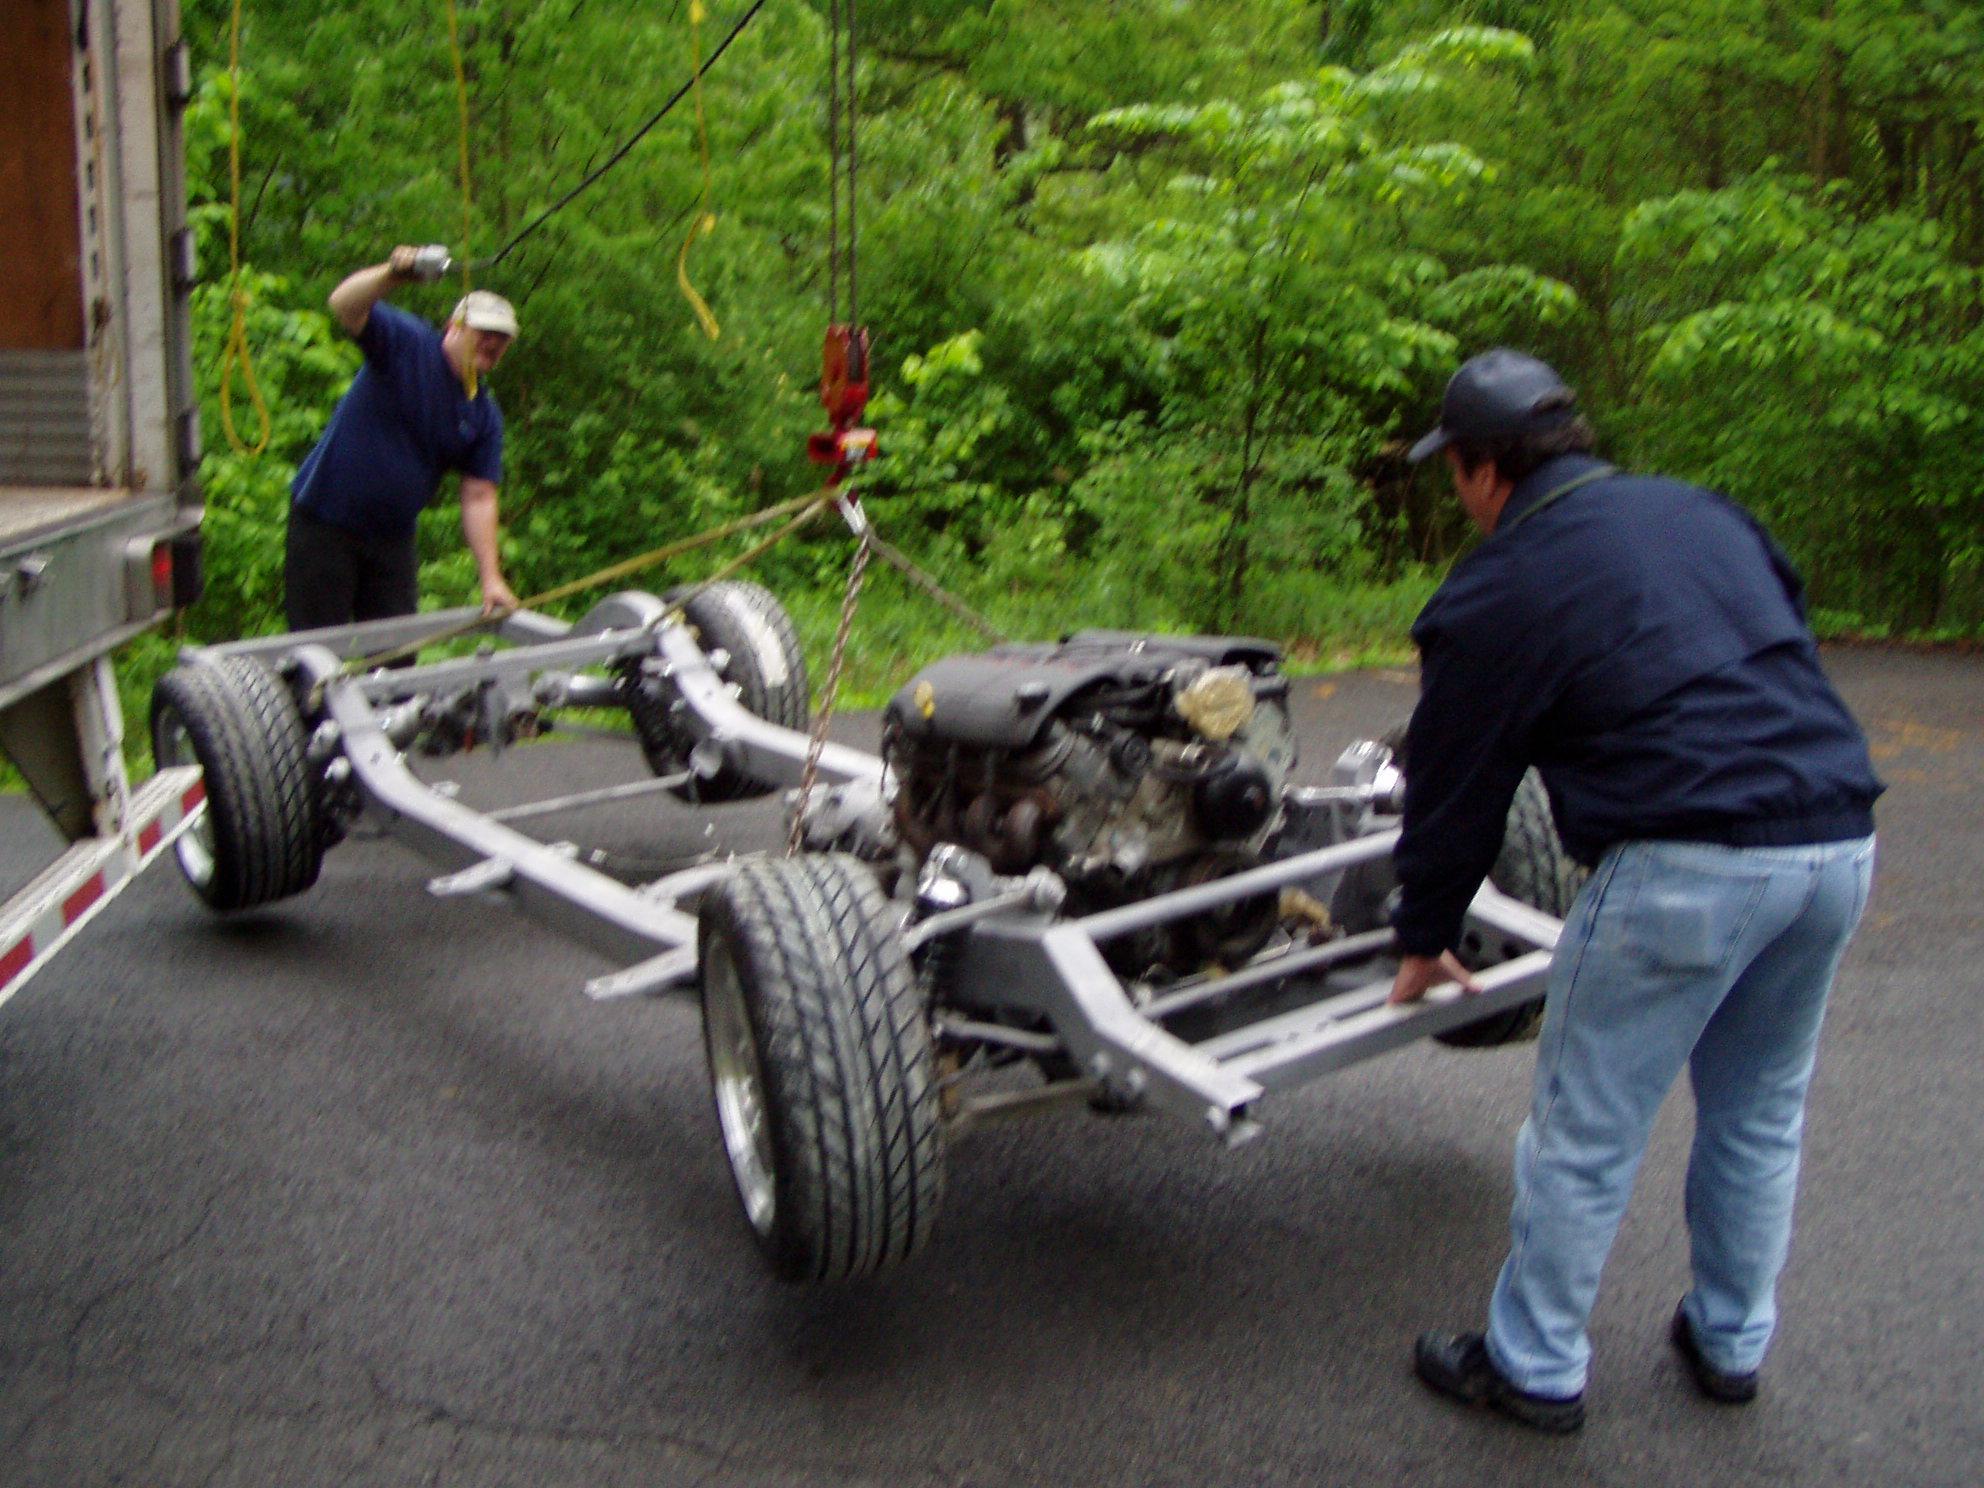
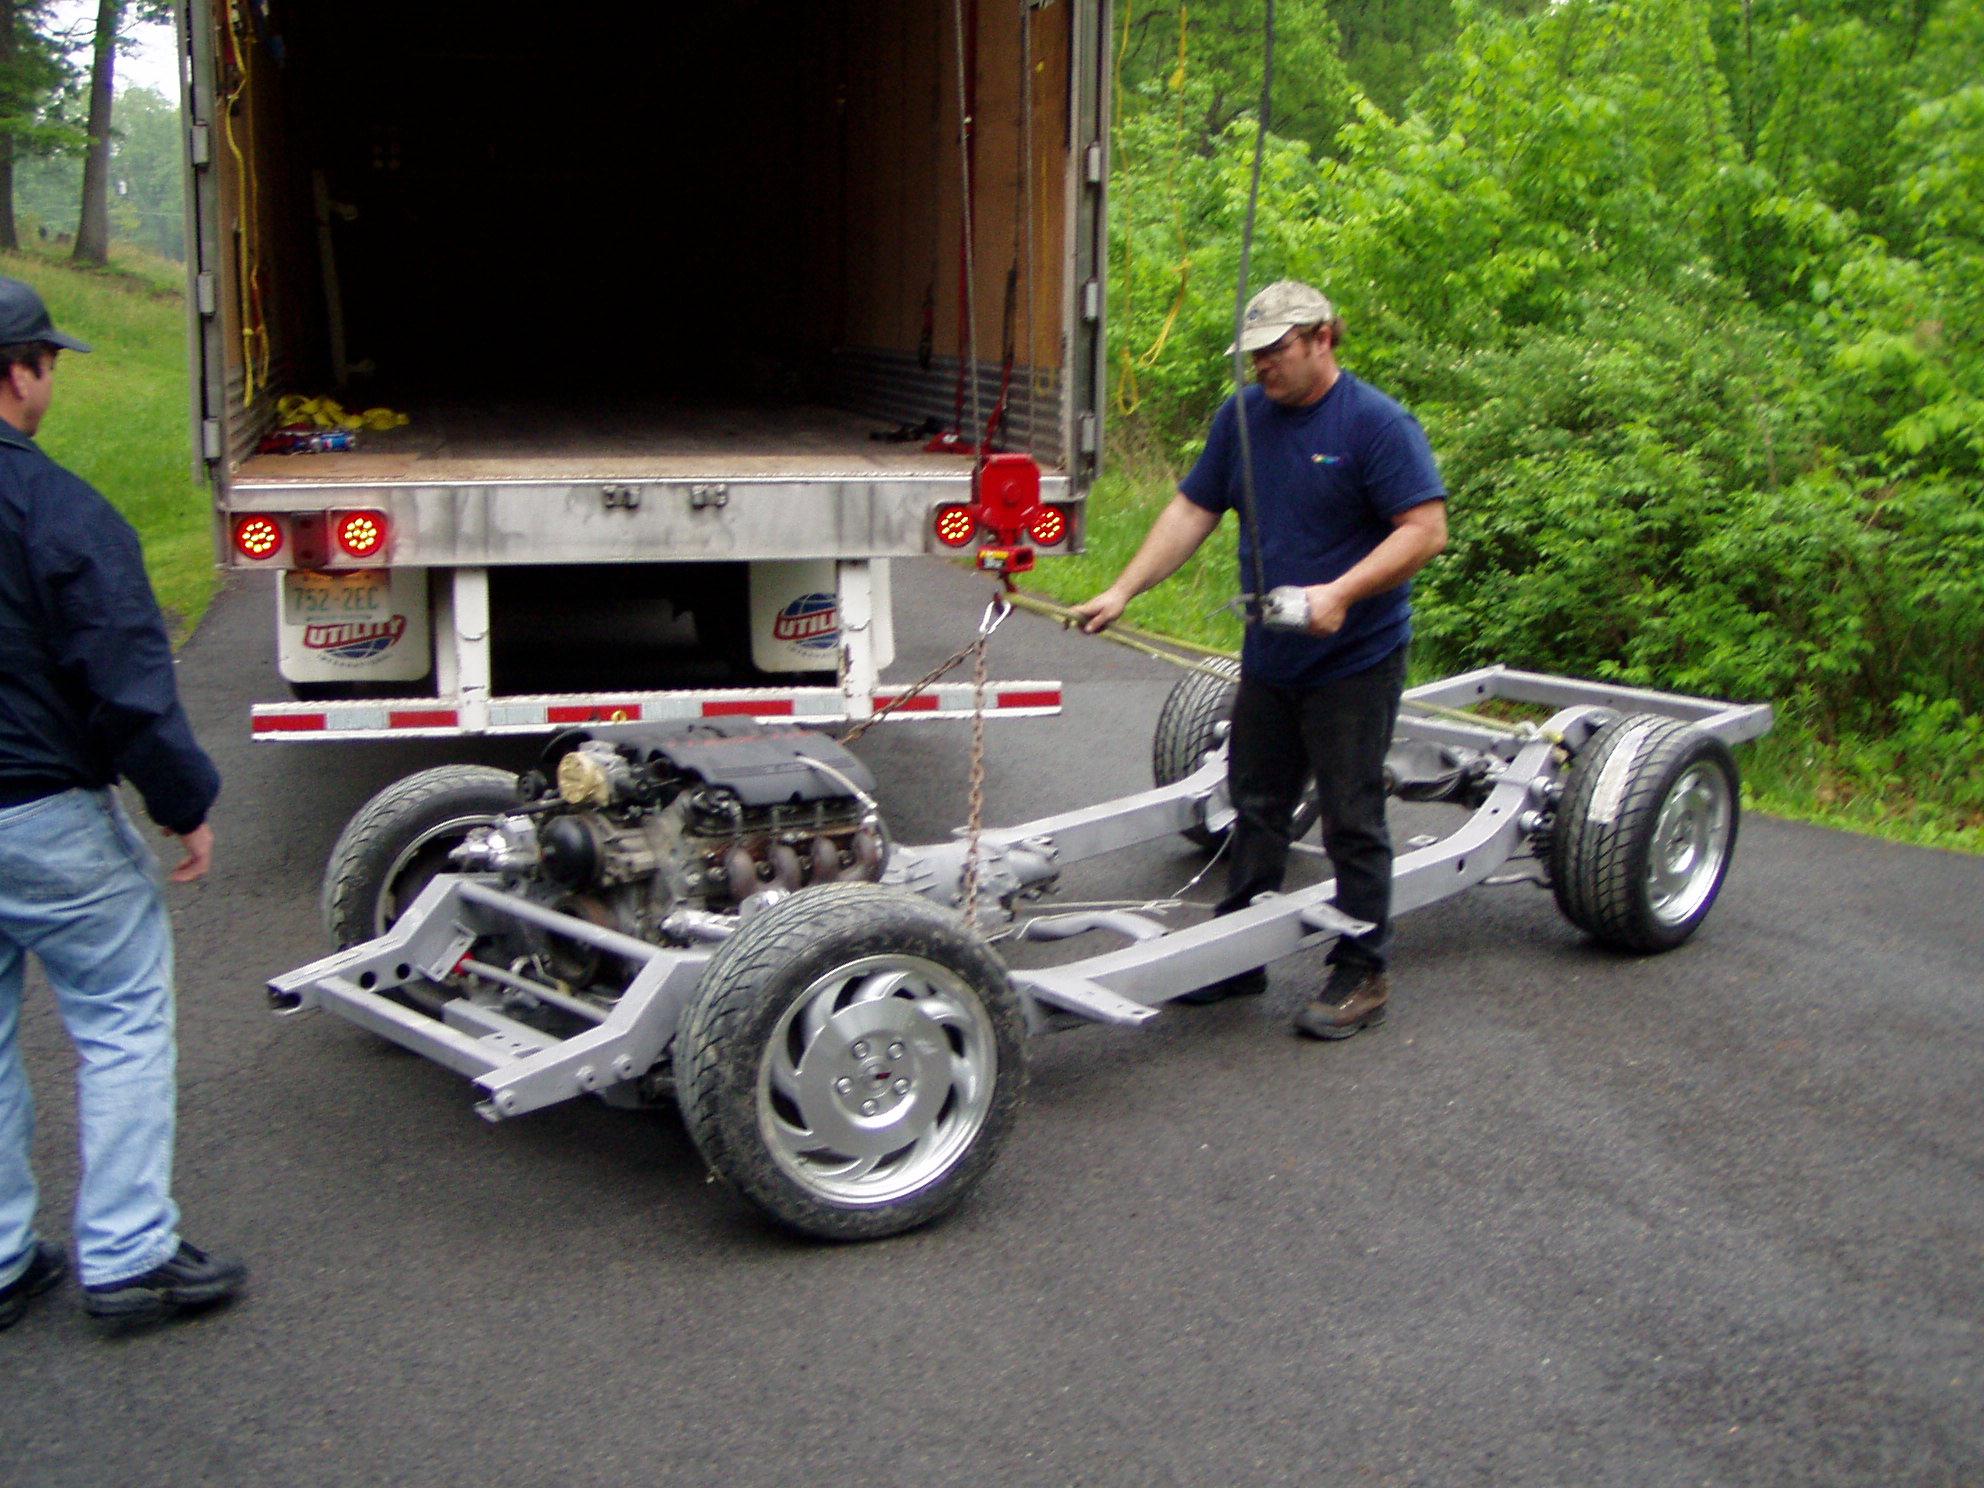
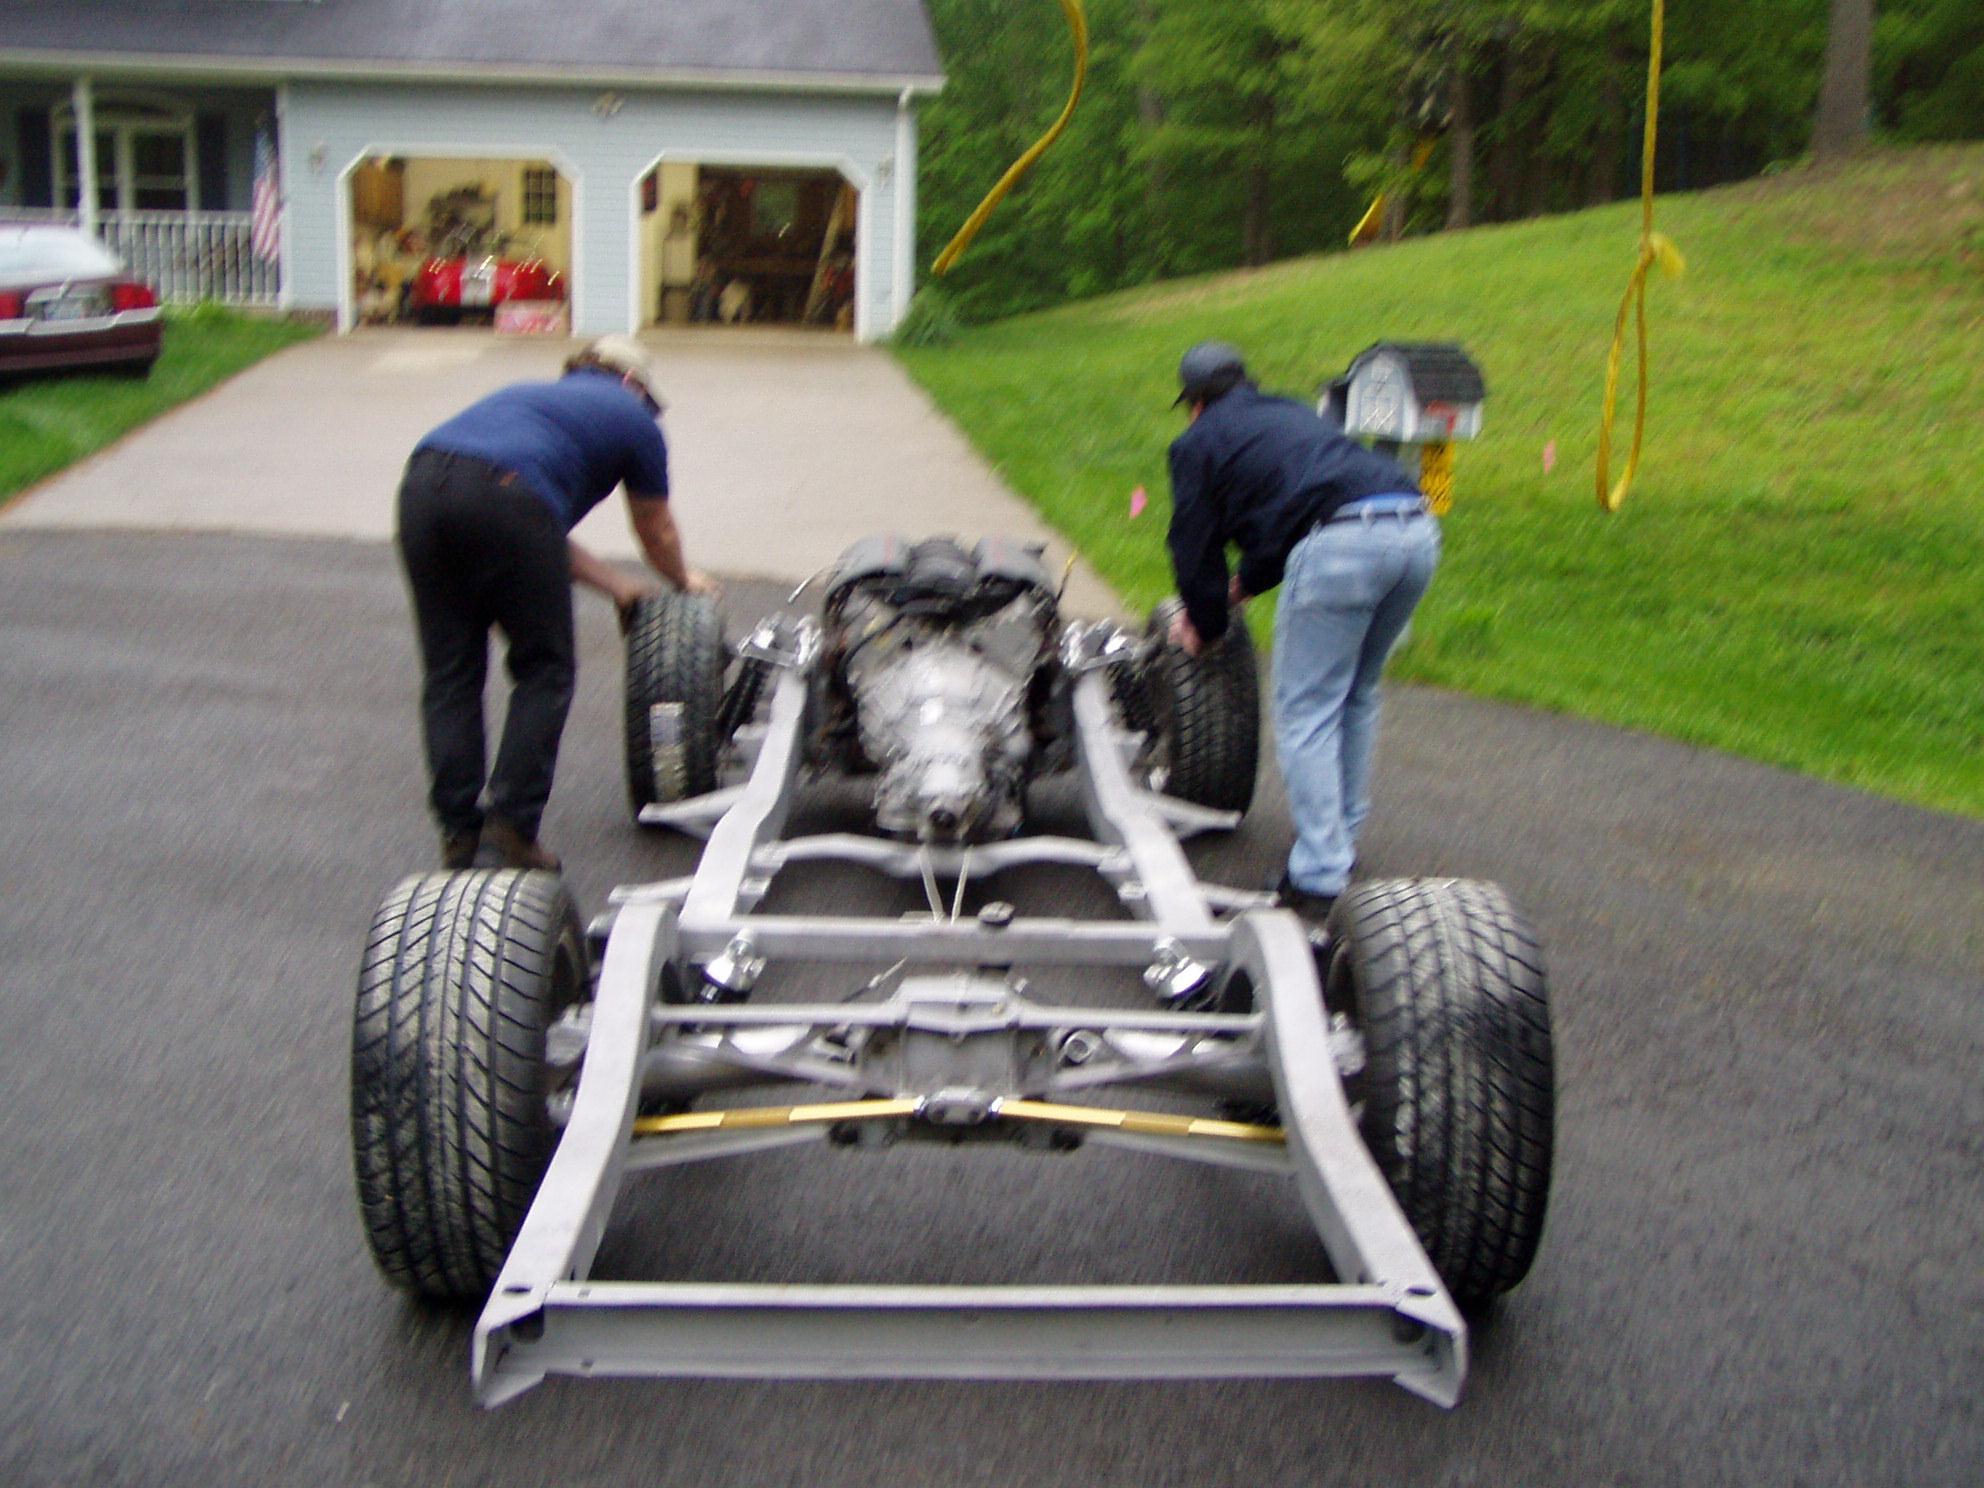
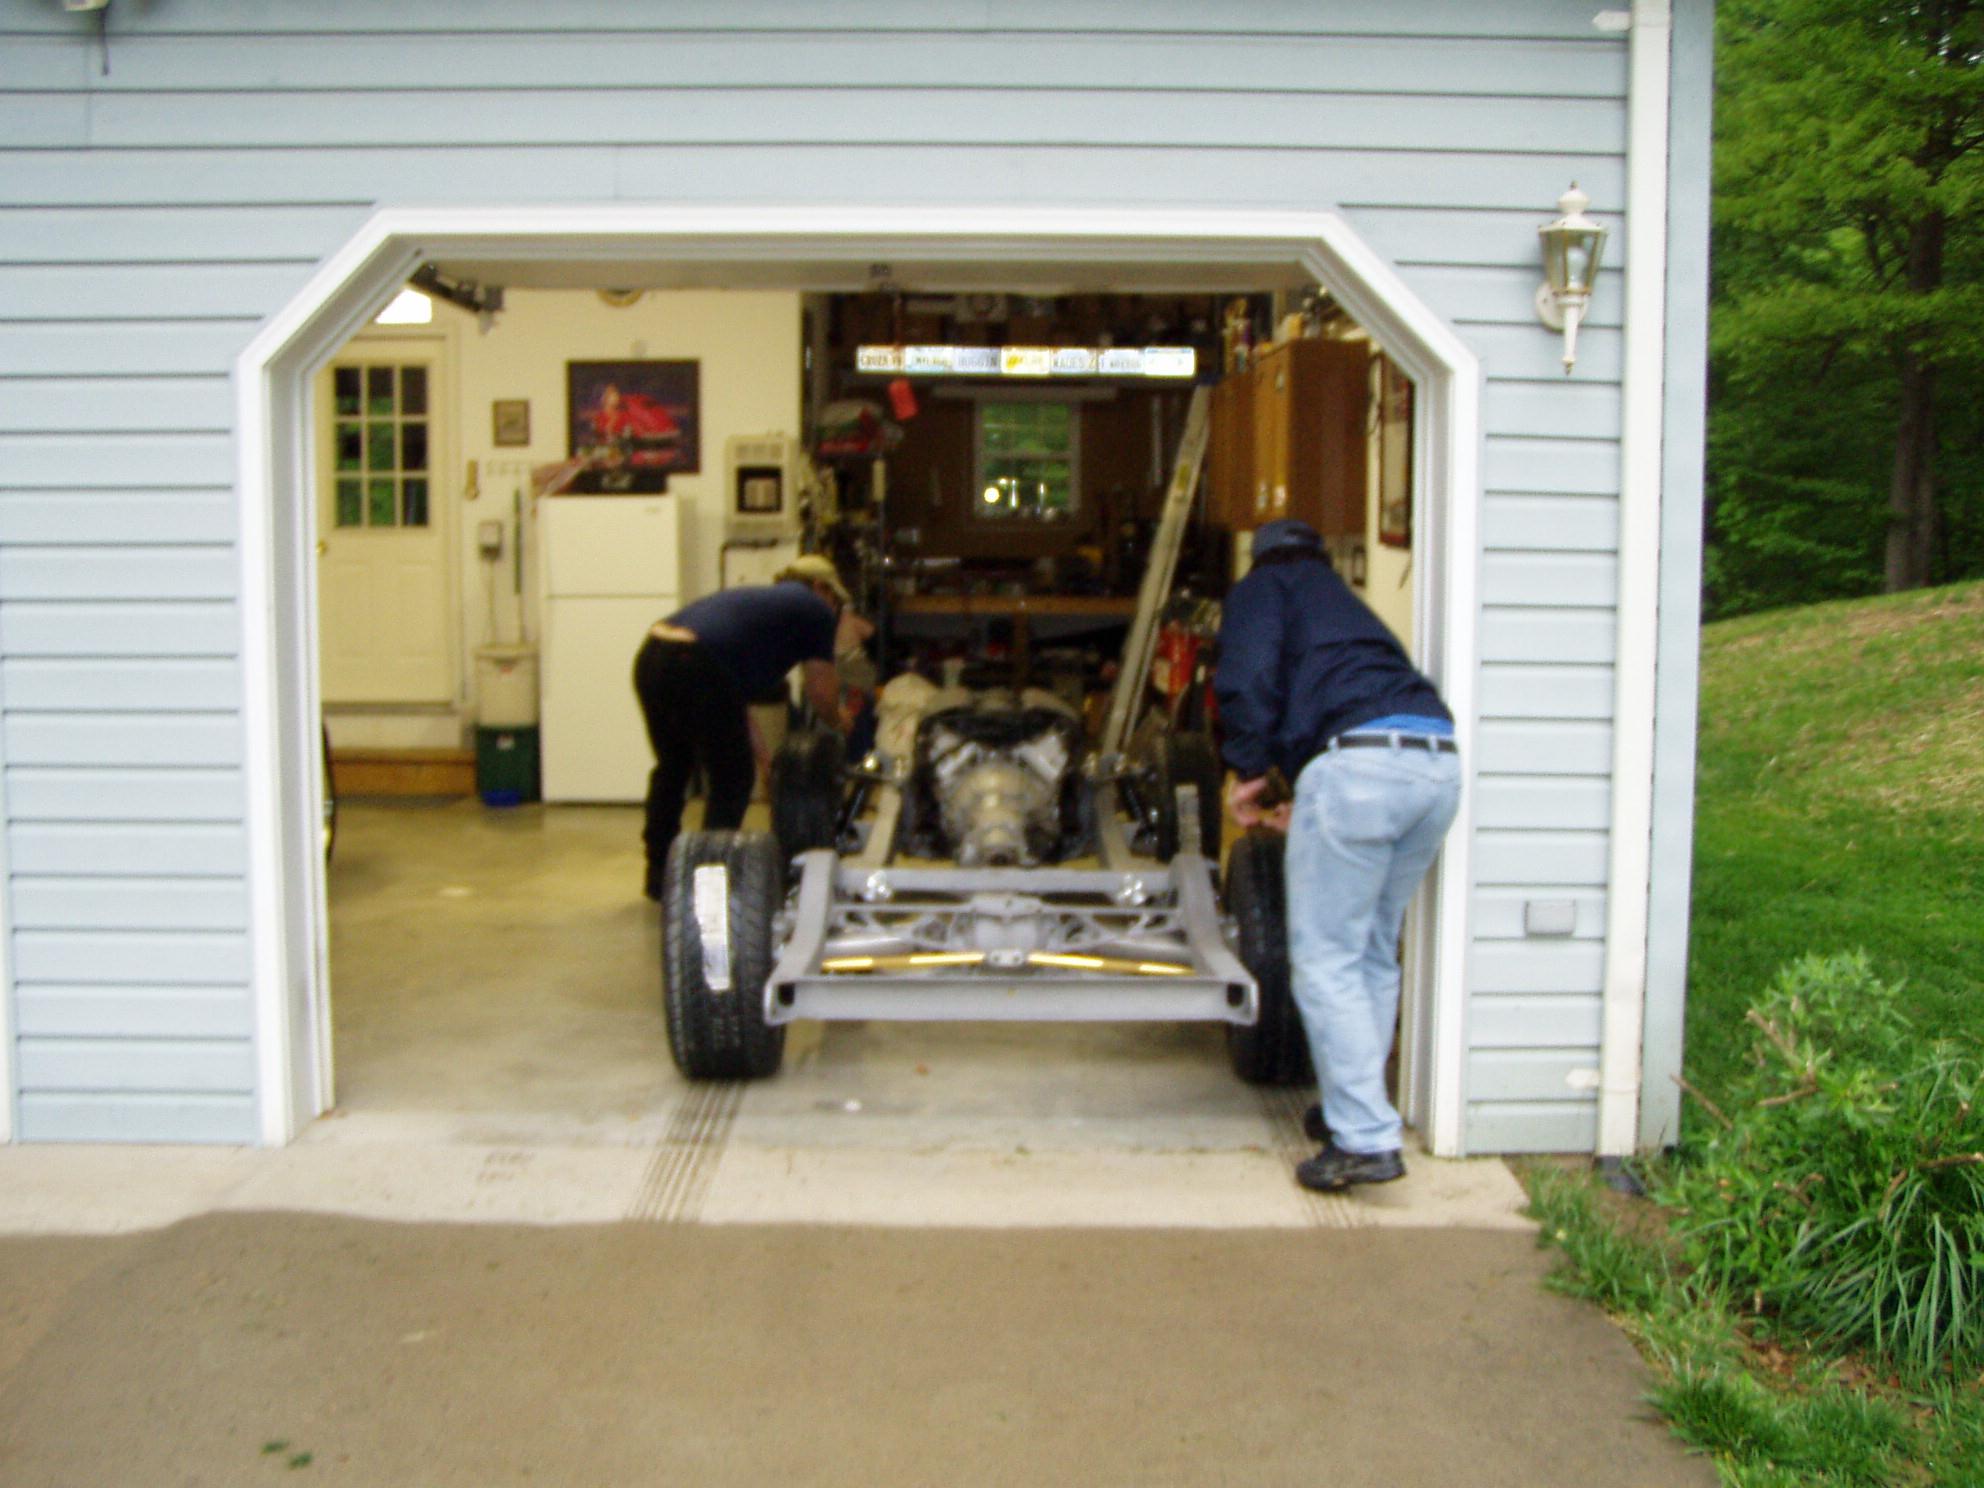
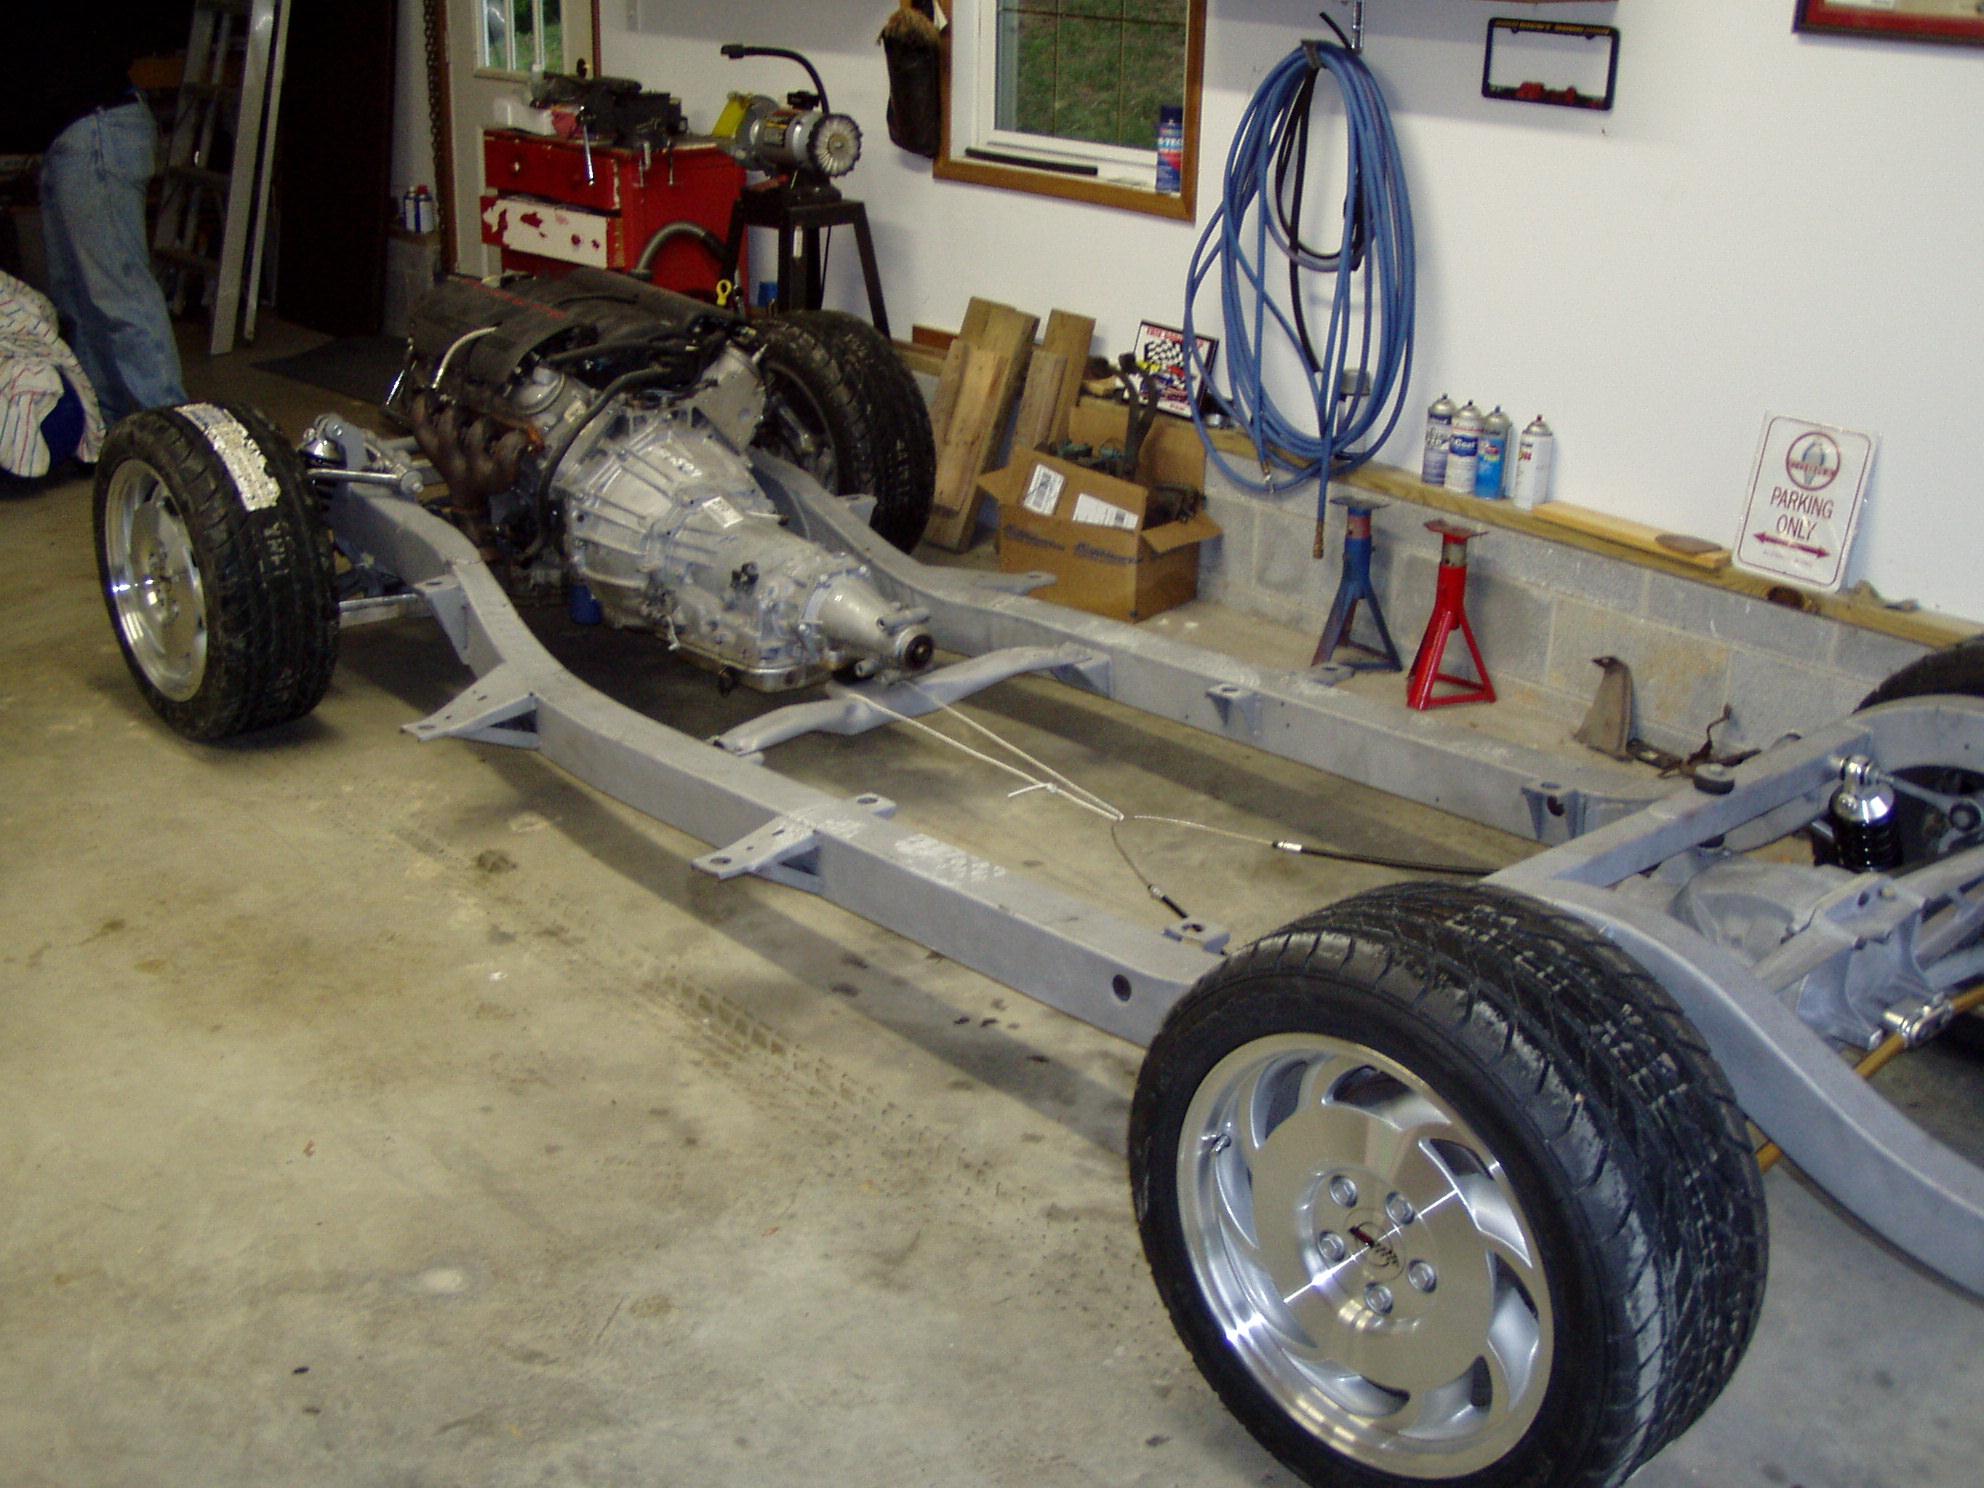
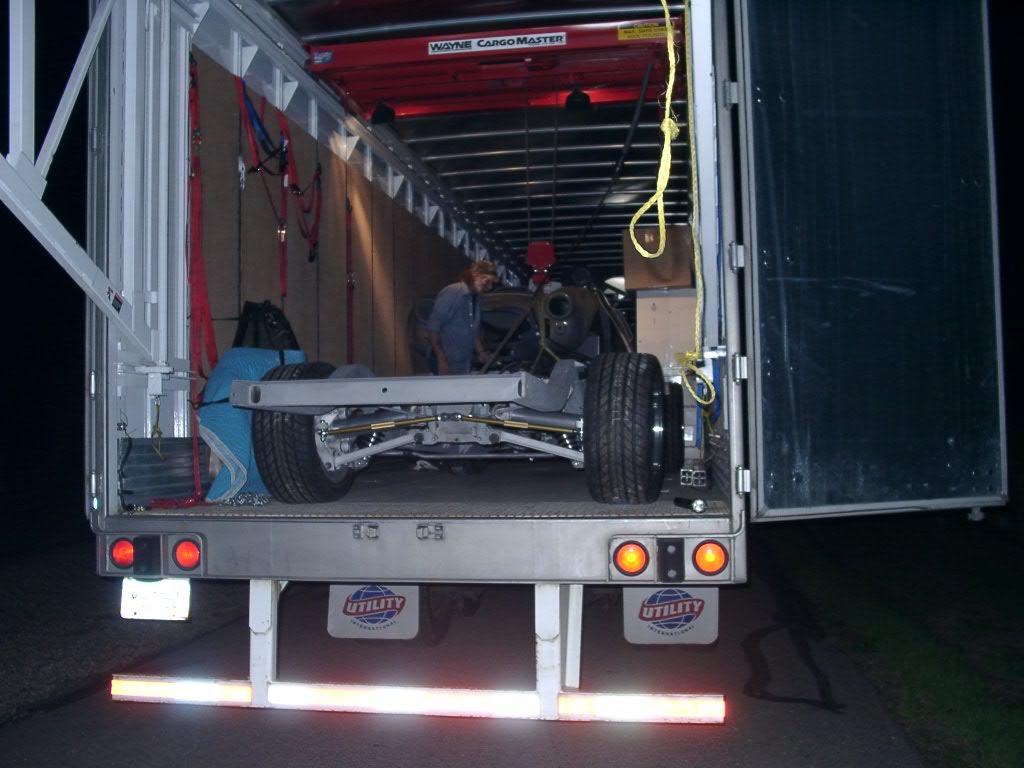
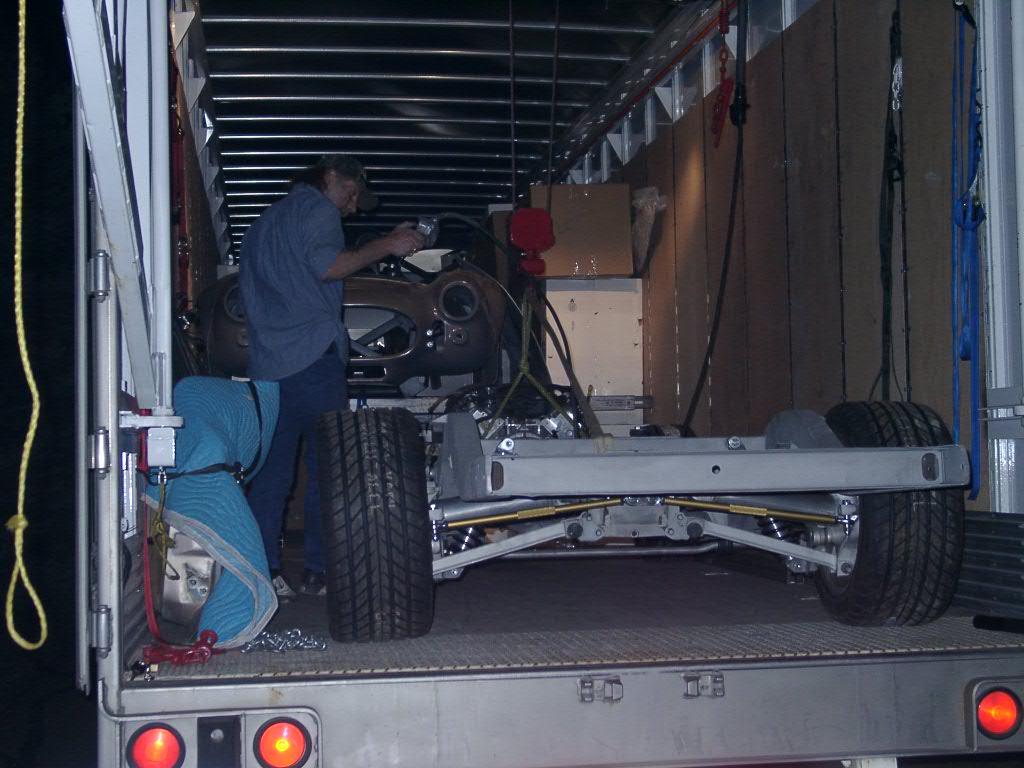
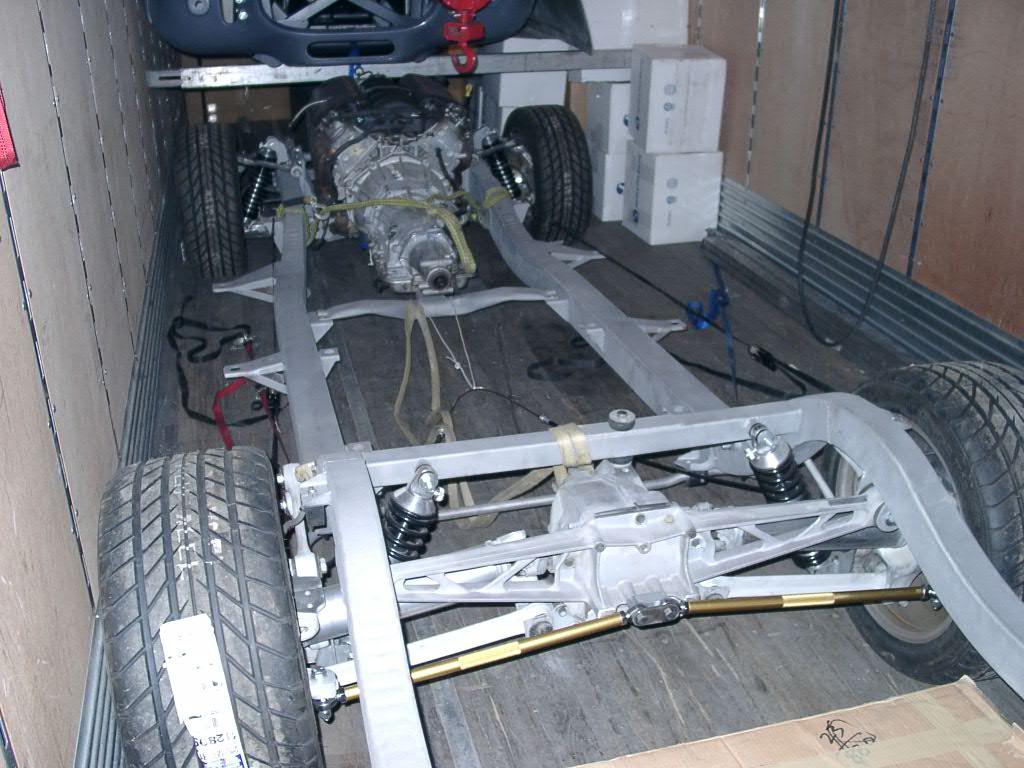
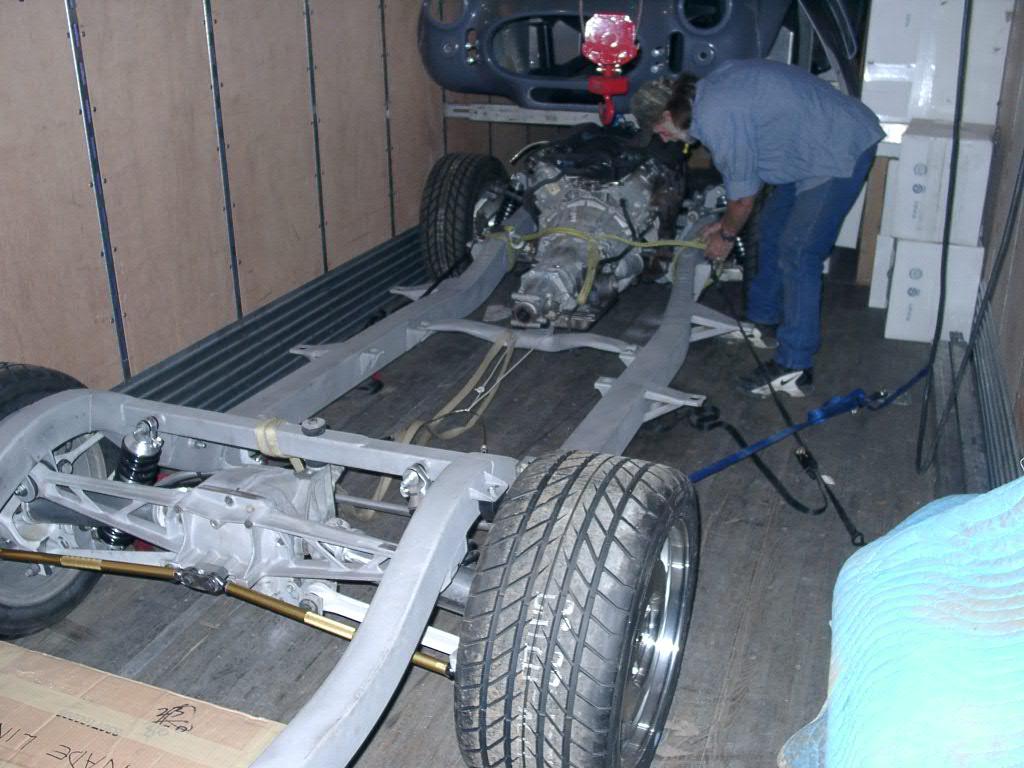
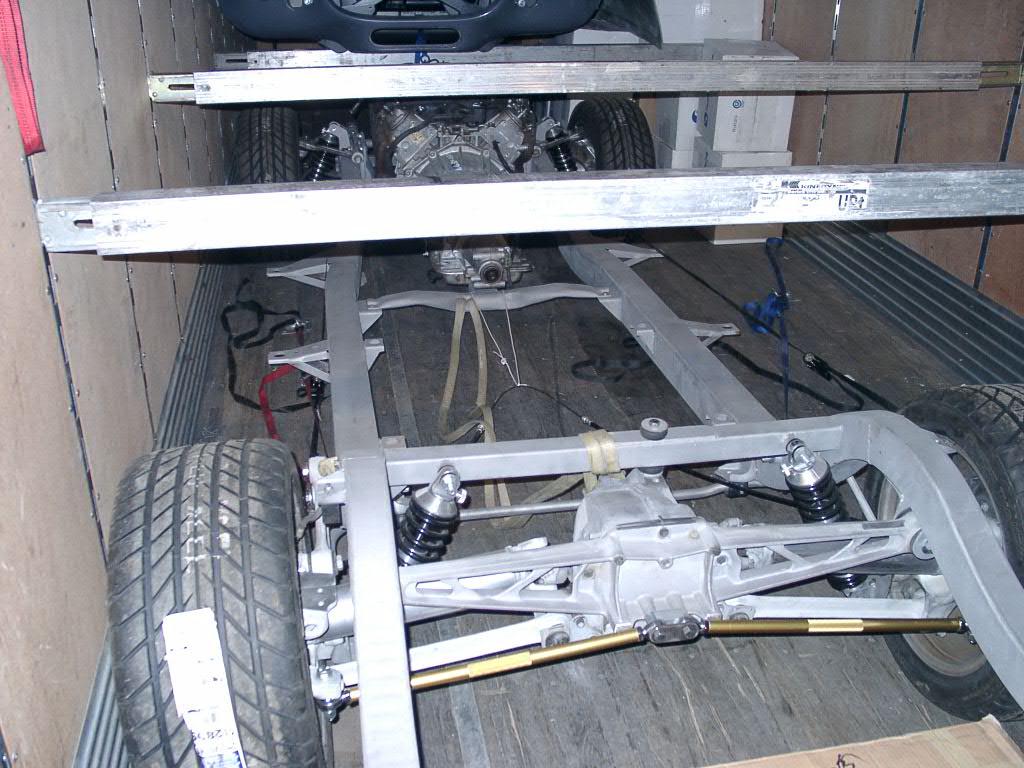
| Chassis Arrives in West Virginia |
| May 9, 2003, Stewart Transport truck squeezes into my housing development's narrow streets to drop off the chassis. |

 |
 |
| Chassis Heads East! |
| April 27, 2003 at 3:00 a.m., Laszlo loaded the frame onto Collin Stewart's truck and said goodbye to his winter project. After dropping off a few more Factory Five Racing Cobra kits out west, the truck will head back east towards West Virginia. |
 |
| Reassemble - Rear Details |
| Brake line tabs are in place and rear toe adjuster is almost finished. Laszlo still has to design and install brackets for the parking brake cables. It will then be ready for shipment to West Virginia! |
 |
 |
| Reassemble - Front Details |
| Here are some pictures of the frame as Laszlo reassembled it and installed the aluminum half-shafts. Just a few more brackets for brake lines and parking brake cables need to be attached. |
 |
 |
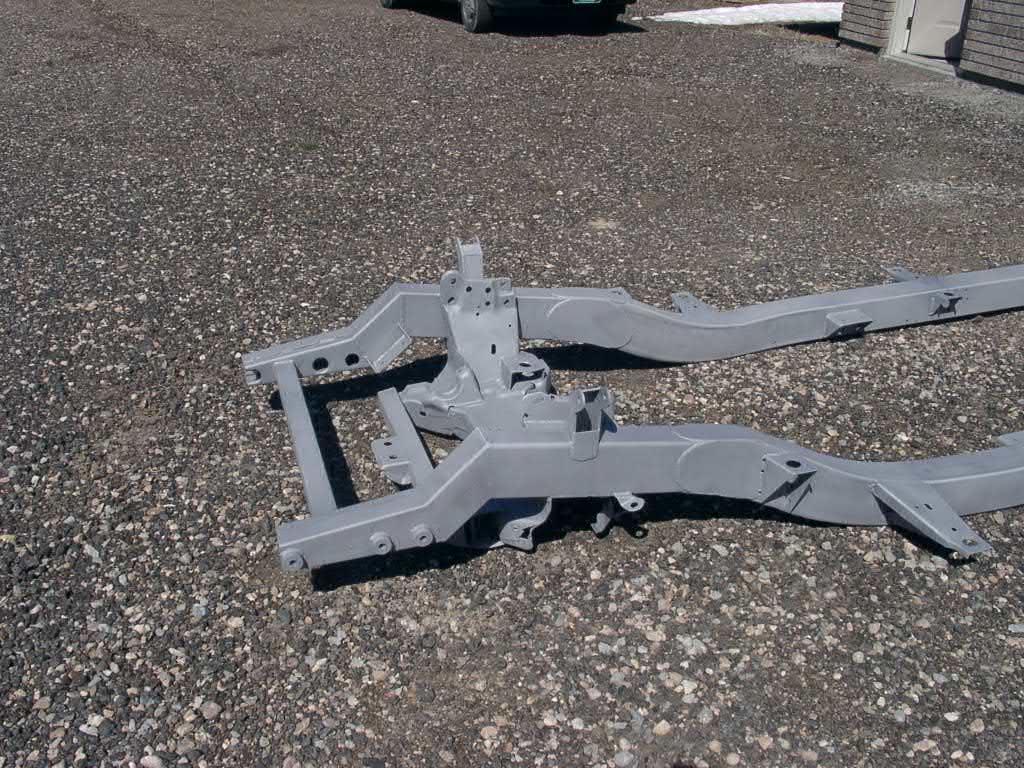
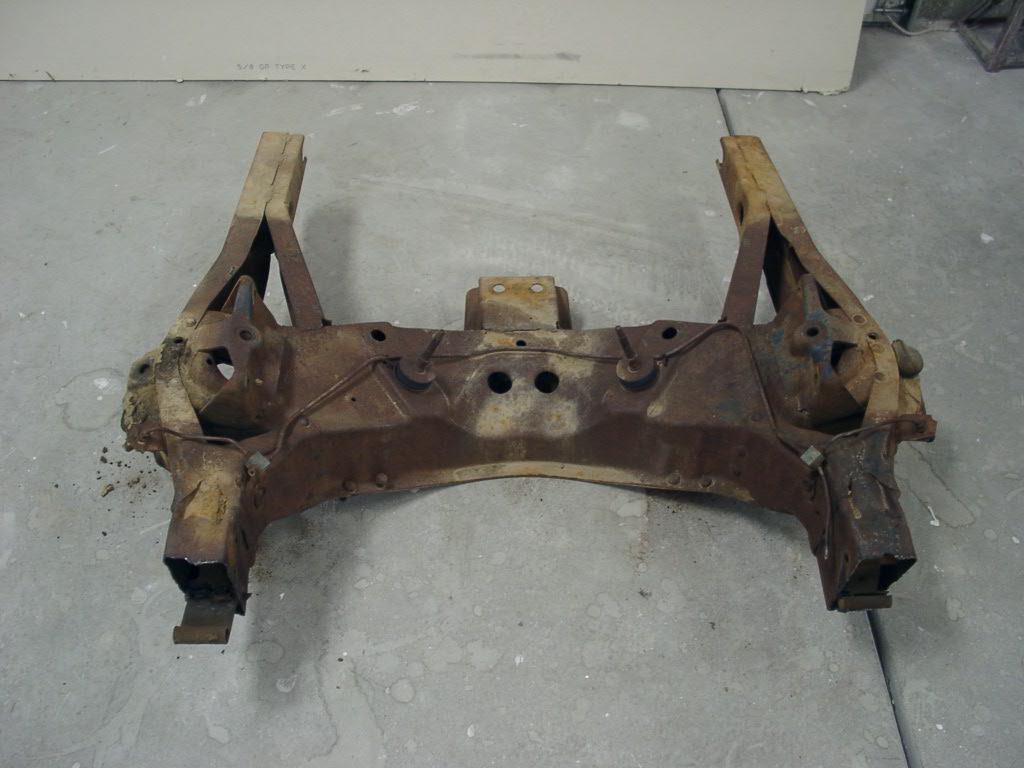
| Sandblast & Clean-up |
| Laszlo rented a commercial sandblaster and cleaned up the frame, brackets, and other associated parts. I think it looks great with all the rust eliminated. |
 |
 |
|
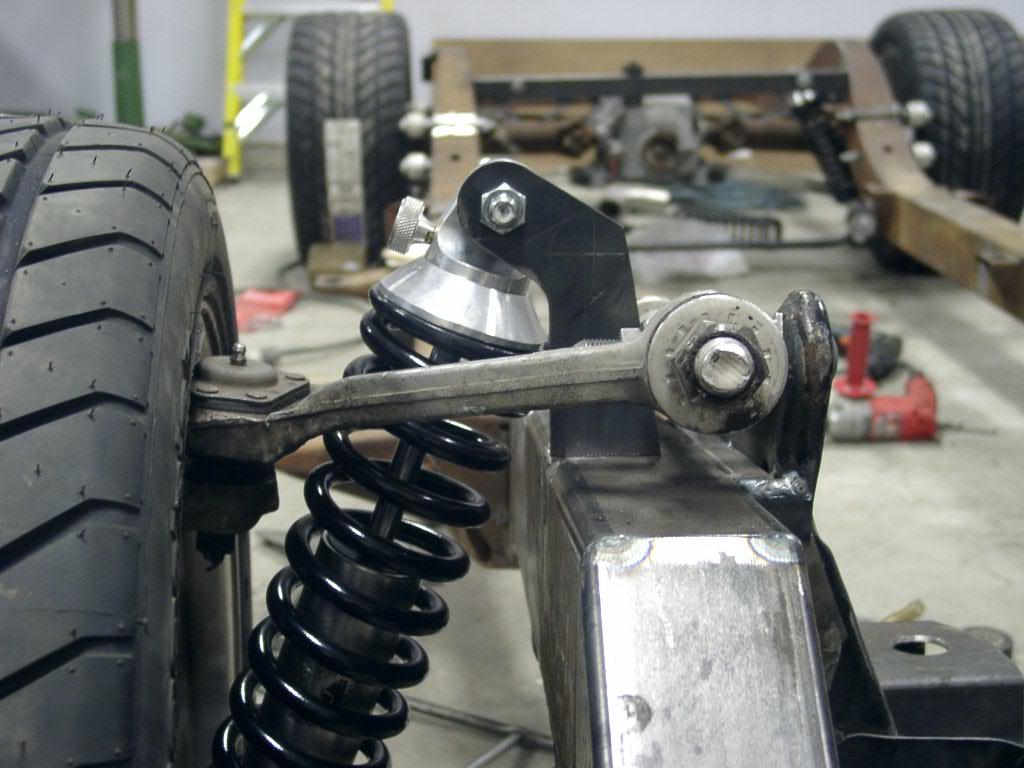
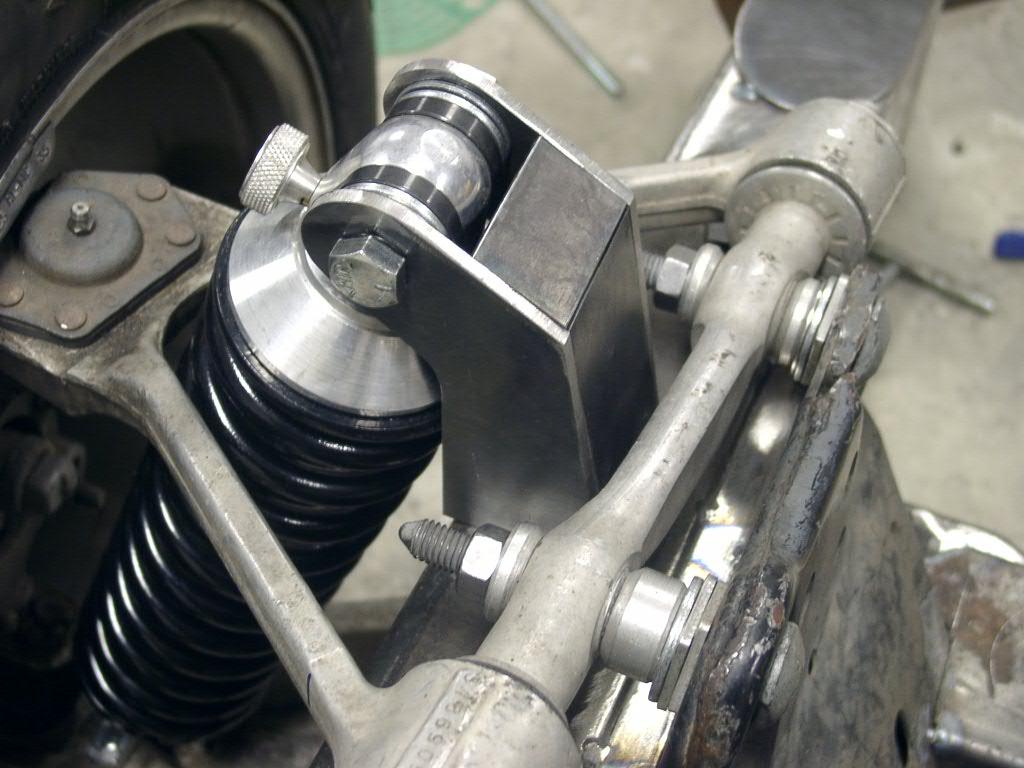
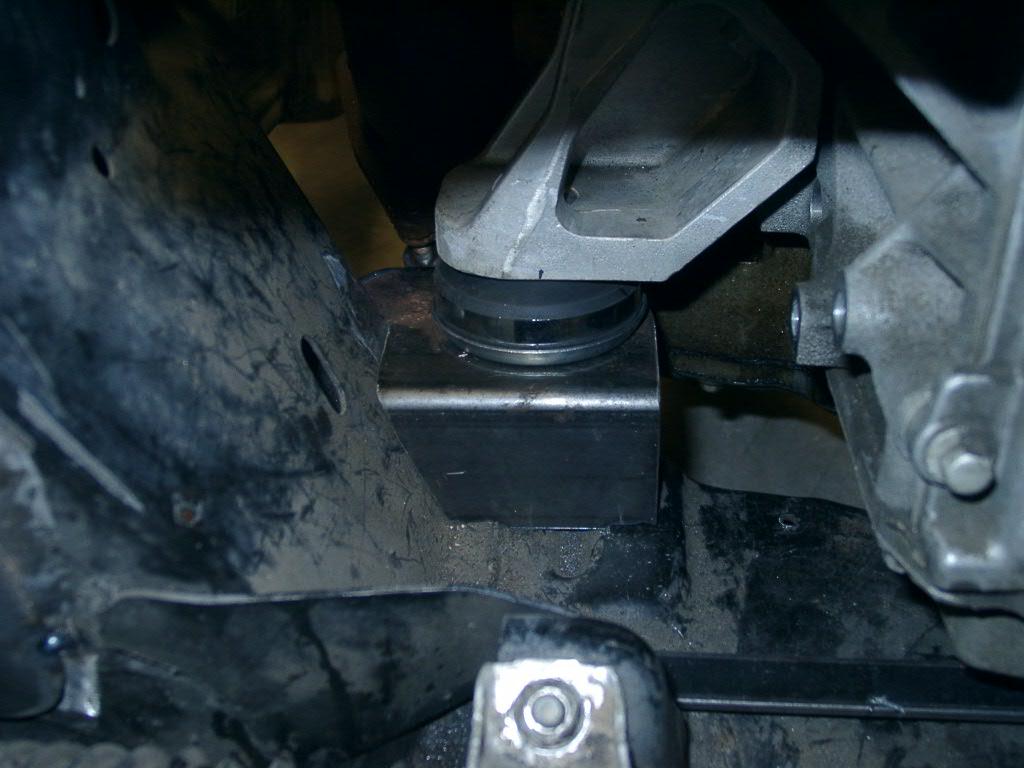
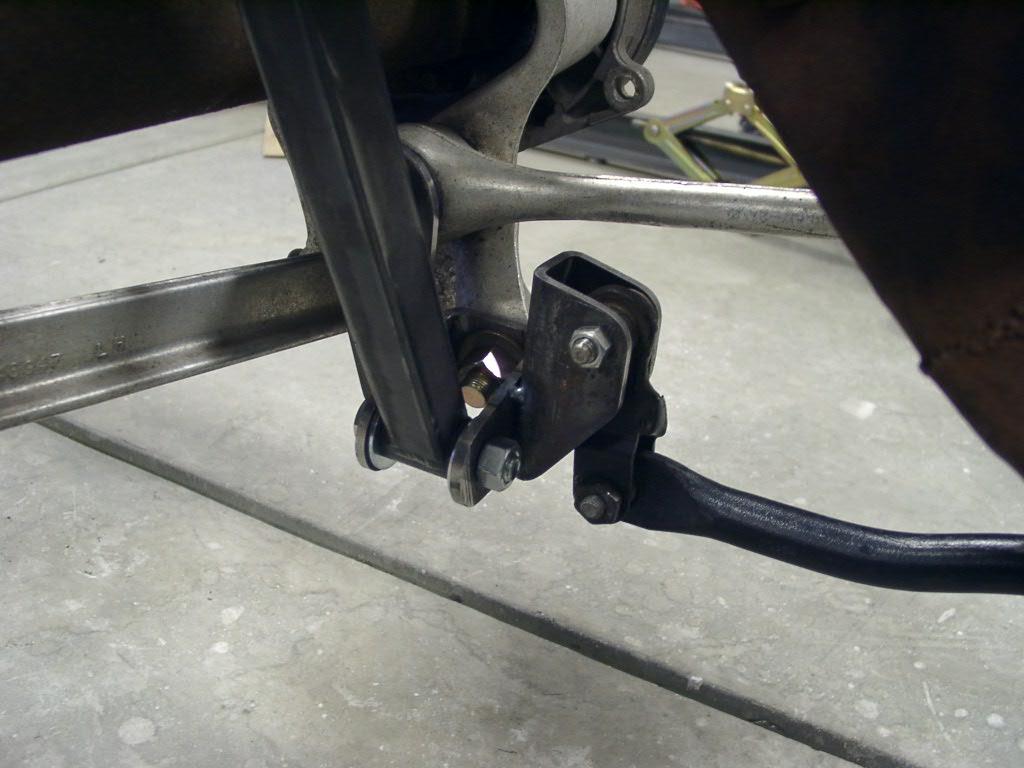
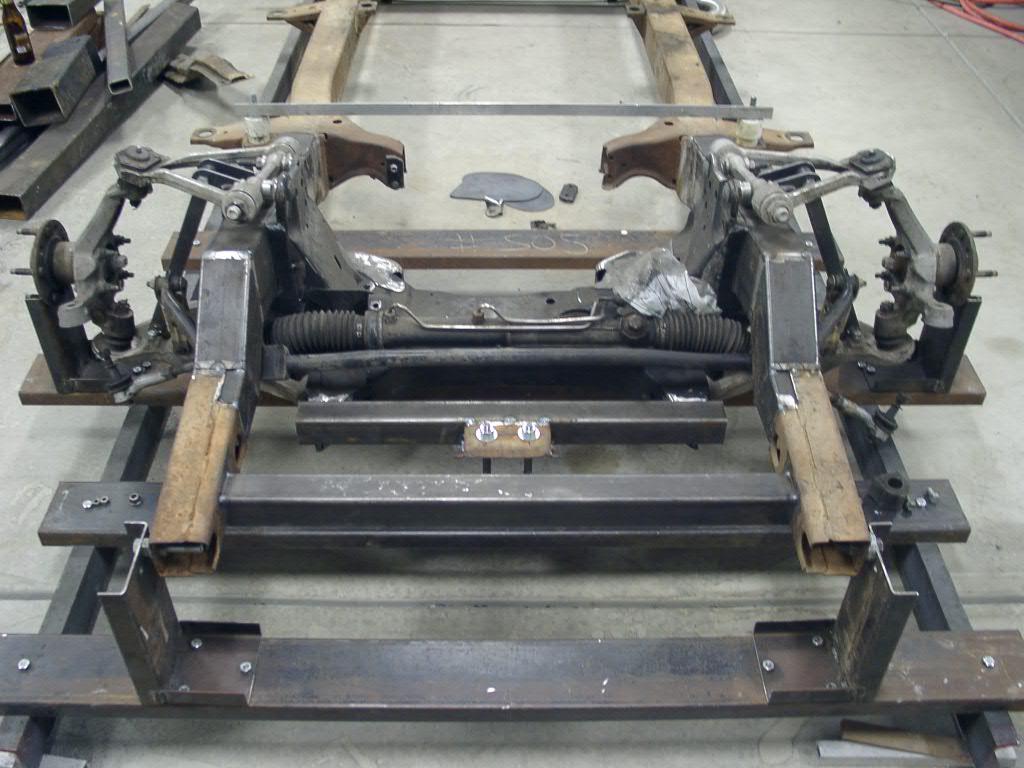
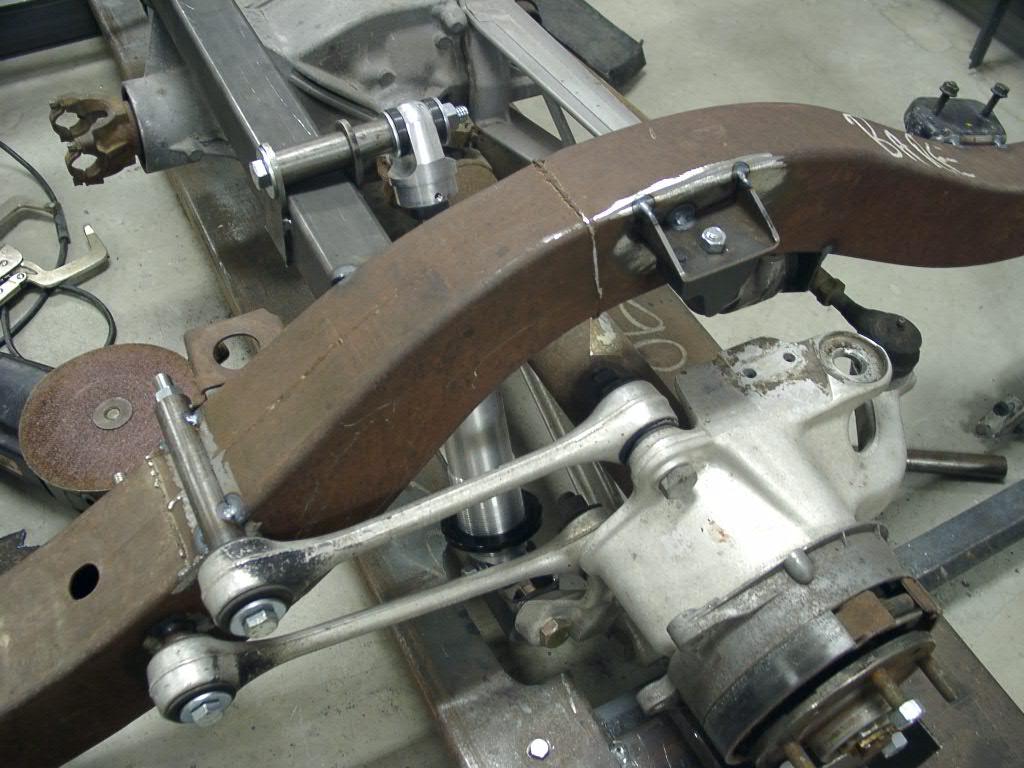
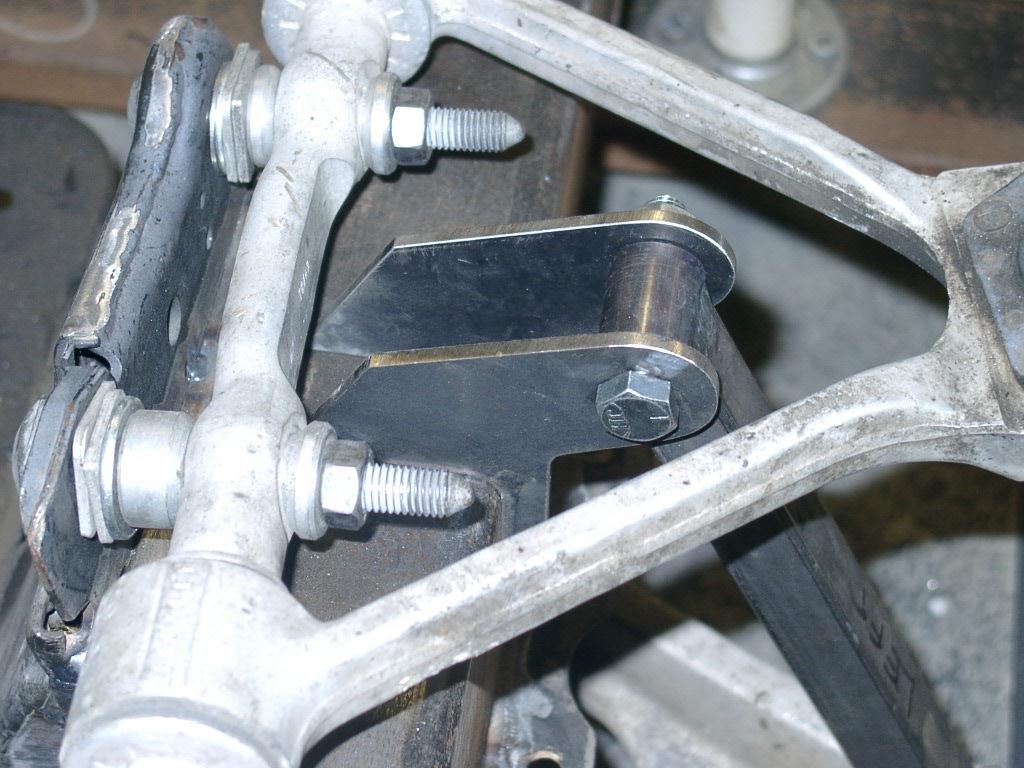
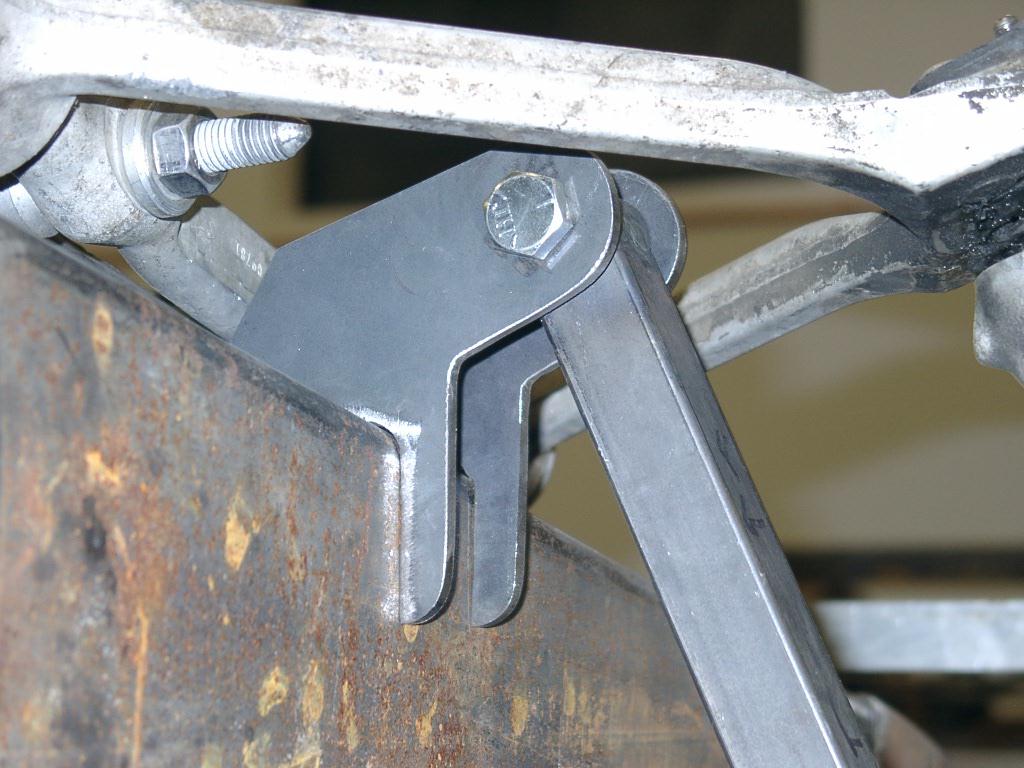
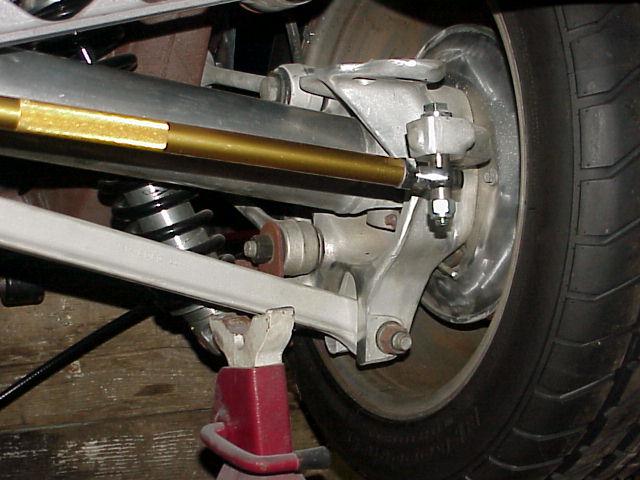
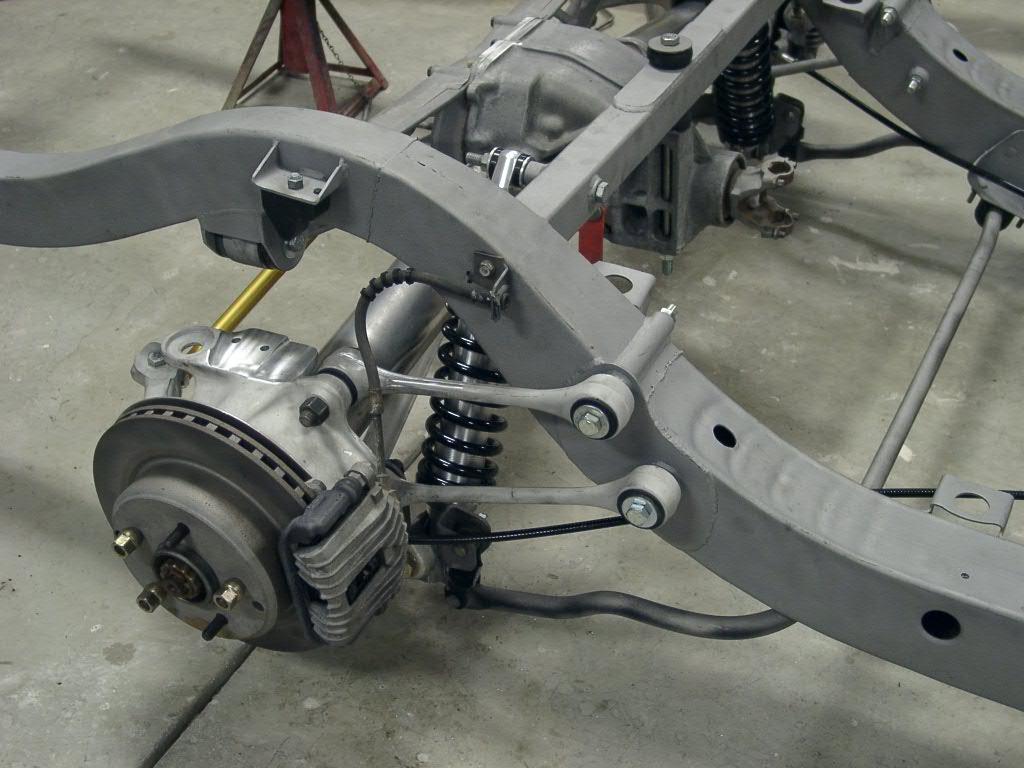
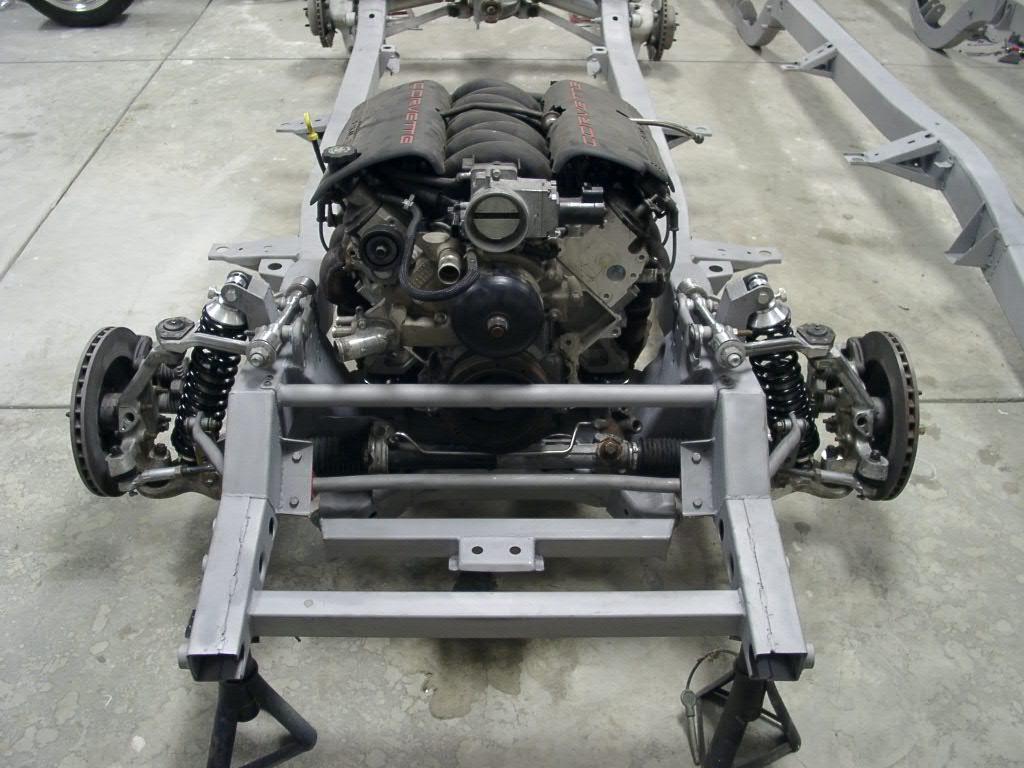
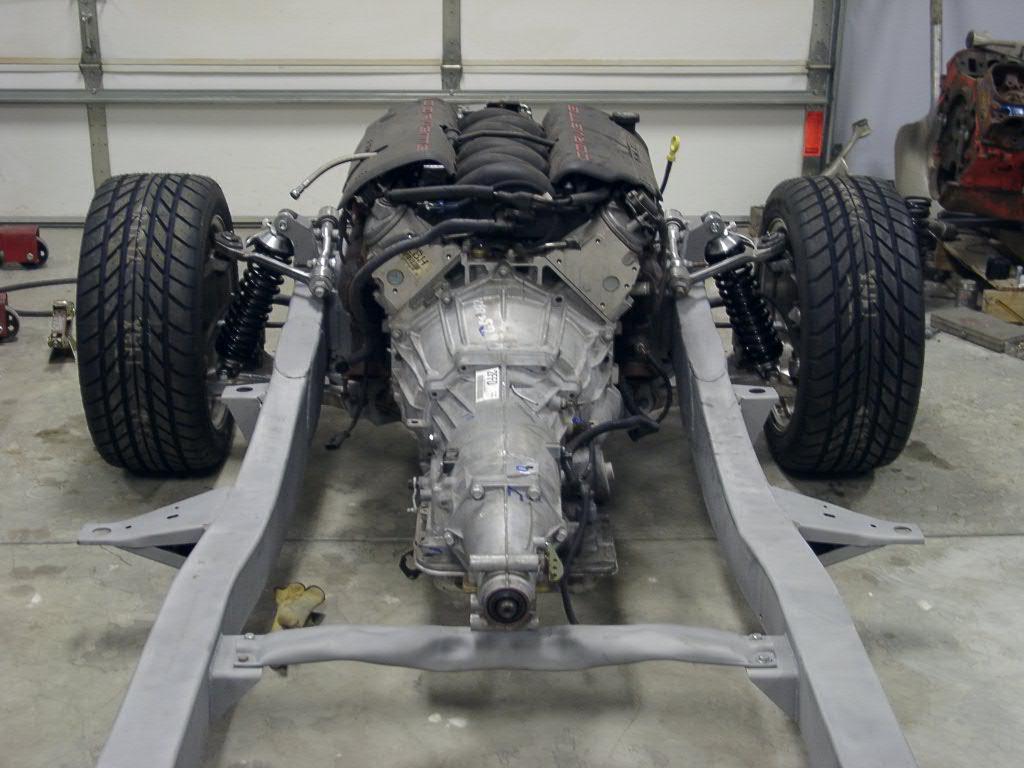
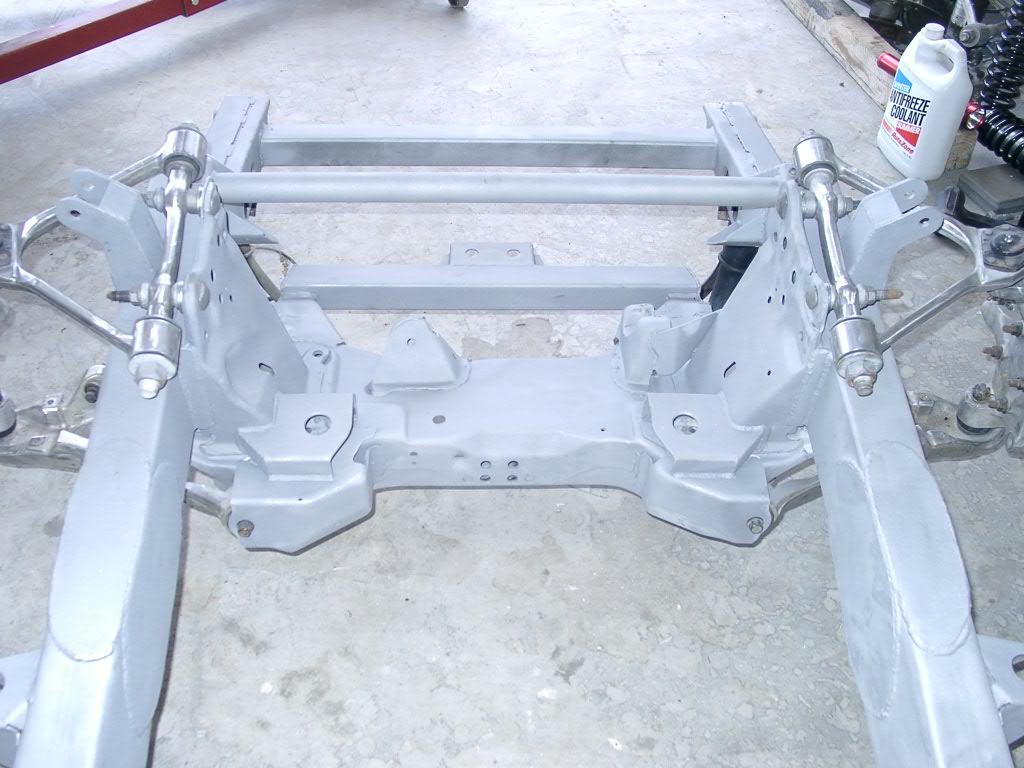
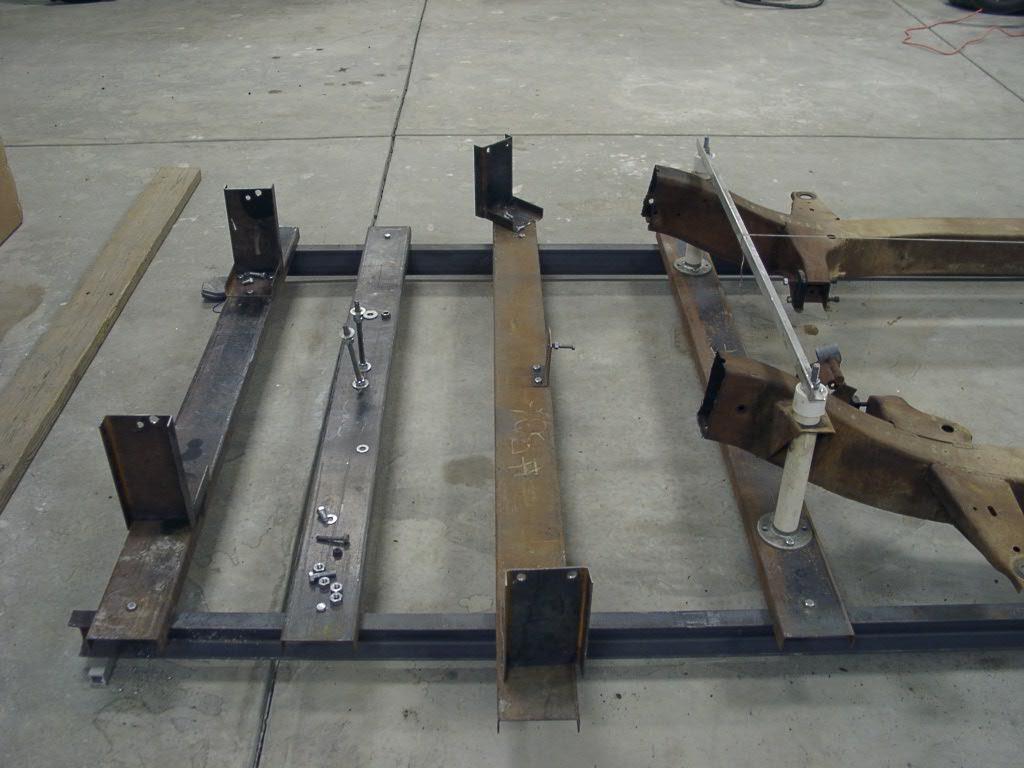
Front Shock Mounts |
|
After many hours of analysis and calculations that are way over my head, Laszlo concluded that the Aldan AS654s are not the best way to go for the front coilovers. In fact the AS658s appear to be a good choice for all four corners, so Laszlo fabricated new brackets to use the AS658s on the front. |
|
|
|
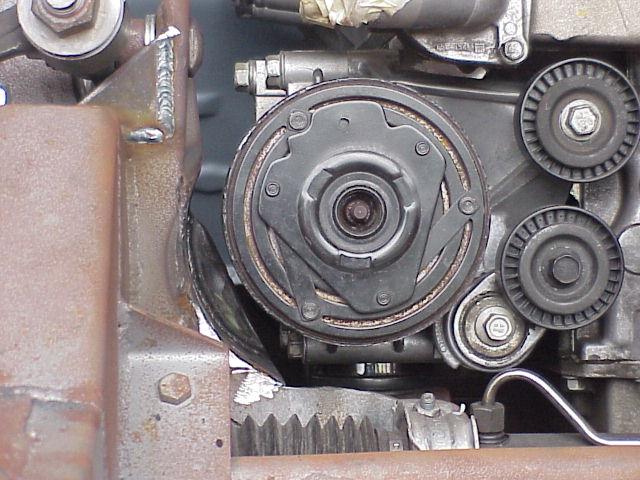
Engine Mounts |
|
Laszlo fabricated and attached pads to the frame. Looks "factory" original to me! The brackets on the engine are stock Vette, the rubber biscuits are from Street & Performance, and the pads on the frame are custom made by Laszlo. |
|
|
|
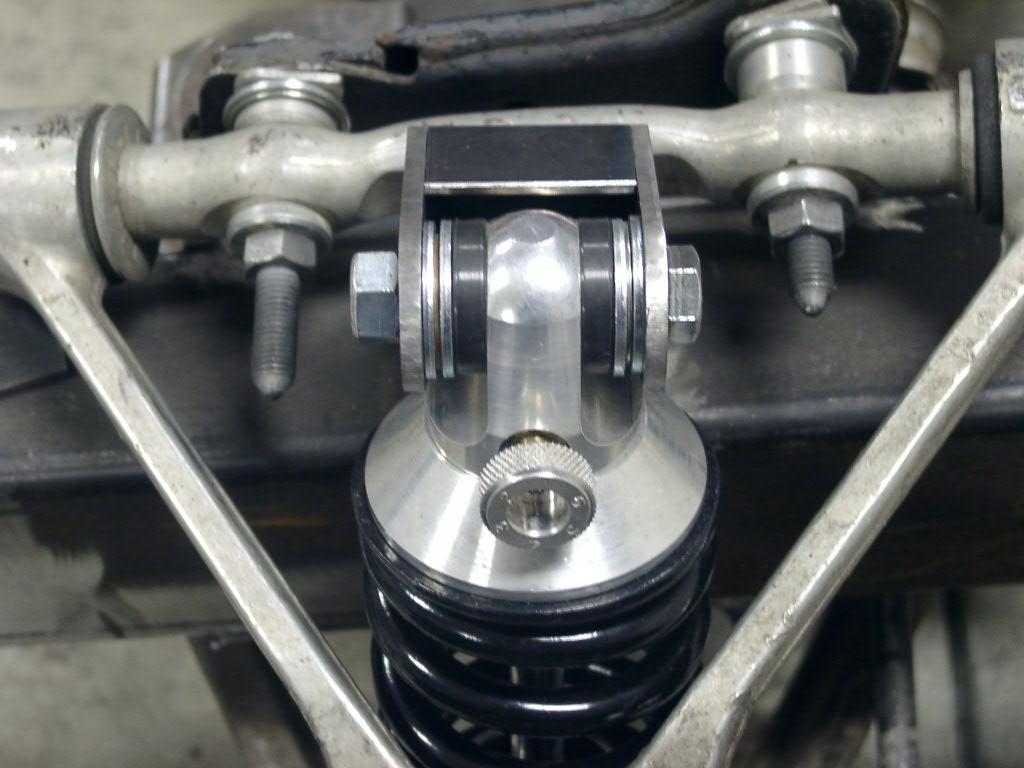
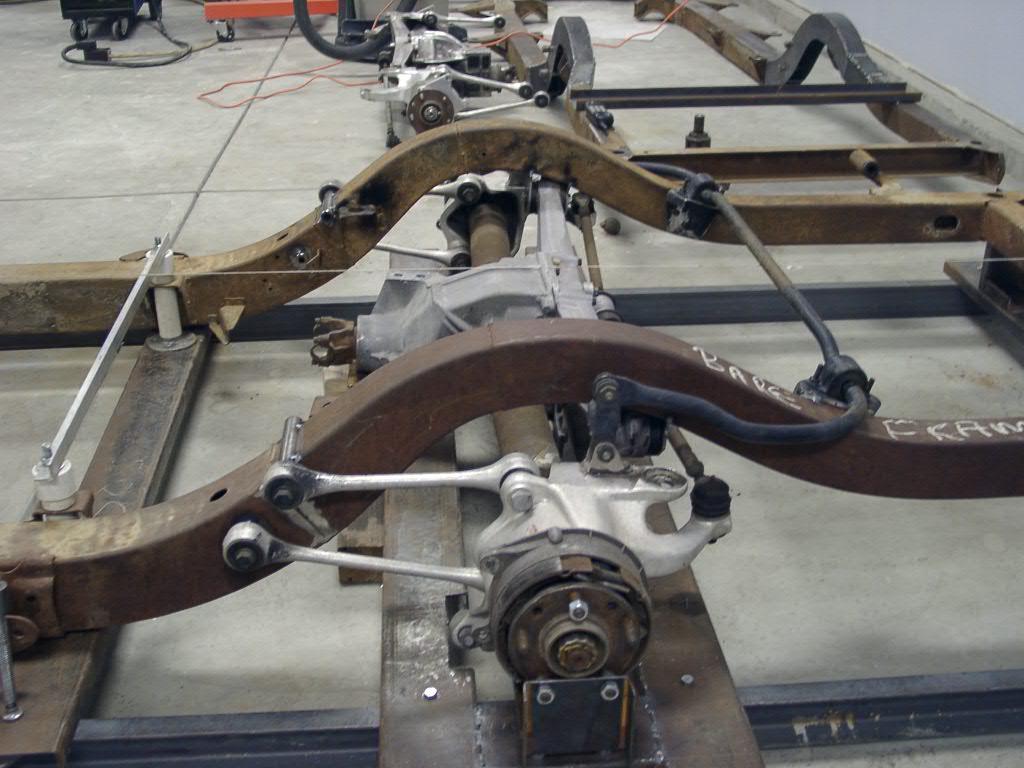
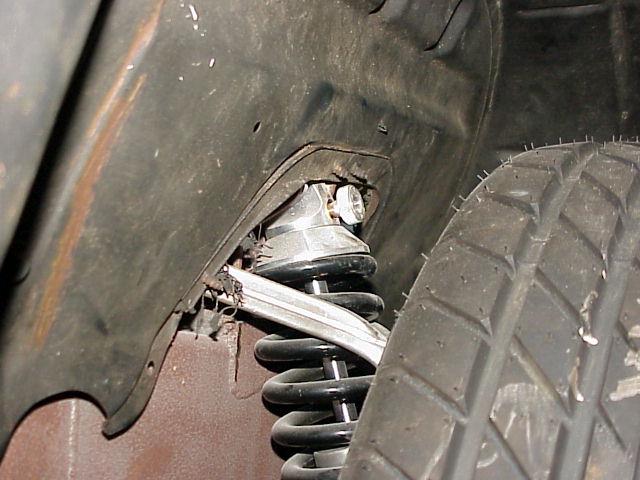
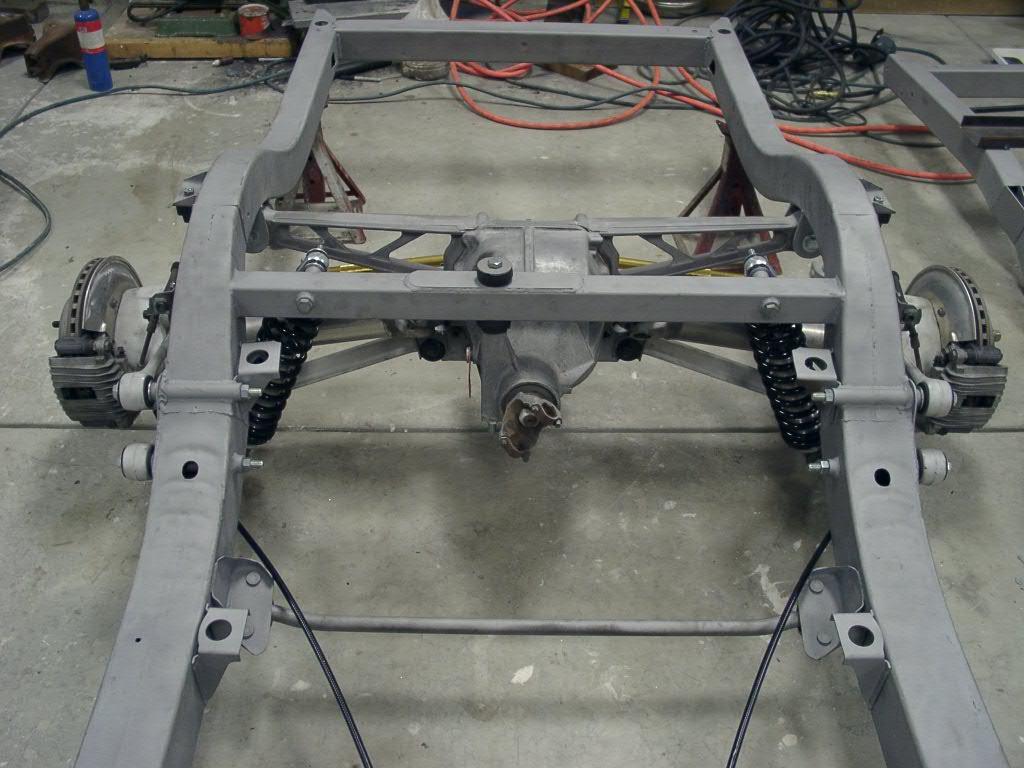
Rear Shocks |
|
Here are some pics of the rear Aldan AS658 coilovers mounted to the rear crossmember. |
|
|
|
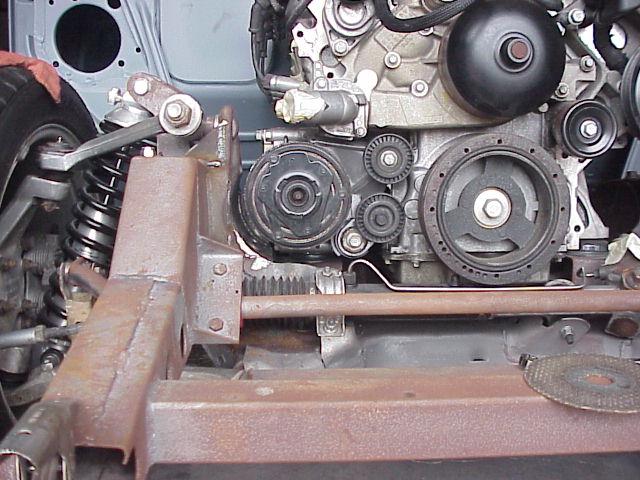
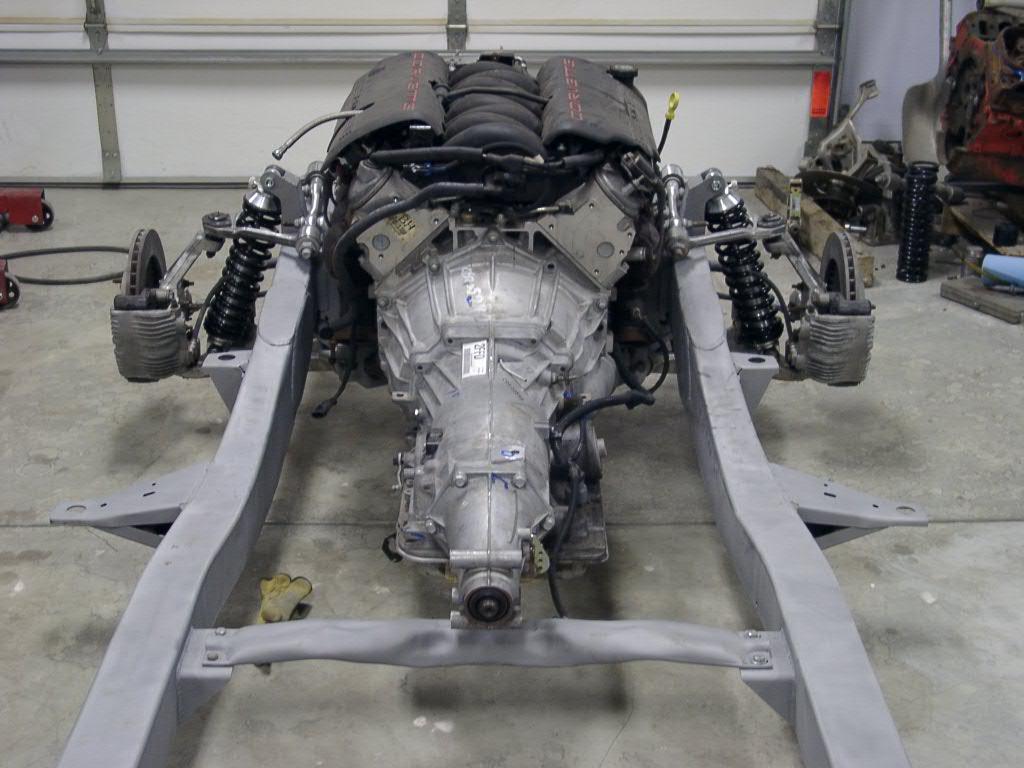
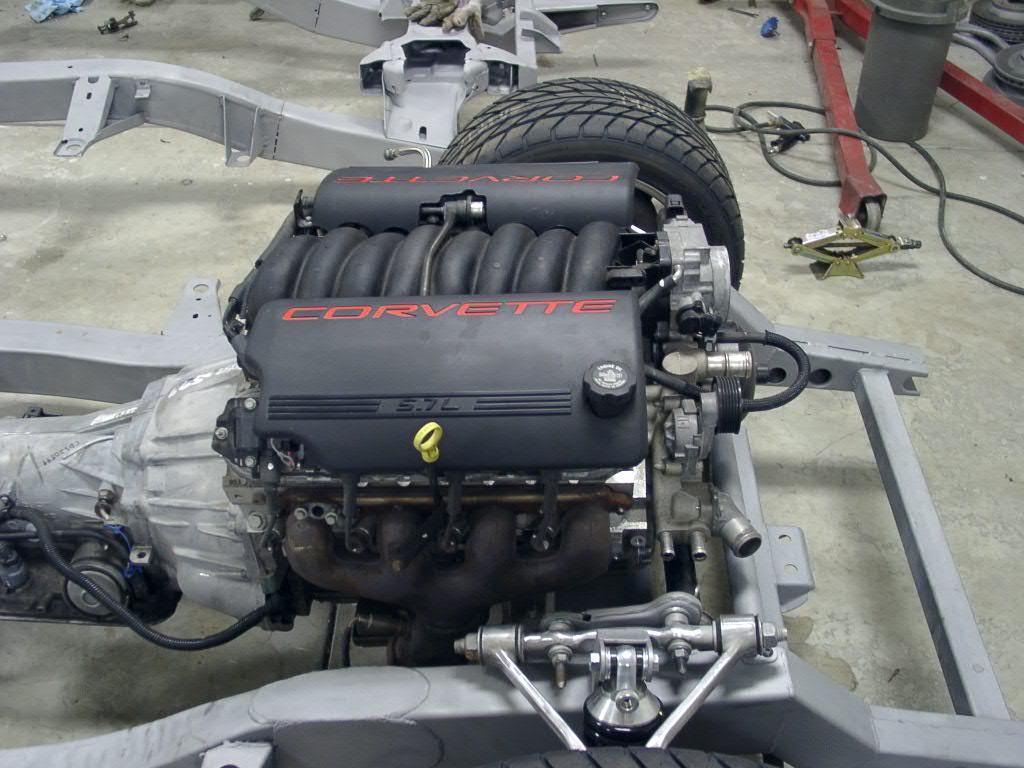
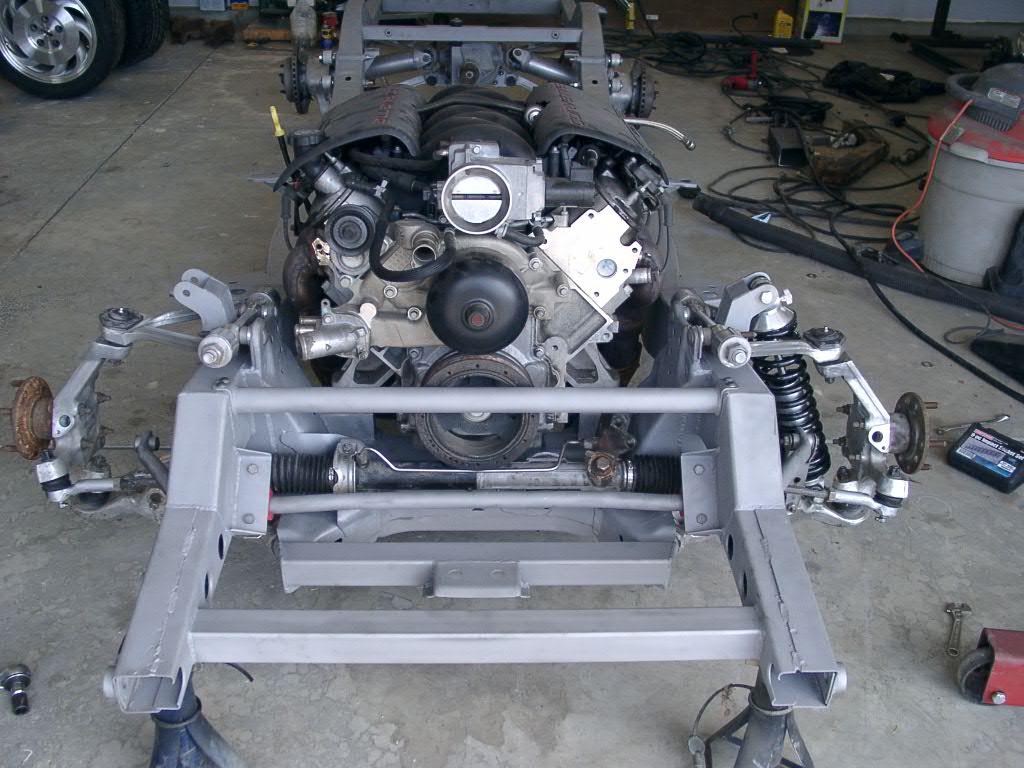
Engine Placement |
|
Laszlo is working hard to determine the best position for the engine. The pic below shows the engine placement about two inches forward of the "stock" location in a '57 Chevy. That puts the lower pulley above the steering rack. We are considering moving it another inch or so forward to allow the front of the engine to be lowered, putting the pulley in front of the rack. I called Street & Performance and ordered their Biscuit Motor Mount Kit for the LS1. This will interface between the stock Corvette engine mounting brackets and the custom pads Laszlo is making for the frame. |
|
|
|
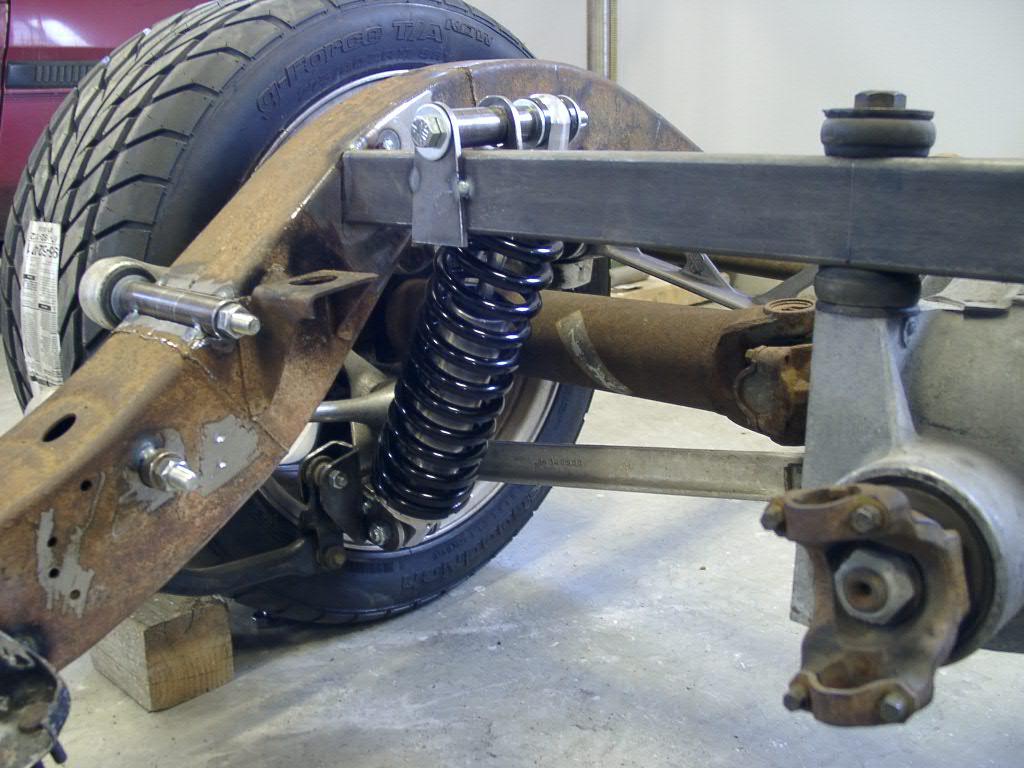
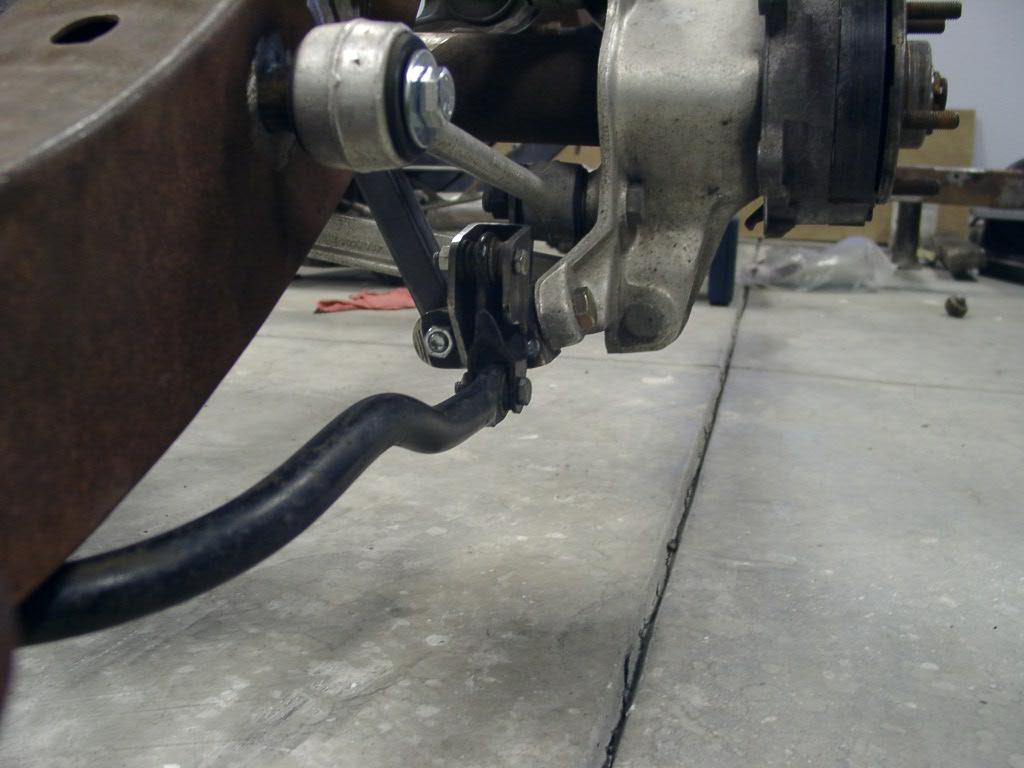
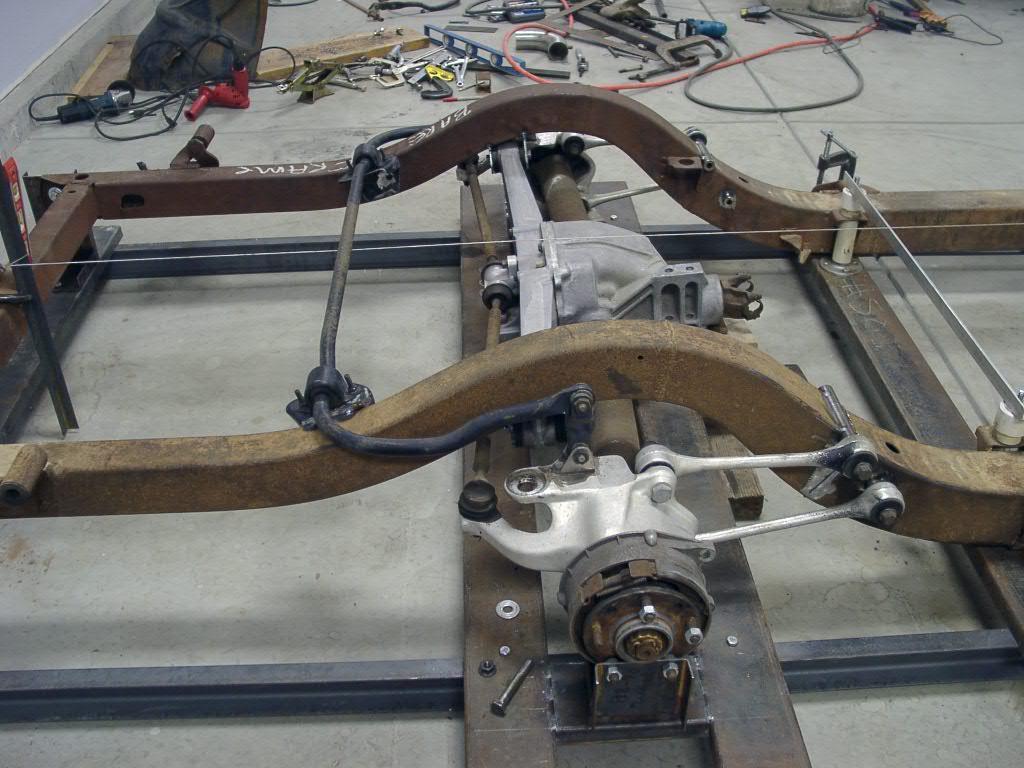
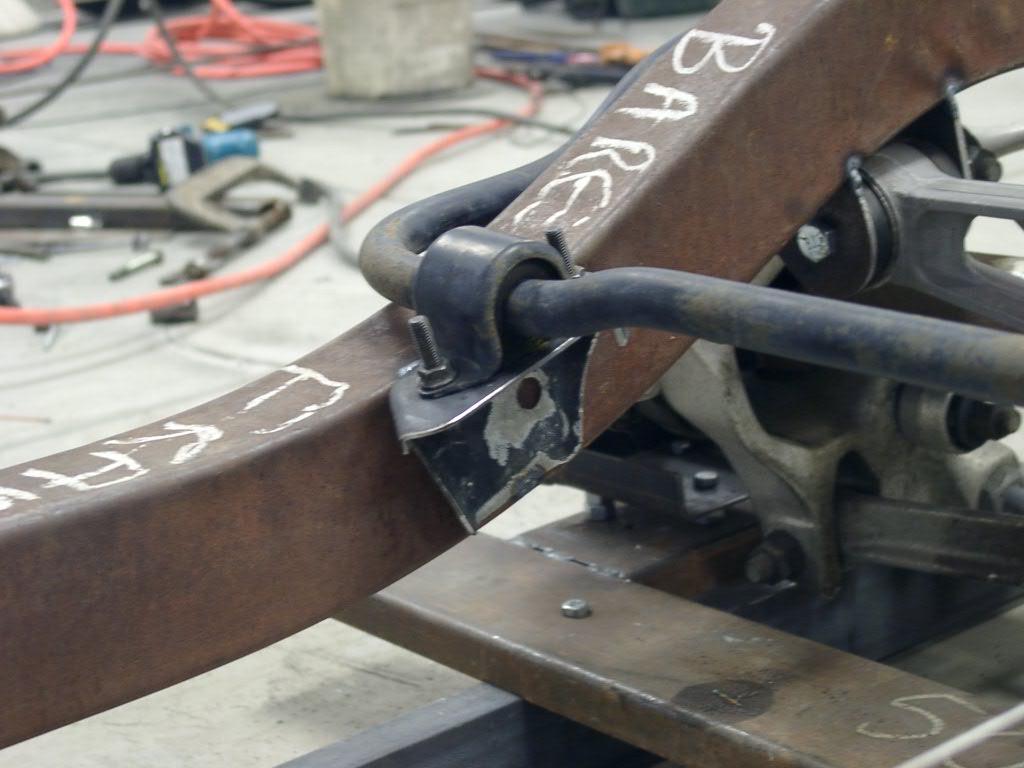
Rear Sway Bar |
|
The rear sway bar is mounted in front of the axle to keep it out of the way of the fuel tank and spare tire well. |
|
|
|
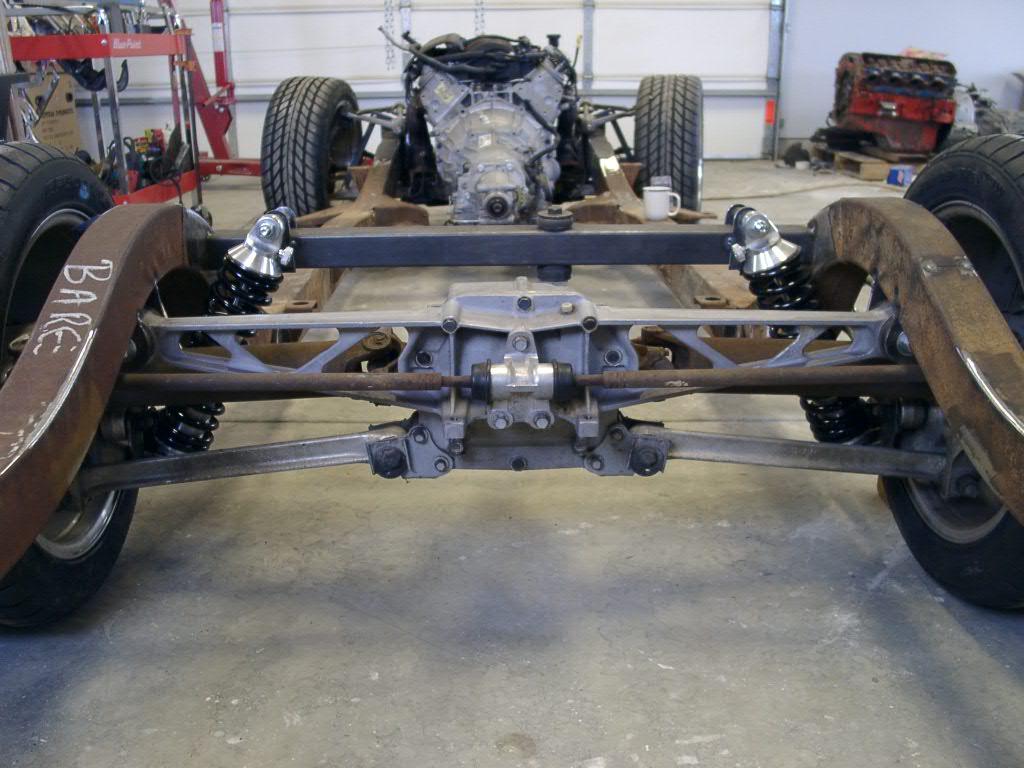
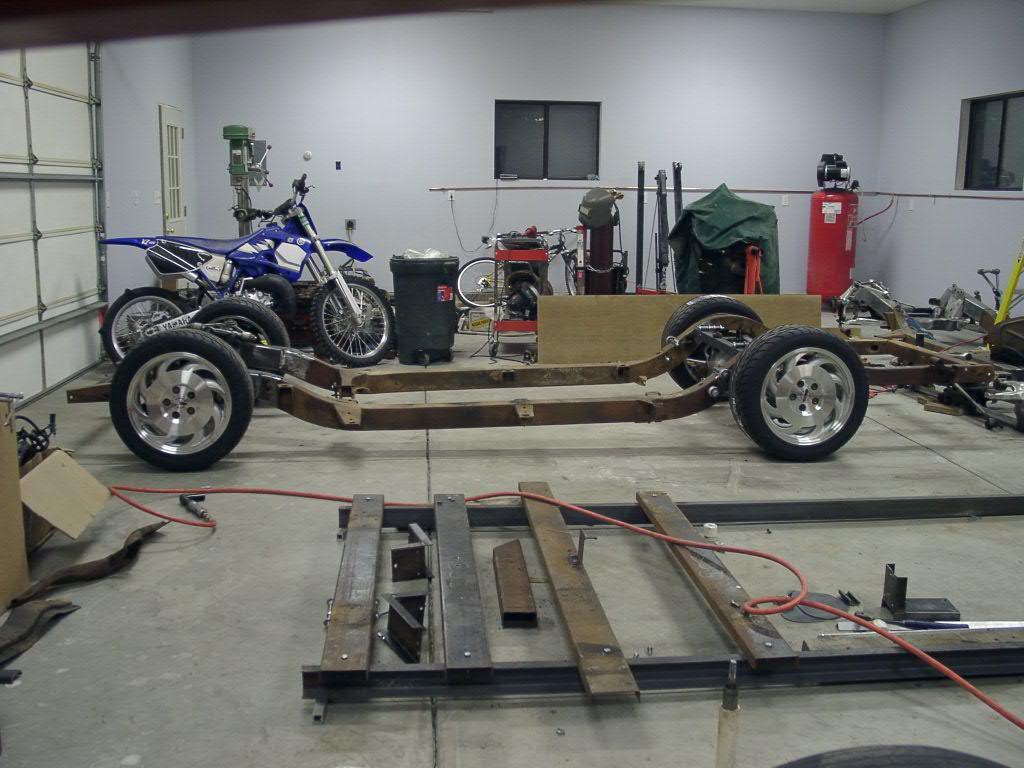
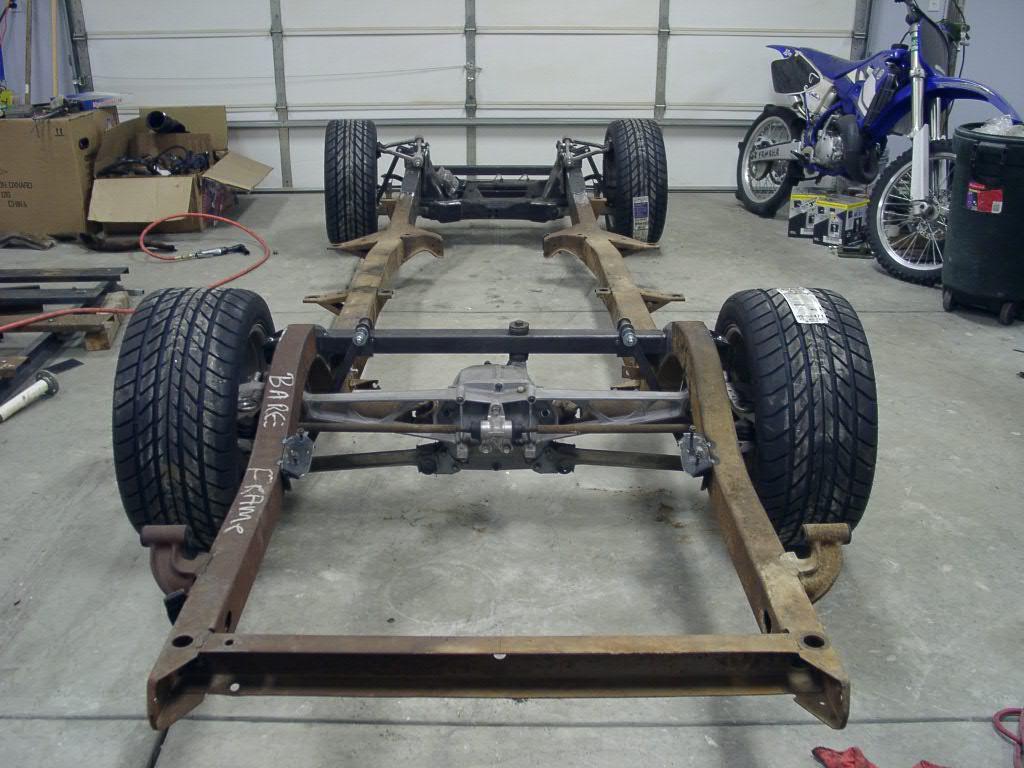
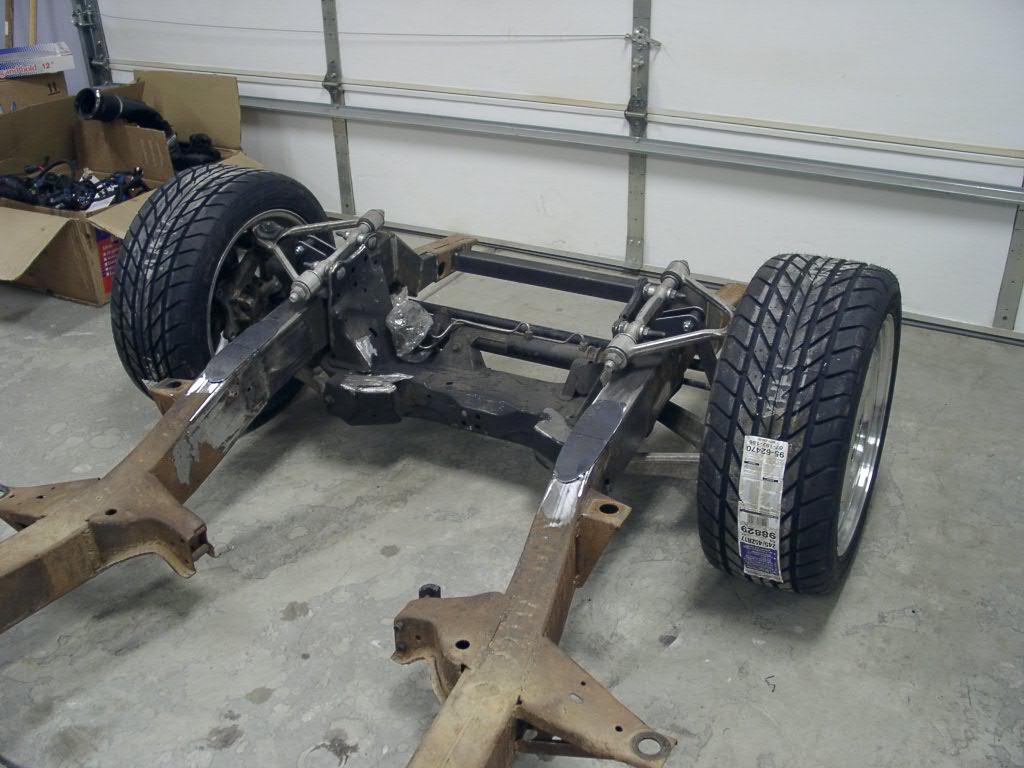
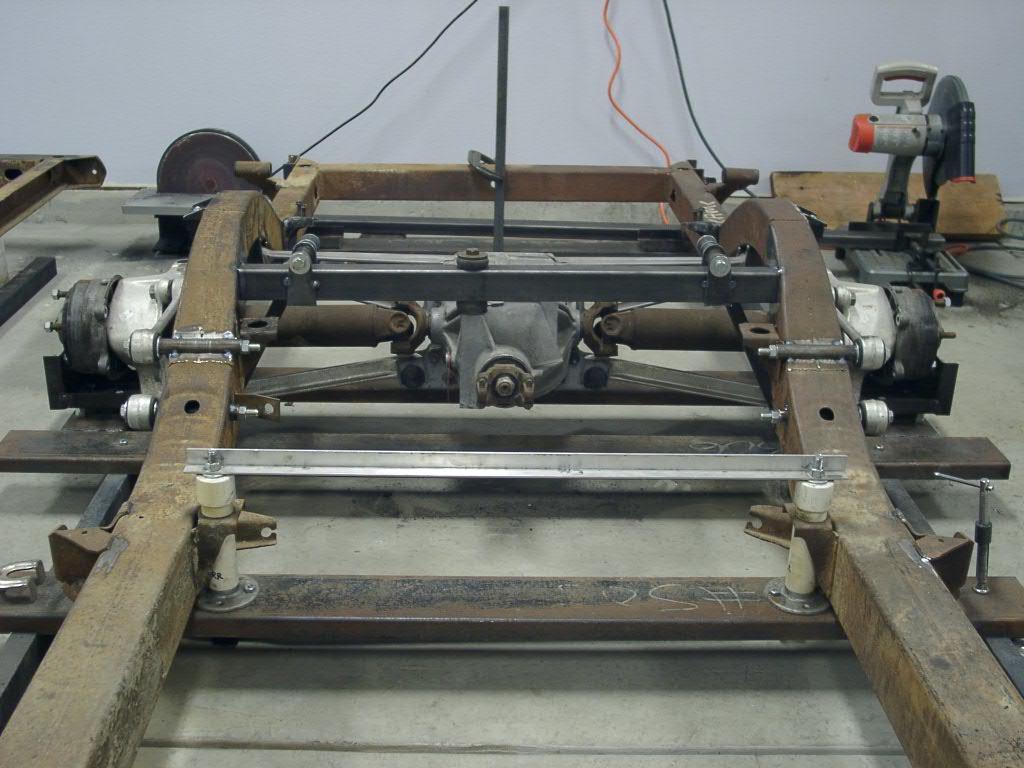
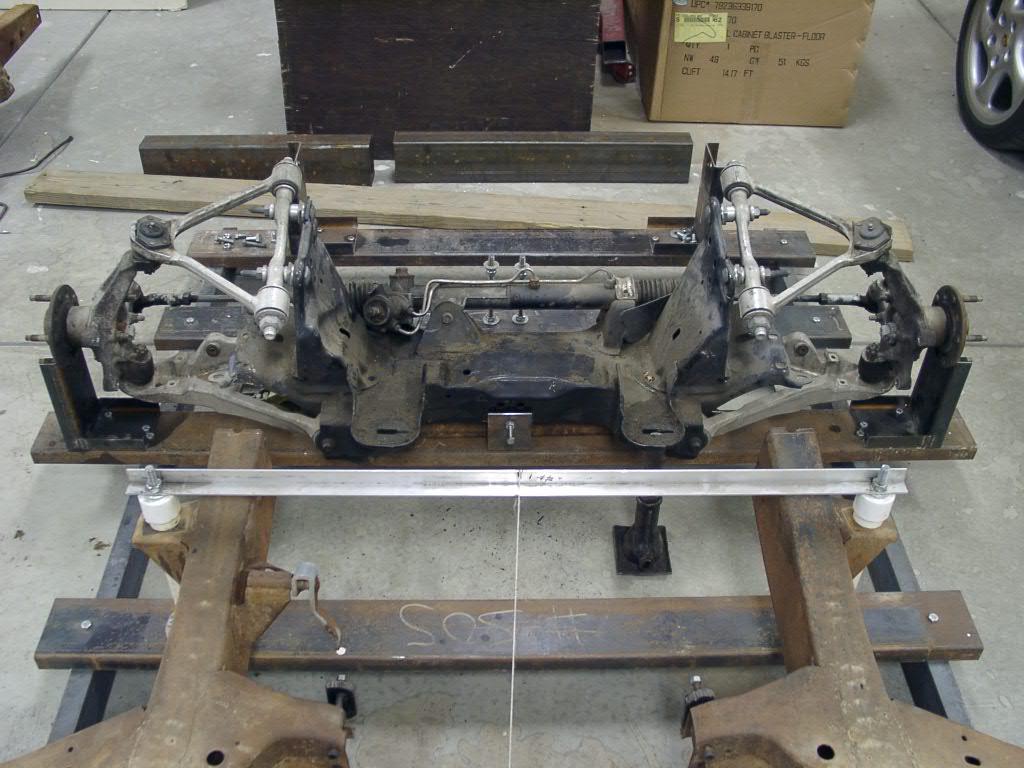
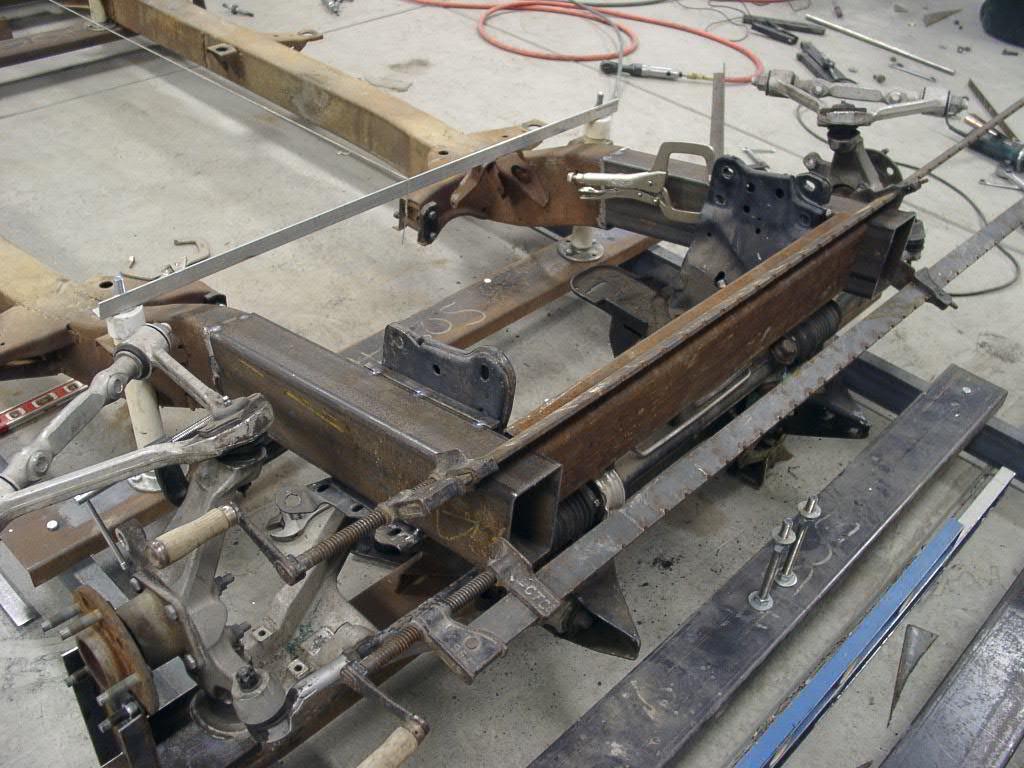
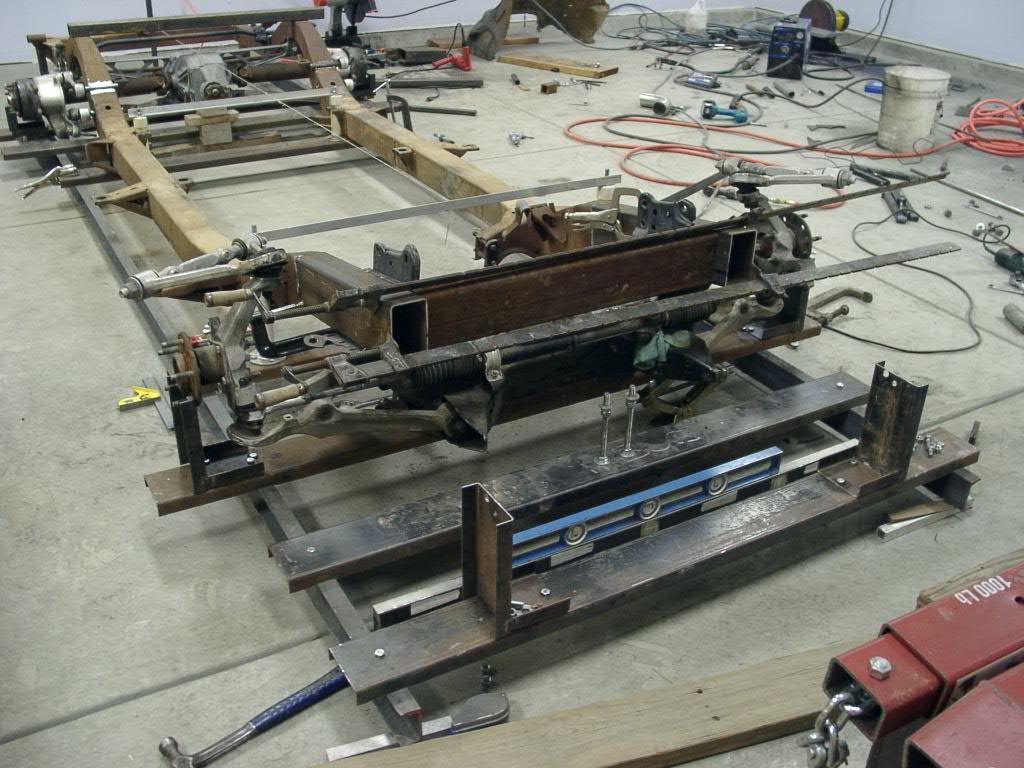
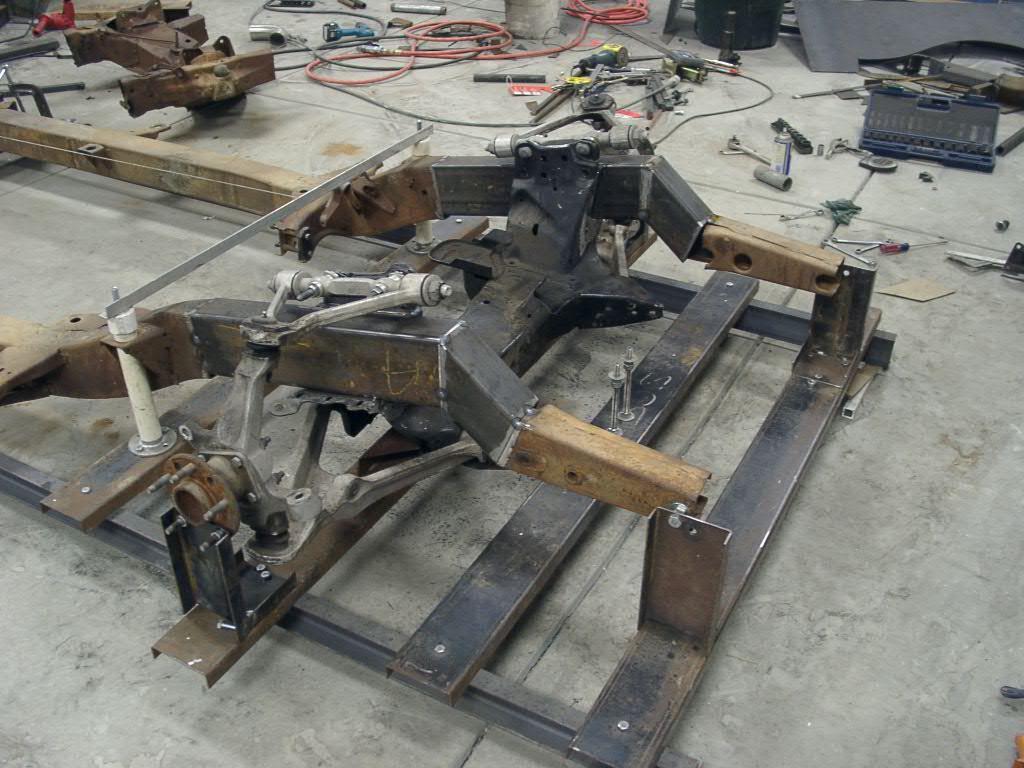
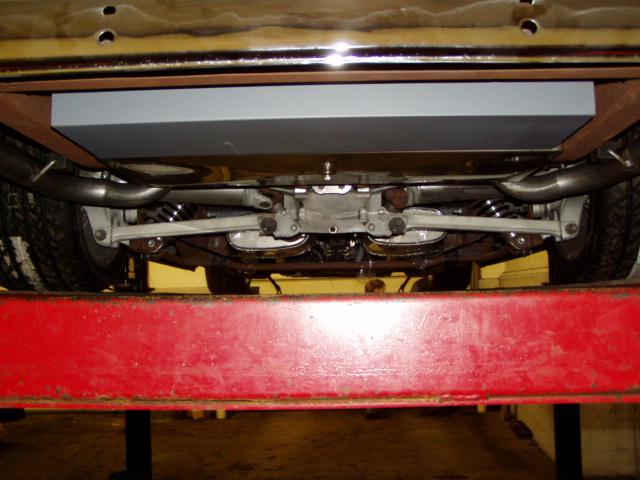
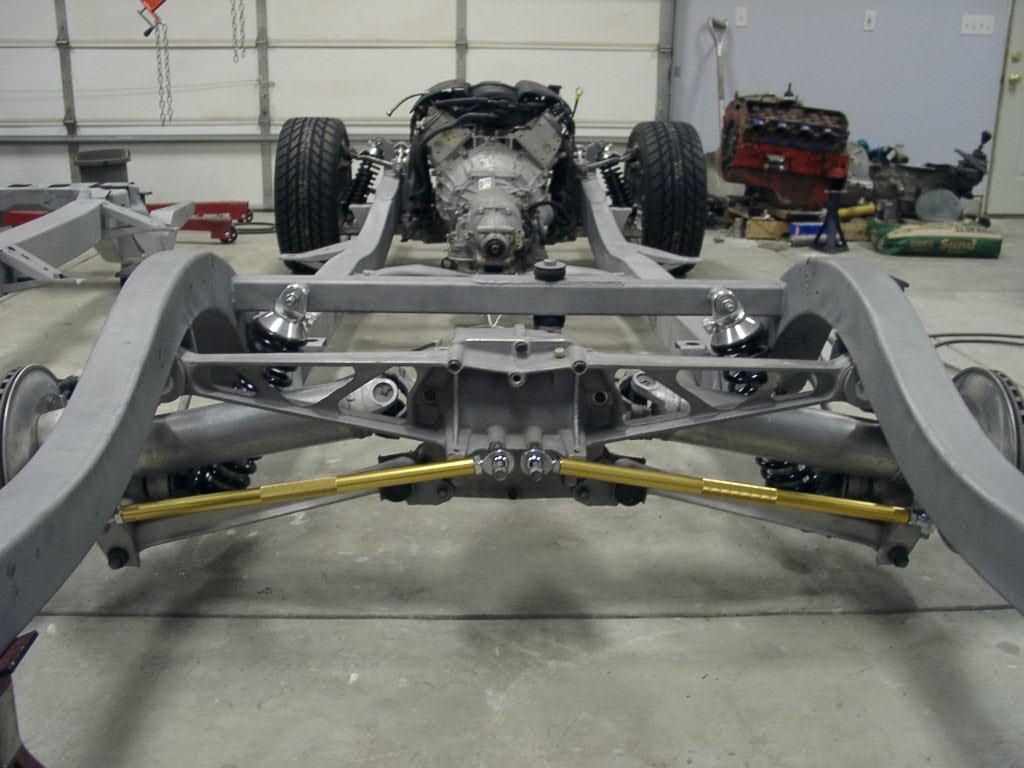
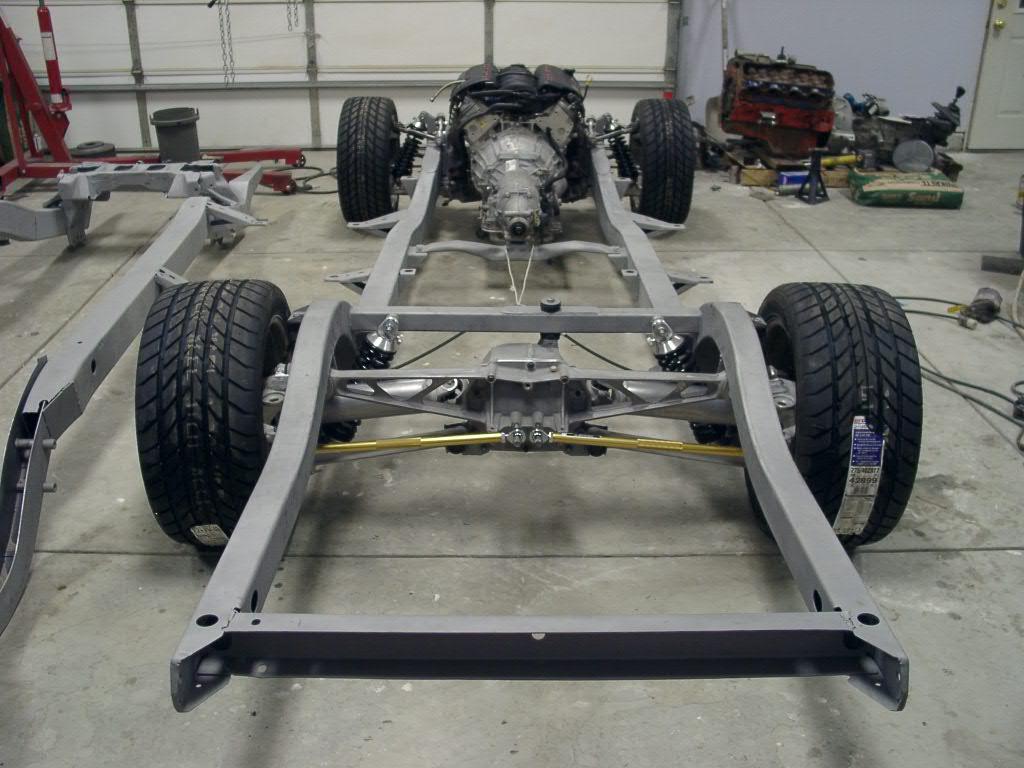
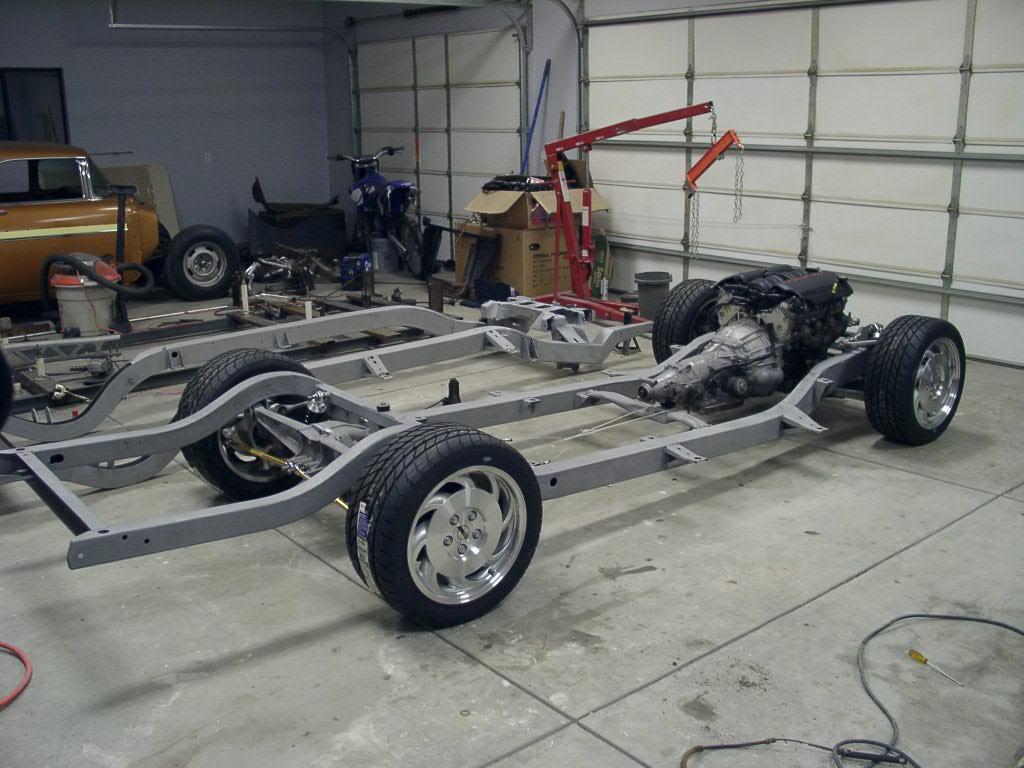
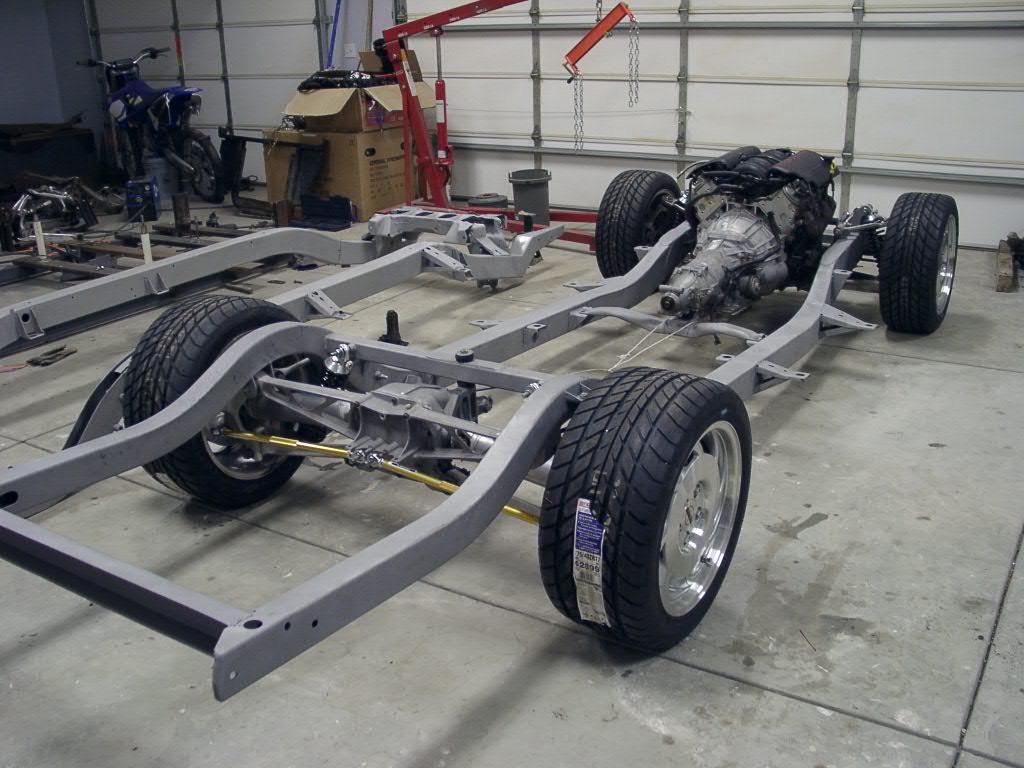
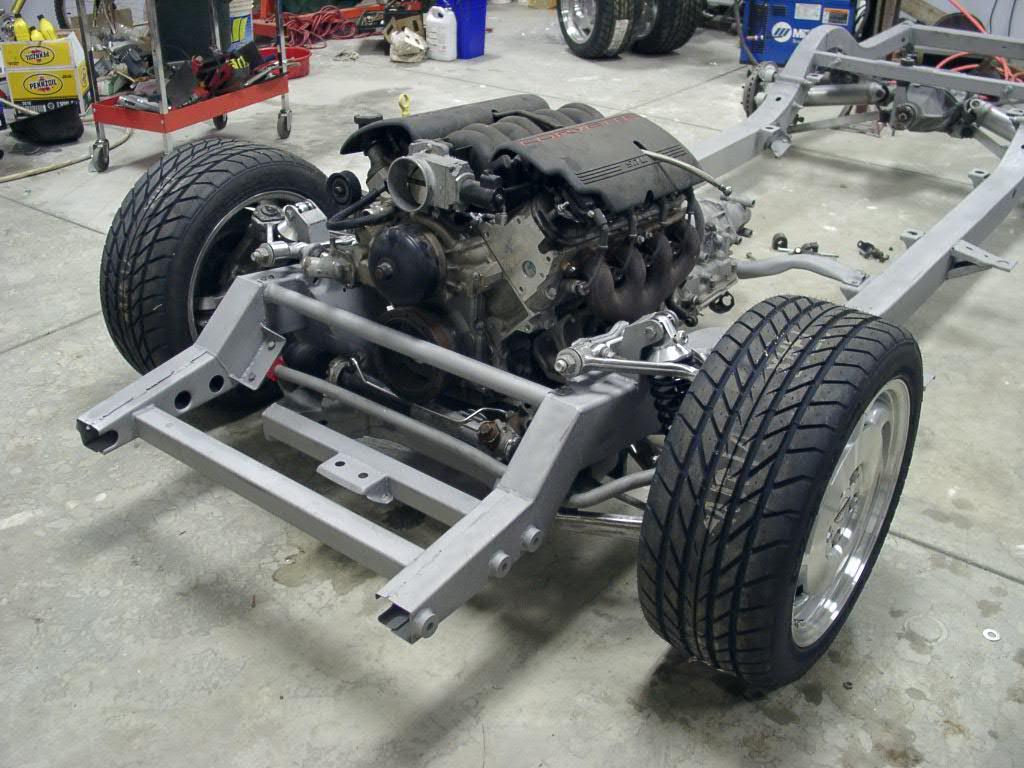
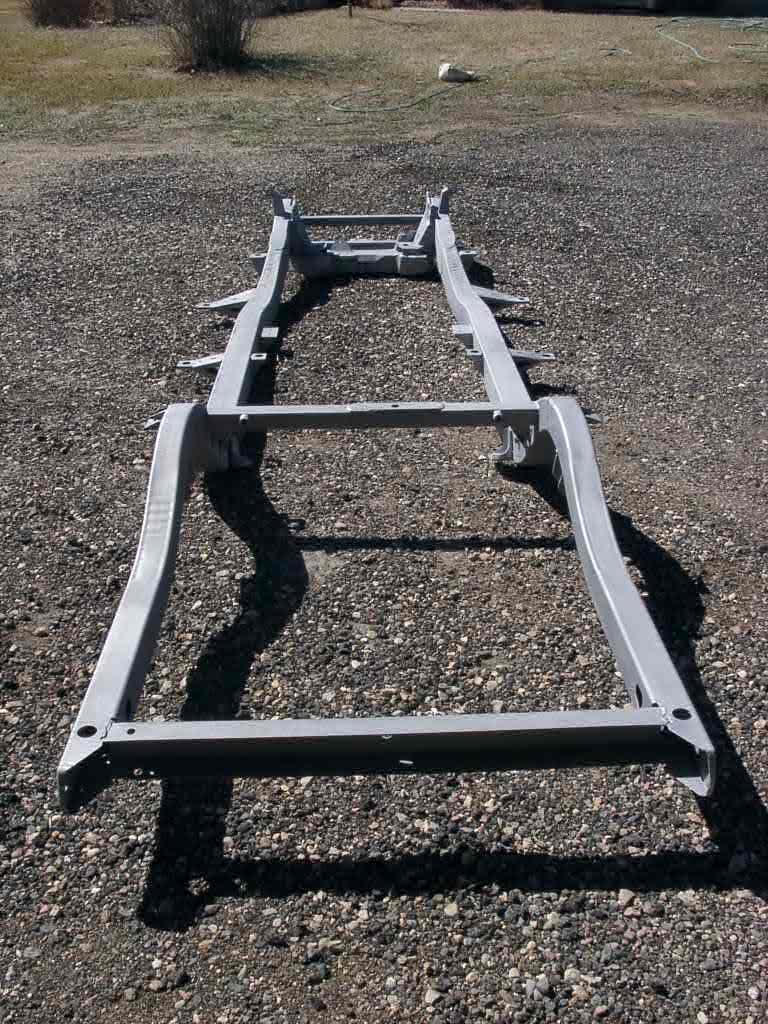
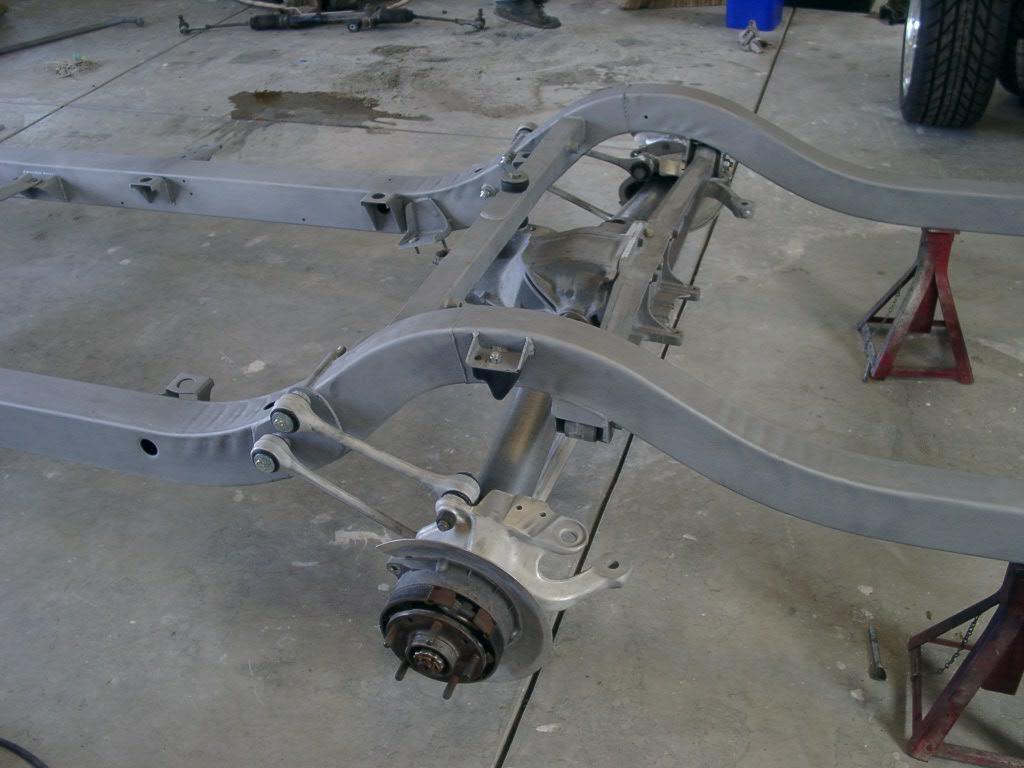
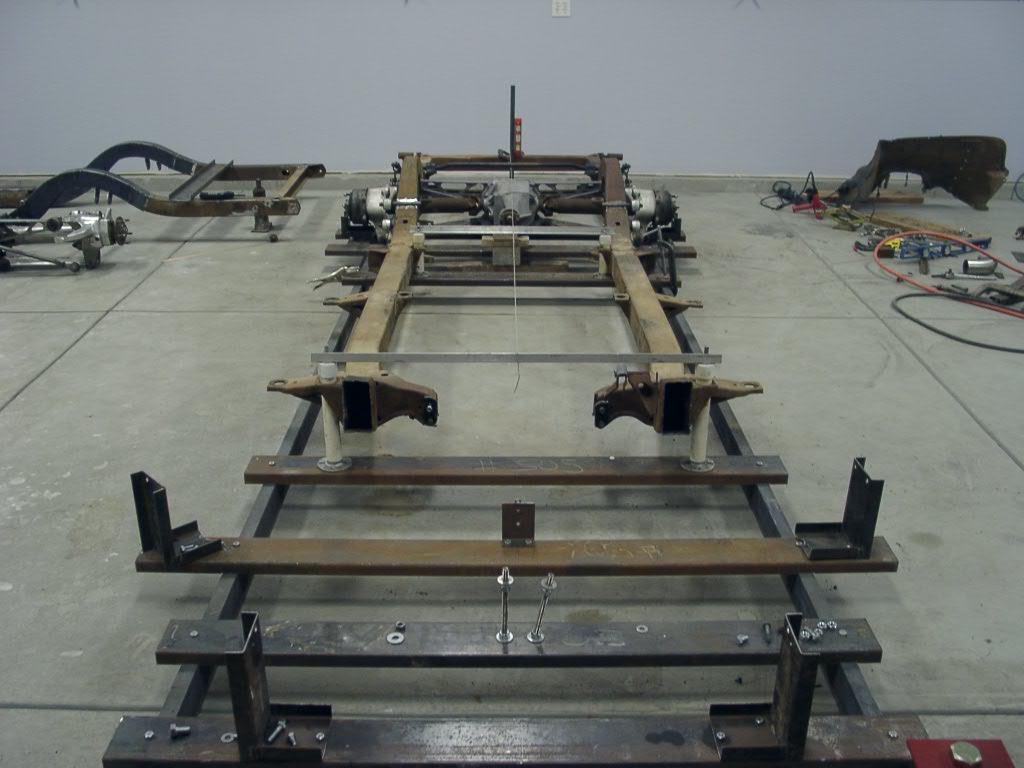
On Four Wheels! |
| The chassis is out of the jig and mounted to the wheels for the first time. The front bumper bolts are 11-11 1/8" off the ground, and the rear is about 14 1/4" off the ground. The front of the k-member is 5 1/2" off the ground (equivalent to 5" on a stock crossmember), and the lowest point of the frame is about 4 1/2". I will be able to go up at least an inch in the front and/or rear with no problem with the coilovers if necessary. The pics of the frame on its wheels show the stance pretty well. |
|
|
|
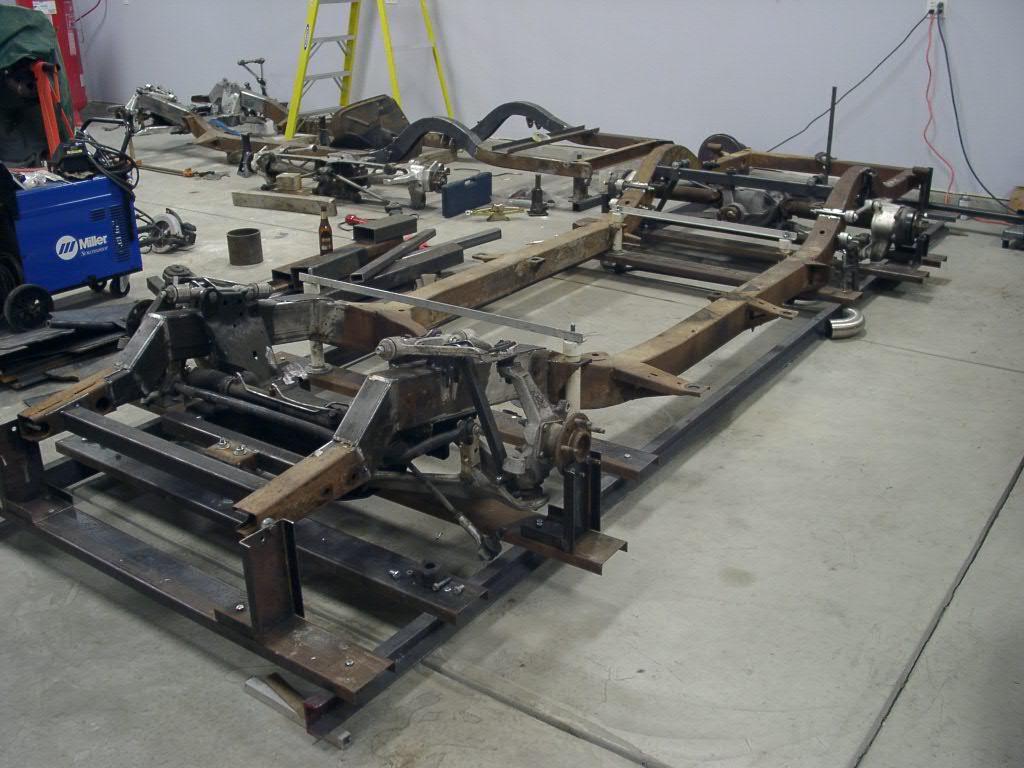
Details, Details, Details... |
|
Early February, 2003, Laszlo designed and fabricated the front radiator support, rear snubbers, rear crossmember/pinion support, and rear shock mounts. The frame is almost ready to come out of the jig! |
|
|
|
|
|
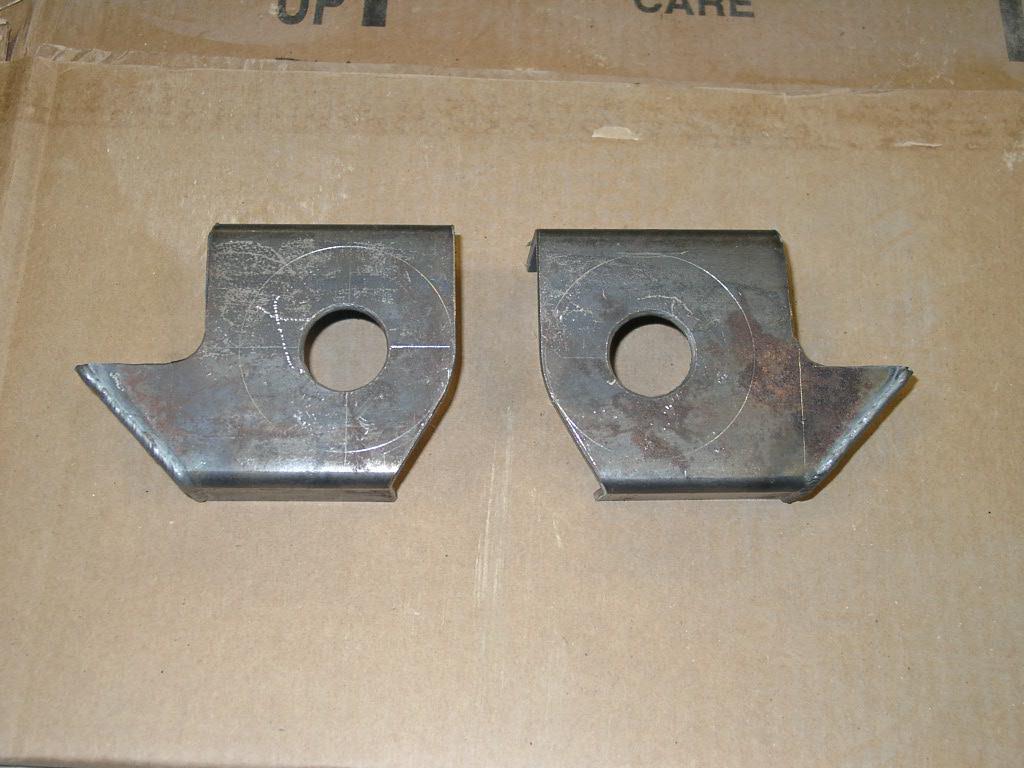
Front Shock Mounts |
|
On January 16, 2003, Laszlo designed and fabricated the first version of front shock absorber mounts. Front shocks were initially planned to be Aldan AS654 coilovers. |
|
|
|
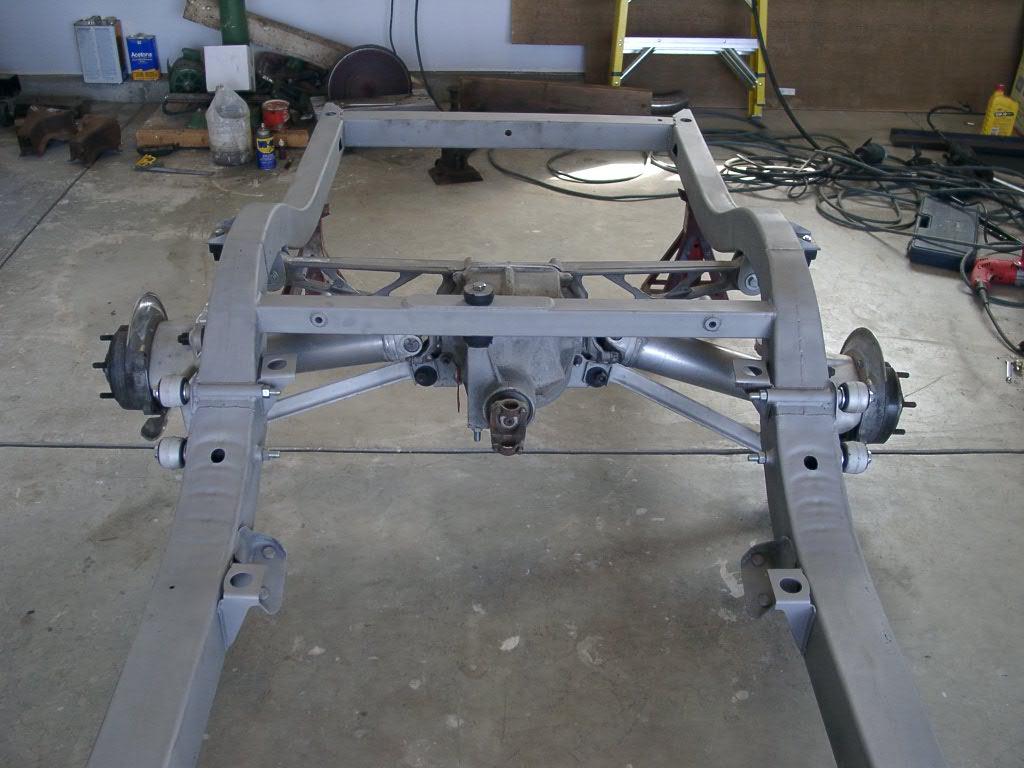
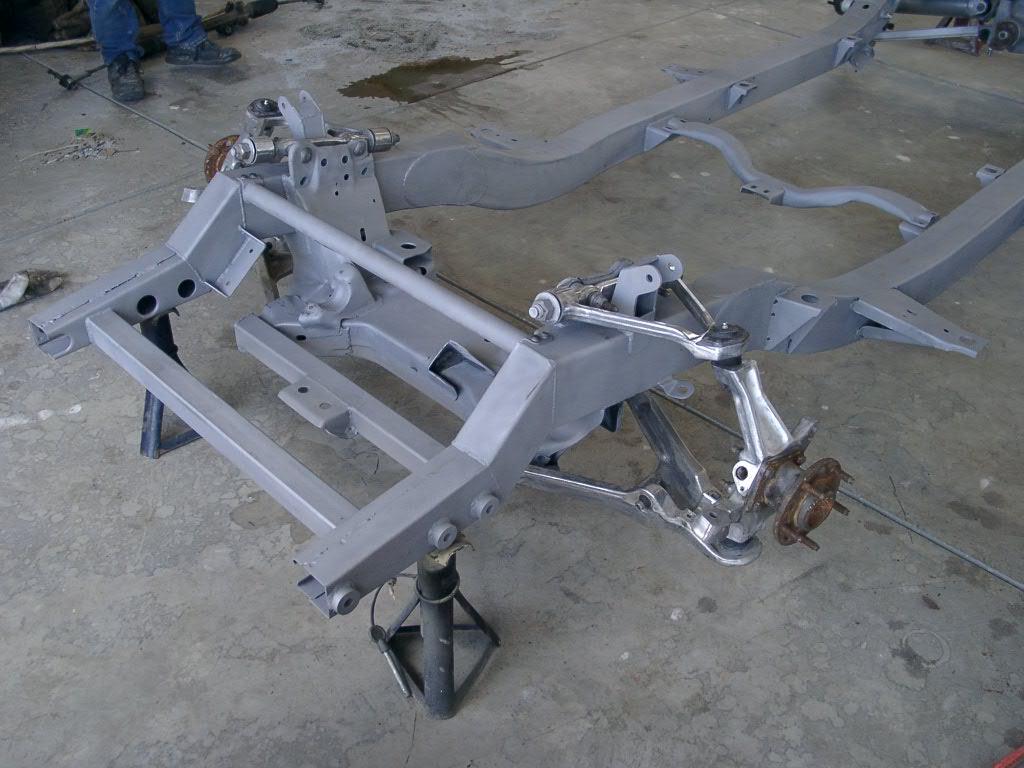
Front Suspension In Place |
|
Here are the pics of the front suspension being put in place. |
|
|
|
|
|
Checking the "Stance" |
|
Laszlo suggested that I remove the wheels and position the car at the precise height that it will eventually sit based on the planned location of the Vette suspension components on the frame. These measurements take into consideration the placement of the suspension and the diameter of the tires. |
|
The bottom side of the rear hump in the frame is 18.5" off the floor. The front crossmember is 5" high. The lowest point of the frame is about at the front of the doors, and it is 4.5" off the floor. The rocker panels measure 8 3/4" high just in front of the rear wheel wells, and 6 3/4" at the front of the doors. |
|
|
|
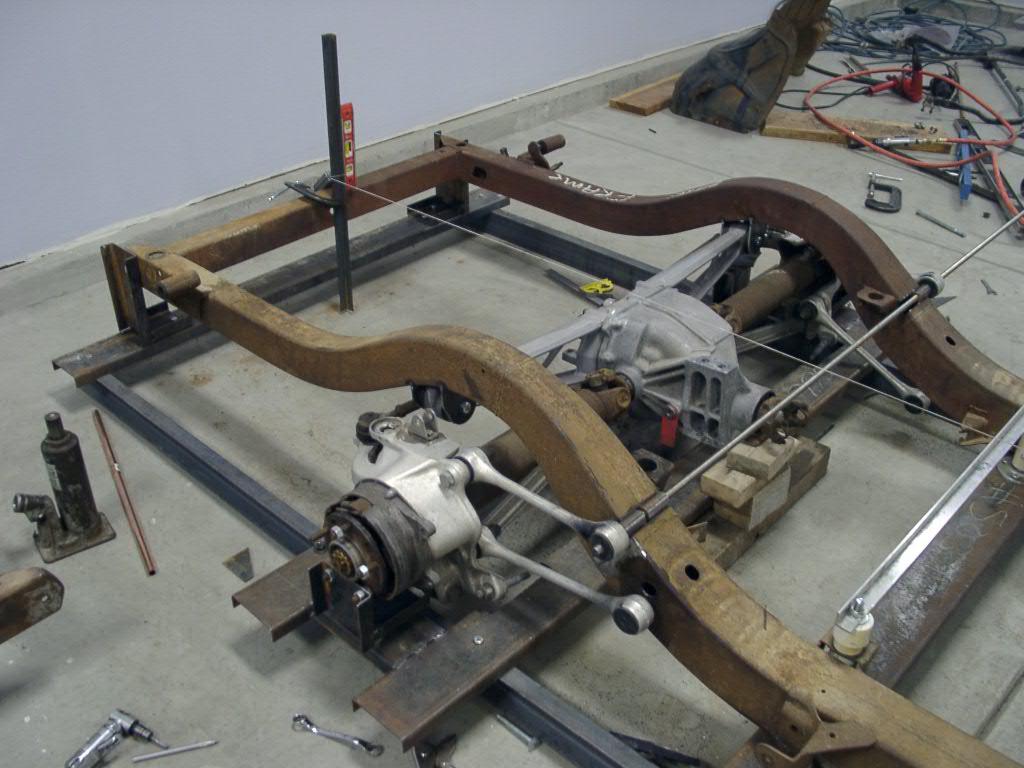
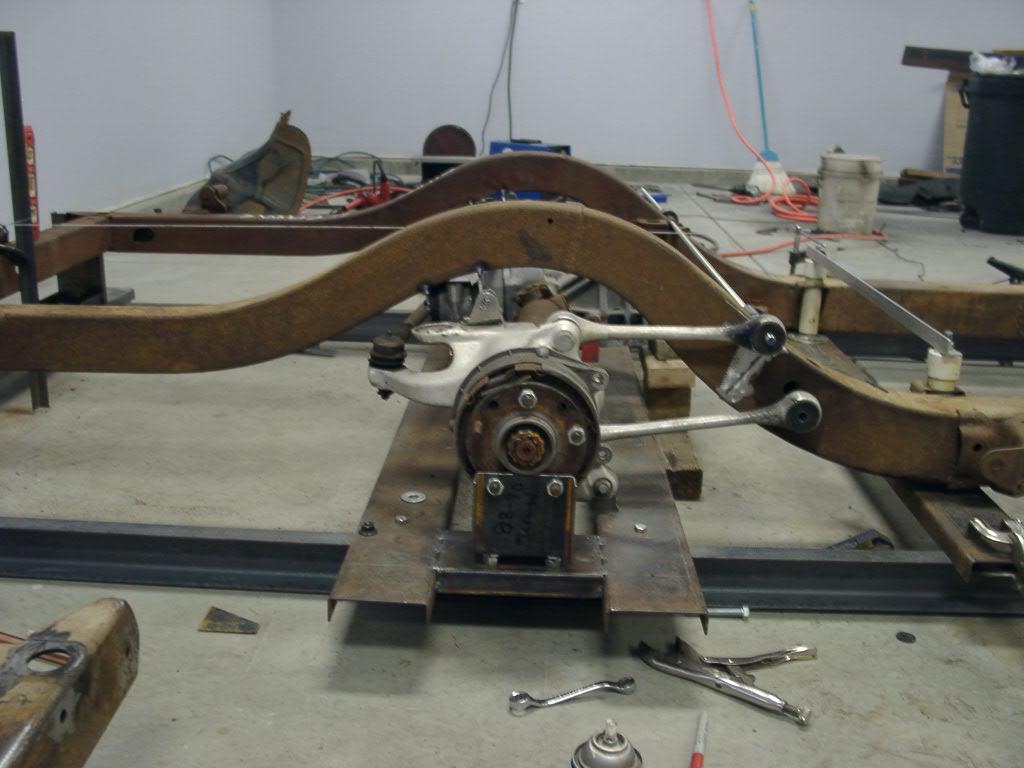
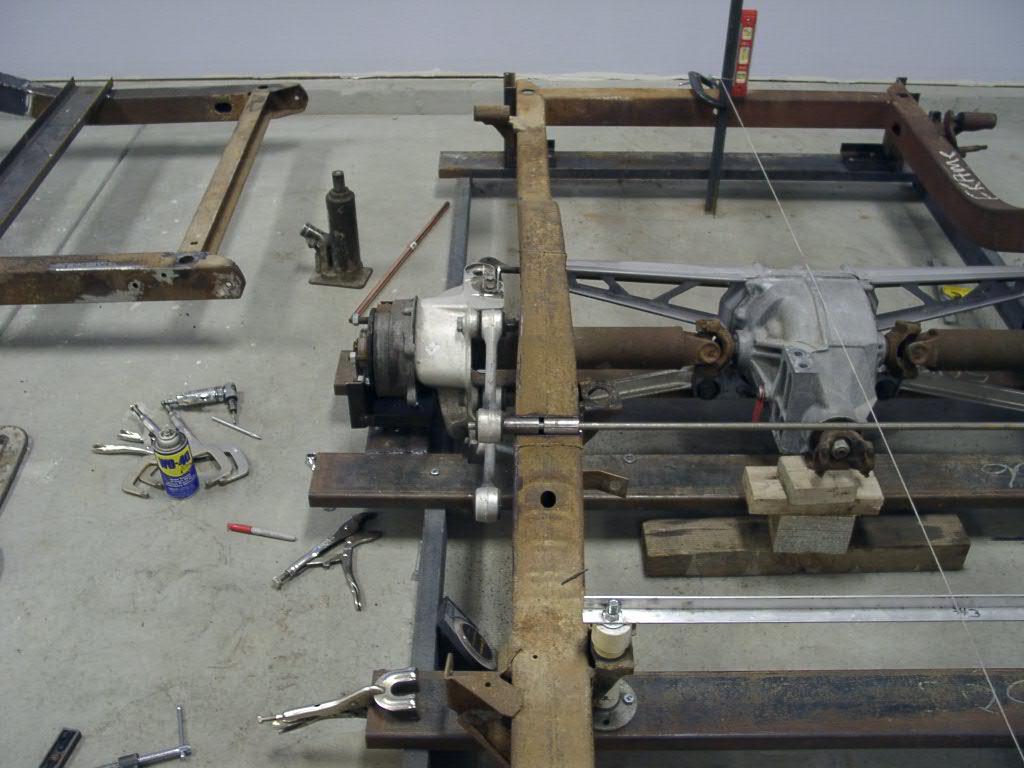
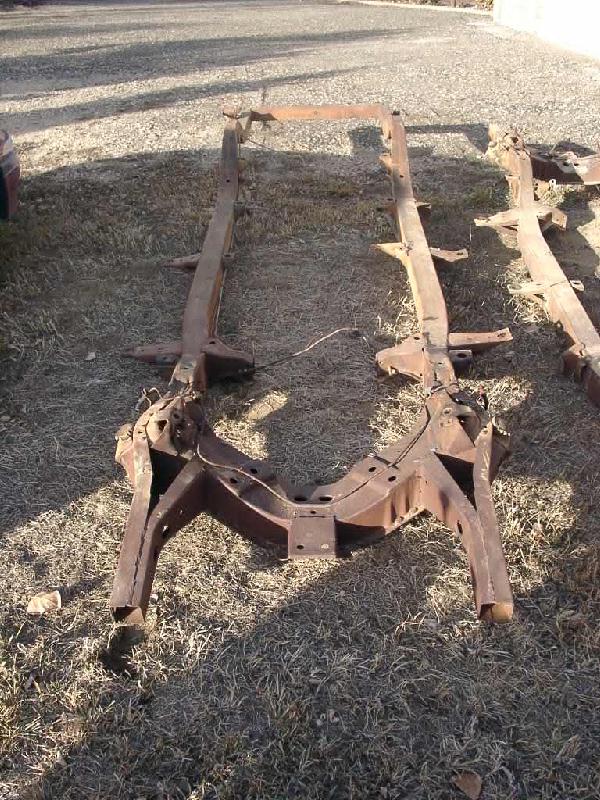
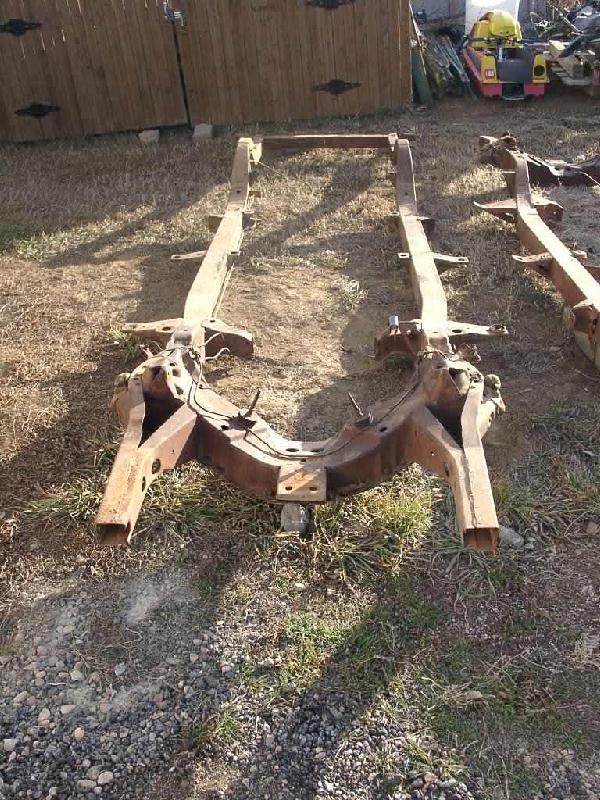
Frame Work Begins! |
| During the week of Christmas, 2002, Laszlo mounted the frame in his jig and began fitting the Vette rear end and sway bar. Note: After looking at these pics and considering the fuel tank and spare tire well, I asked Laszlo to reposition the sway bar to the front of the axle assembly. |
|
|
| With the rear end tacked in place, Laszlo moved to the front and cut off the old front section to make room for the Vette frame section. |
 |
|
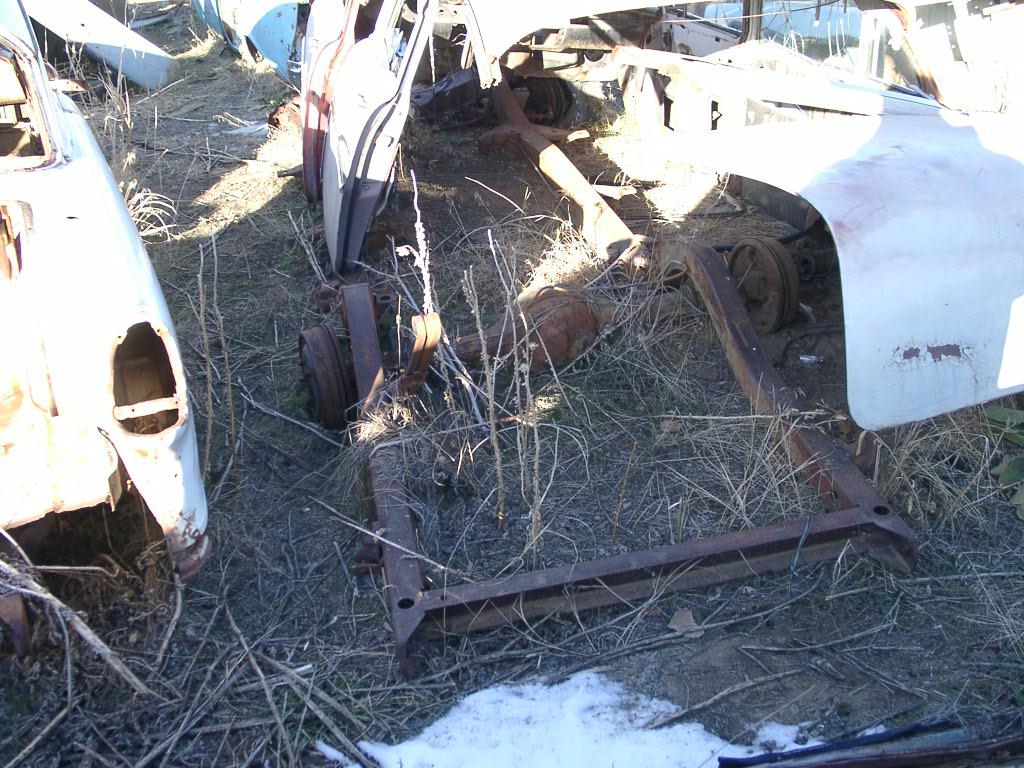
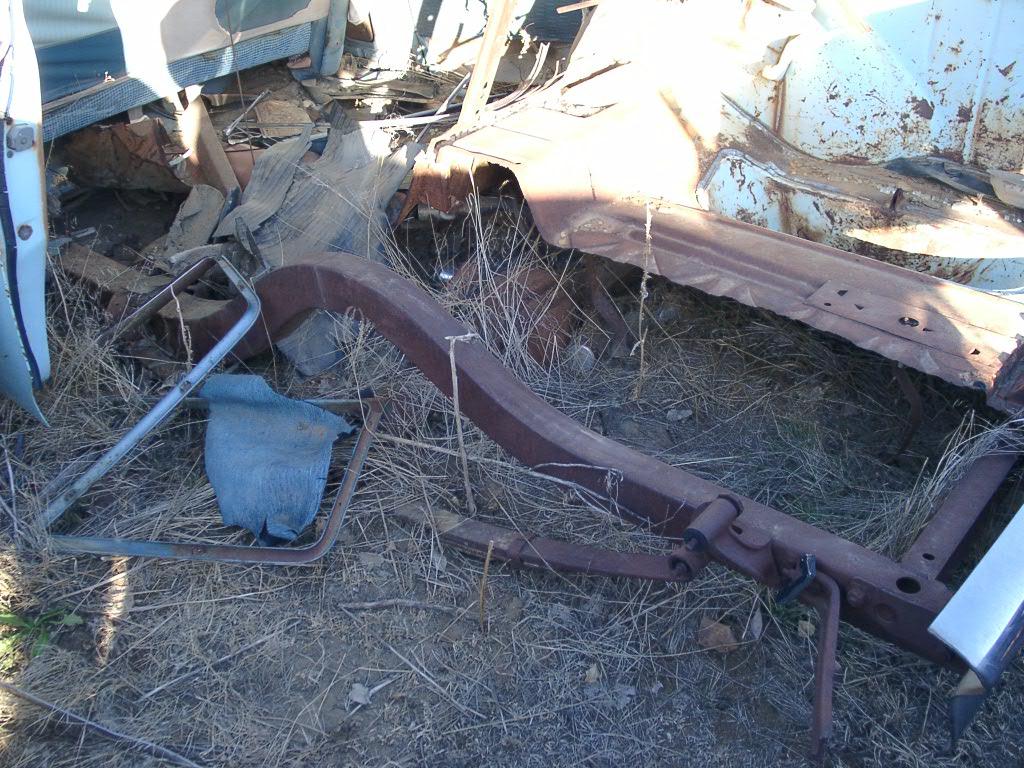
Donor Frame |
|
Laszlo went to a boneyard in CO and picked up a frame for my Nomad project in December, 2002. |
|
|
|
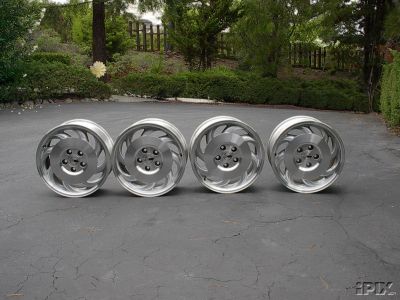
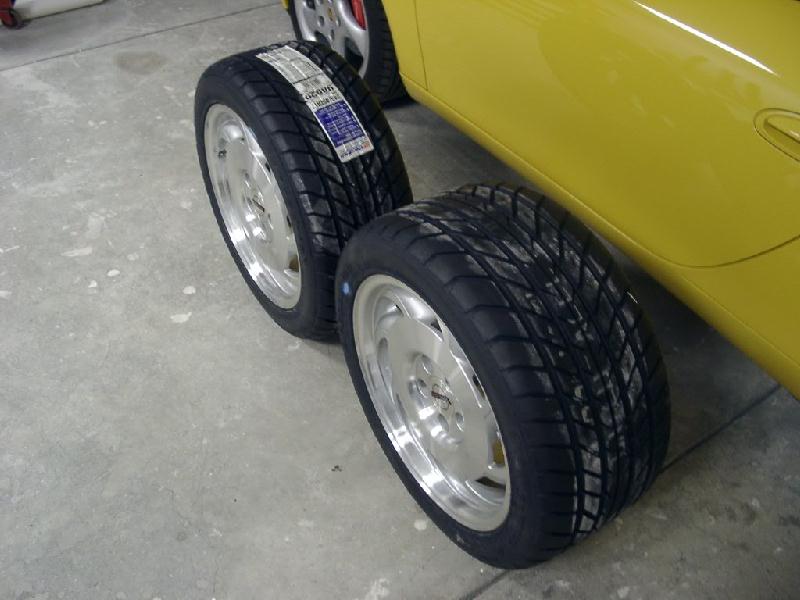
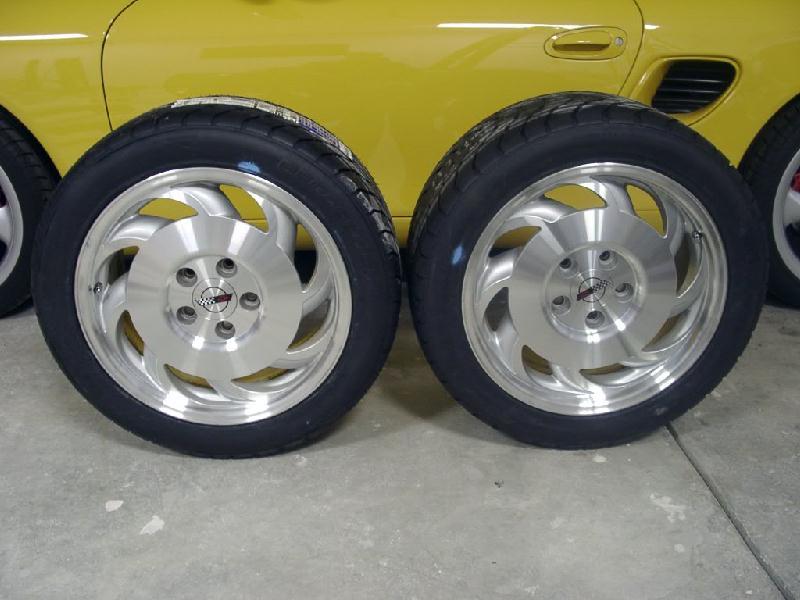
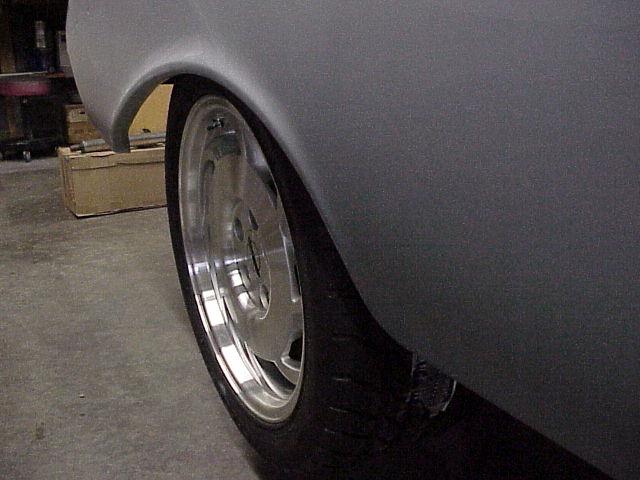
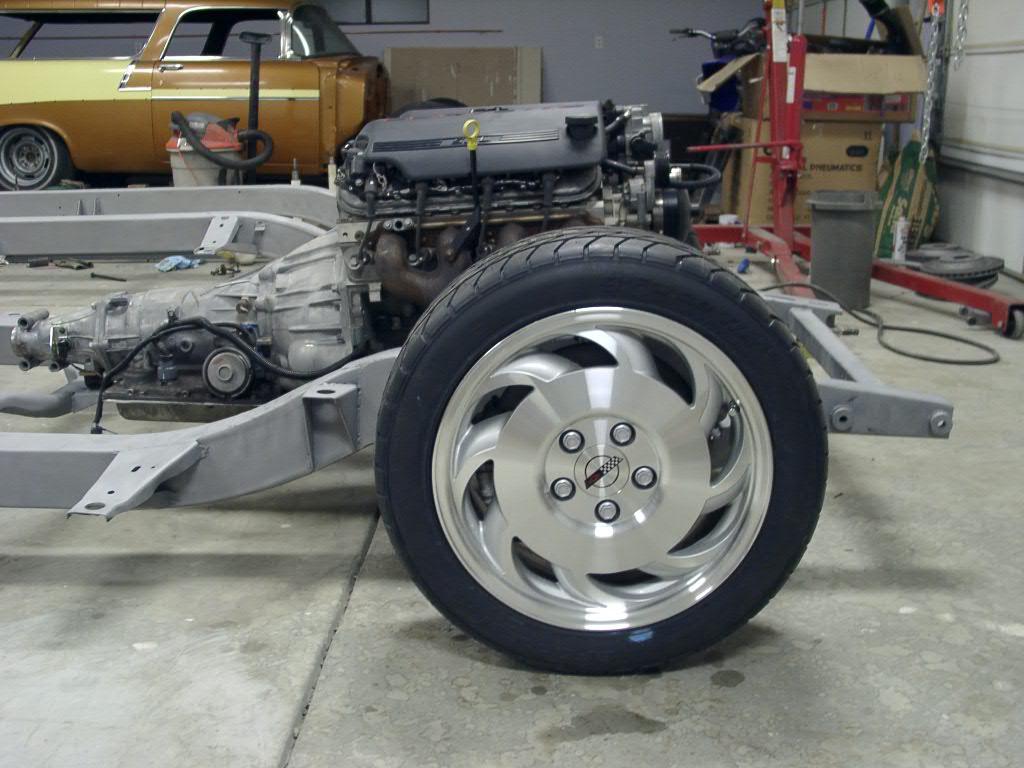
Wheels and Tires |
|
Believe it or not, the first things I acquired for the chassis were the wheels and tires. This was necessary to ensure that the frame work that will be done by Laszlo will allow the tires to fit correctly in the wheel wells. I bought the wheels on and Ebay auction, and the tires at Tirerack. |
|
The wheels are Corvette "Sawblade" wheels. Fronts are 17" x 8.5". Rears are 17"x 9.5". The tires are BF Goodrich G Force T/A's, size 245/45/17 for the front and 275/40/17 for the rear. |
|
|